アート
美容とウェルネス
工芸
文化と歴史
エンターテインメント
環境
食品と飲料
リバースエンジニアリング
科学
スポーツ
テクノロジー
ウェアラブル
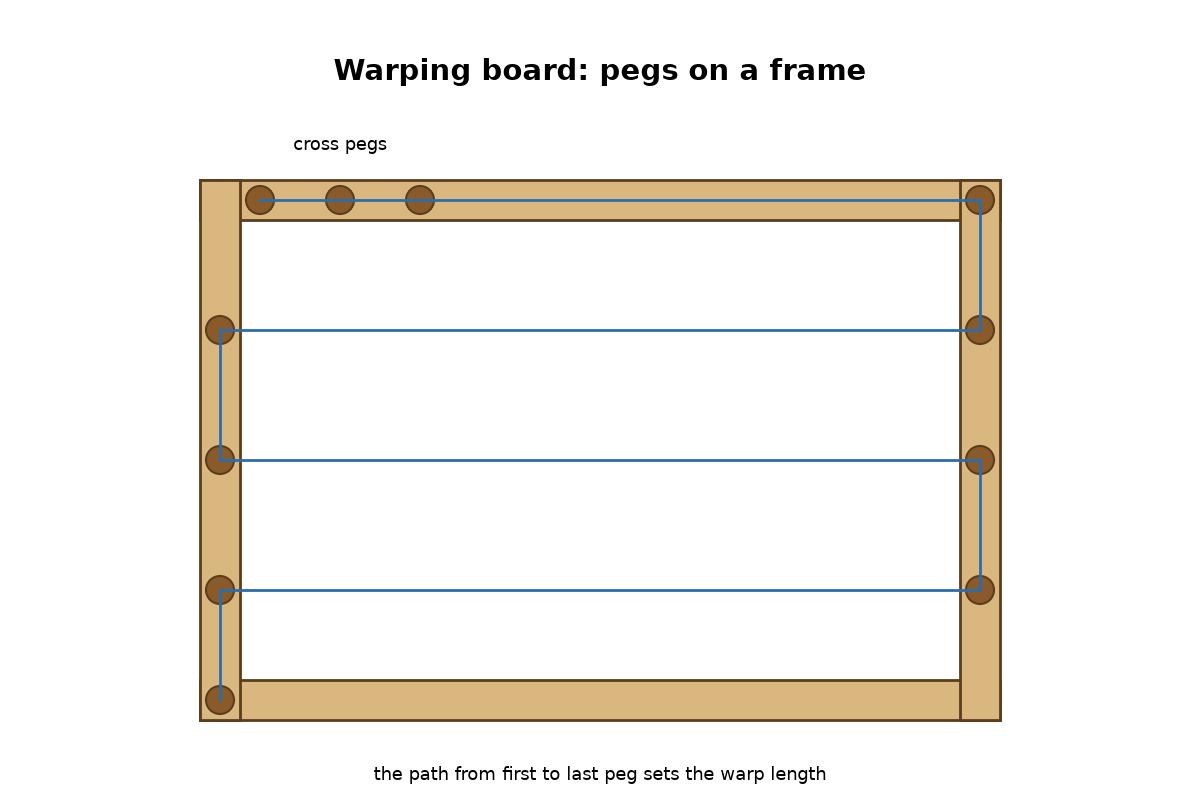


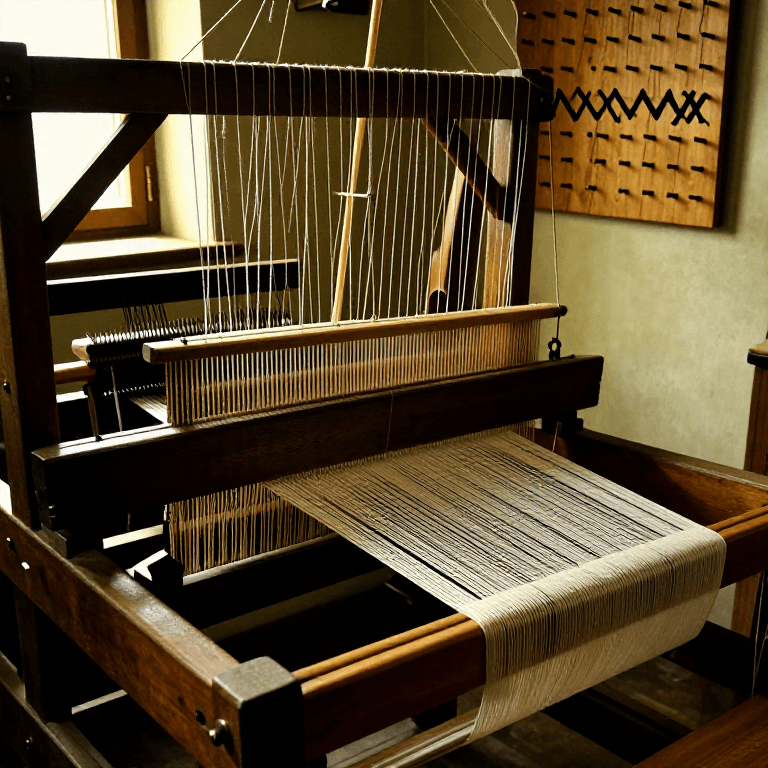
Warping Board: a Pegged Frame for Measuring Warp
Warp is measured by winding it round pegs, from two door handles up to a board with pegs on it. A warping board is a frame with pegs down both sides and two cross pegs near the start: the zigzag path sets the warp length and the cross keeps the threads in order.
The picture: our diagram of the board and a warp path.
初心者
A day
手順
1
1
Cut the frame
Cut the frame
Saw two side bars and two cross bars from beech, about 5 cm wide, for a frame about 90 by 80 cm.
このステップの材料:
 ブナの製材2 個
必要な工具:
 背金鋸
 定規
 完全スコヤ
2
2
Half-lap the corners
Half-lap the corners
Saw and chisel a half-lap at each end so the bars overlap flush. Glue and clamp the frame square.
このステップの材料:
 膠(にかわ)30 g
必要な工具:
背金鋸 のみセット
 木槌
 C 型クランプ完全スコヤ
 二重鍋(湯煎鍋)
3
3
Drill for pegs
Drill for pegs
Drill peg holes down both sides about every 25 cm, slanting slightly upward, and two close together on the top bar for the cross.
必要な工具:
 ハンドドリル定規
4
4
Fit the pegs
Fit the pegs
Cut dowels about 12 cm long, round their ends, and glue them in so they stand about 10 cm proud. Sand everything smooth so the yarn cannot catch.
このステップの材料:
 堅木のダボ14 個膠(にかわ)20 g
必要な工具:
背金鋸木槌 紙やすり
5
5
Warp length
Warp length
Jupyter ノートブックを読み込み中…
この設計図で作るもの

関連ブループリント
これらのブループリントは知識を共有しています — 技術、材料、原理

CC0 パブリックドメイン
このブループリントはCC0で公開されています。許可を求めずに、自由にコピー、修正、配布、あらゆる目的で使用できます。
メイカーを応援するには、ブループリント経由で製品を購入してください。メイカーには メイカーコミッション がベンダーにより設定されています。または、このブループリントの新しいイテレーションを作成し、自分のブループリントにコネクションとして含めて収益を共有できます。