アート
美容とウェルネス
工芸
文化と歴史
エンターテインメント
環境
食品と飲料
リバースエンジニアリング
科学
スポーツ
テクノロジー
ウェアラブル
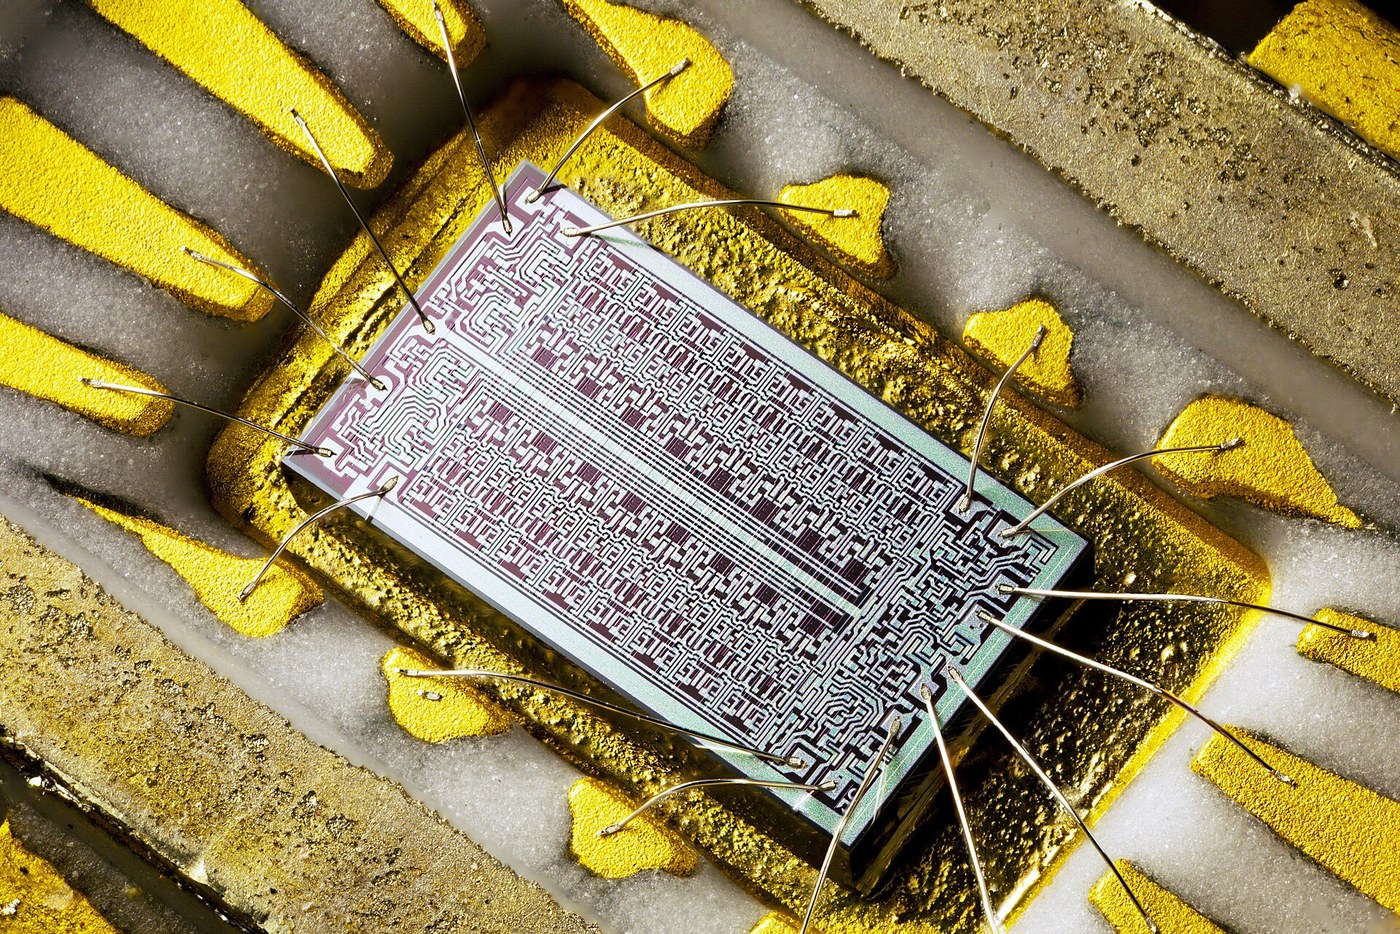


Wire Bonding
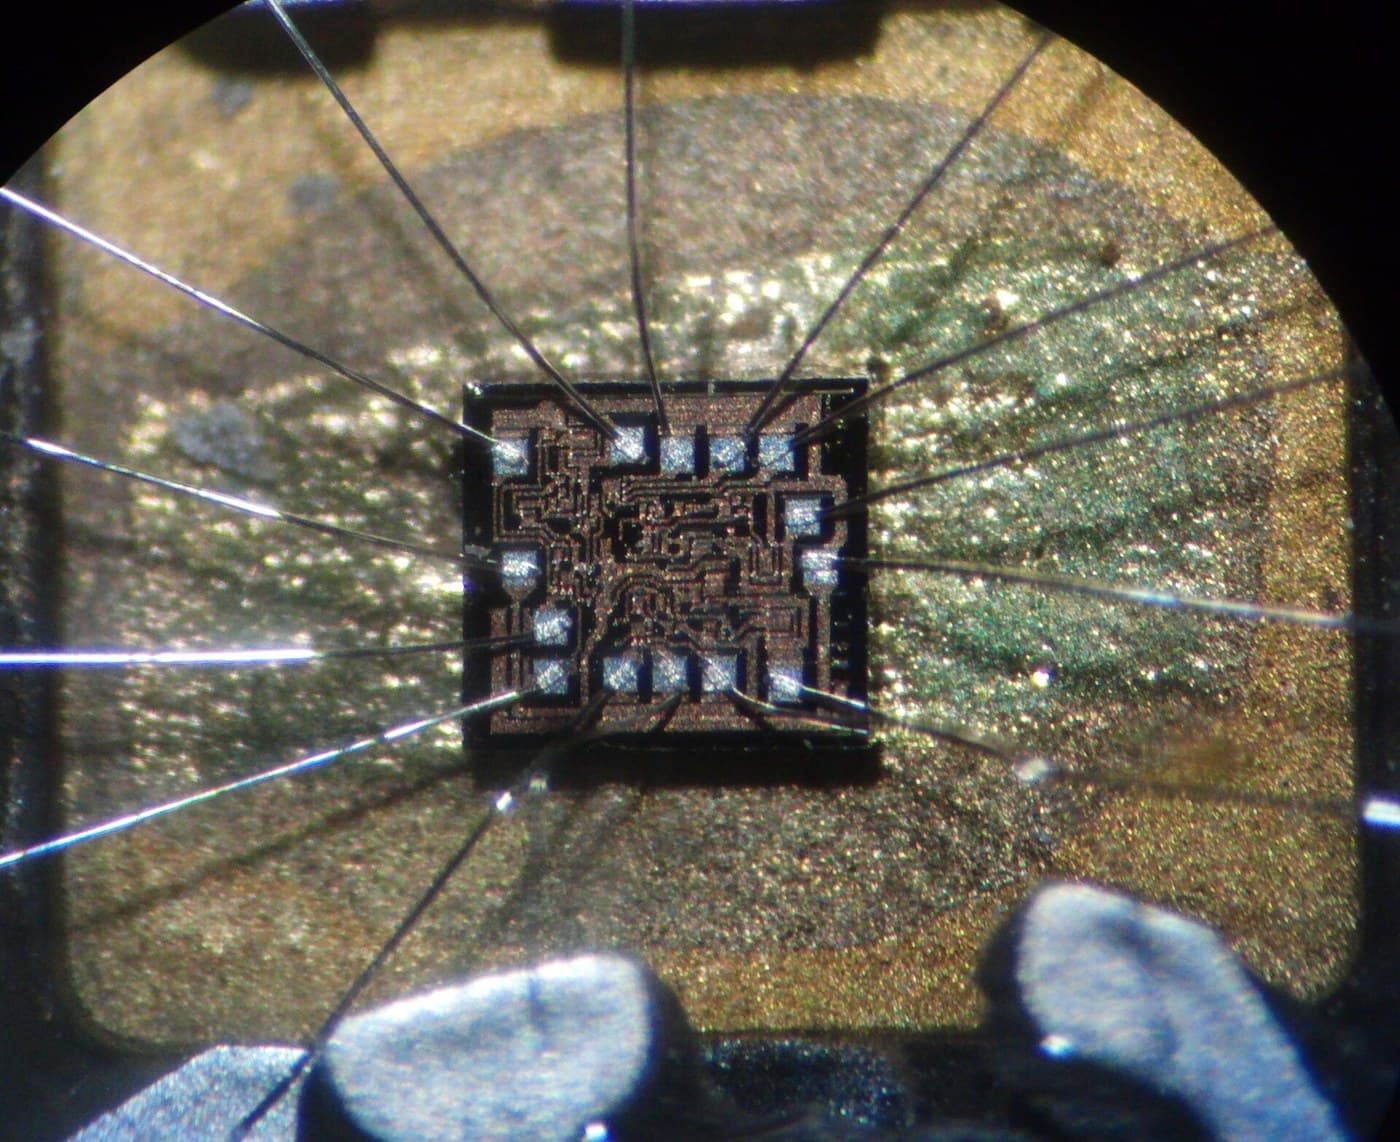
Every chip in the world connects to its package through wires thinner than a human hair, welded on one at a time, at fifteen or twenty joints per second, without solder and without heat that would damage the die.
The scale is worth stating. A bond wire is 25 micrometres in diameter — a third the thickness of a hair. A bond pad is 60 to 100 micrometres square. A modern machine places one, arcs the wire over, places the second end, and cuts, in about 60 milliseconds, and does it a billion times a year with a defect rate measured in parts per million.
And it is not soldering. There is no filler metal, no flux, and nothing melts. Wire bonding is SOLID STATE welding: two clean metal surfaces pressed together hard enough, with enough energy supplied, that the atoms on each side share electrons across the interface and the two pieces simply become one piece. The joint is as strong as the wire.
There are two ways to supply that energy and they are a genuine sibling pair, still both in use sixty years on.
THERMOCOMPRESSION uses heat and force. Heat the whole assembly to around 300 degrees Celsius, press gold wire onto a gold pad, and the metals diffuse into each other. It is simple and it makes excellent joints — and 300 degrees is far too hot for many packages and for anything plastic.
ULTRASONIC uses force and vibration instead. Press aluminium wire onto an aluminium pad at room temperature and vibrate the tool at 60 to 120 kilohertz. The vibration scrubs the surface oxides aside and the friction supplies the energy locally, at the interface, where it is needed. No bulk heating at all.
And then the answer that won by taking half of each: THERMOSONIC, gold wire at 125 to 150 degrees with ultrasonic assist. Hot enough to help, cool enough for plastic packages, and fast. It is what almost every chip in your possession is bonded with.
You will make real bonds, pull-test them, and find out what a good one costs.
上級者
6 hours
手順
1
1
Make a thermocompression bond by hand
Make a thermocompression bond by hand
You cannot buy an ultrasonic bonder. You CAN make thermocompression bonds, because they need only heat and force, and both are available on a bench.
THE MATERIALS. 25 or 50 micrometre gold wire — jewellers sell it, and 50 micrometre is far easier to handle for a first attempt. A gold-plated substrate as the target: a gold-plated PCB pad, a gold-plated pin header, or a scrap of gold-plated connector. Gold to gold is the classic pair and it is forgiving because gold does not oxidise, which removes the single biggest variable.
THE TOOL. A fine-tipped soldering iron with a temperature controller, tip dressed FLAT rather than pointed — file or stone the very end square, 0.5 to 1 millimetre across. That flat face is your bonding tool, and its flatness matters more than anything else you will do.
THE SETUP. Hold the substrate on a hotplate at 150 to 200 degrees so the assembly is already warm and the tip is not fighting the whole thermal mass. Set the iron to 300 to 350 degrees.
MAKE THE BOND. Lay the wire across the pad. Bring the flat tip straight down onto it and press — firmly, and straight down, with no sideways movement. Hold for two to three seconds. Lift straight up.
WHAT SUCCESS LOOKS LIKE under the microscope: the wire is visibly flattened where the tool pressed, to roughly half its original diameter and one and a half to two times its width. That deformation is not incidental, it is the process — the wire has to flow plastically to bring fresh, clean metal into contact across the interface. A wire that still looks round did not bond.
THE THREE WAYS IT FAILS, and you should cause each deliberately.
Too cold: the wire deforms a little and lifts straight off. No diffusion happened.
Too hot or too long: the wire flattens excessively and the joint becomes thin and brittle, and it breaks at the heel — the point where the wire leaves the flattened region — which is the classic bond failure and the reason bonding parameters are specified so tightly.
Not square: any tilt on the tool bonds one edge and leaves the other lifted, and the joint is a fraction of its intended area. This is the commonest failure by far when done by hand, and it is why real bonders have a tool that self-levels against the surface.
A CONTAMINATED PAD FAILS SILENTLY. Bond one deliberately after touching the pad with a bare finger. It will look identical and it will pull off at a fraction of the force. That is why bond pads are protected until the moment of bonding, and why an assembly line's cleanliness spec is what it is.
このステップの材料:
 金ボンディングワイヤ1 個
 金めっきピンヘッダー10 個
 生基板(銅張り積層板)2 個
必要な工具:
 はんだステーション
 マグネチックスターラー付きホットプレート
 デジタル顕微鏡
 精密ピンセットセット
 実験用温度計
 赤外線温度計
 イソプロピルアルコール 99 %
2
2
Pull-test them, because appearance is not strength
Pull-test them, because appearance is not strength
A bond that looks right and is weak is worse than one that visibly failed, because it ships. The industry's answer is the destructive pull test, and it is straightforward to reproduce.
THE RIG. A fine hook — a bent sewing needle or a dissecting hook — under the middle of the wire span, connected through a light thread to a small pan. Add water to the pan from a syringe at a steady rate until the bond fails, then weigh the pan. Grams times 9.81 gives you millinewtons.
For 25 micrometre gold wire, industry expects 5 to 10 grams-force, which is 50 to 100 millinewtons. Your hand-made bonds on 50 micrometre wire should manage more if they are good, and far less if they are not.
RECORD WHERE IT BROKE, not just the force. This is the part people skip and it is where the diagnosis lives. There are four outcomes and each names a different problem.
BREAK IN THE WIRE SPAN, away from either bond: the bonds are stronger than the wire. This is the BEST result and it is what a good process produces. The number you measured is the wire's strength, not the bond's, and you have not actually measured the bond at all — which is fine, because you have proved it is not the weak point.
BREAK AT THE HEEL, right where the wire leaves the flattened area: over-deformed. Too much force, too much heat, or too long. The bond itself is strong and you damaged the wire making it.
LIFT AT THE PAD, the whole flattened region peeling away cleanly: no metallurgical bond formed. Too cold, too little force, or a contaminated surface. The wire was pressed onto the pad, not welded to it.
CRATERING, where the bond takes a piece of the pad or substrate with it: too much ultrasonic energy or force. Rare in hand thermocompression, common enough in production that it is a named failure.
TEST TWENTY BONDS AND PLOT THE DISTRIBUTION. You will find a wide spread — hand bonding varies enormously — and that spread is exactly why production bonders control temperature, force, time and ultrasonic power to a few percent and pull-test samples continuously.
NOW THE FAILURE THAT TAKES YEARS: PURPLE PLAGUE. Gold wire bonded to an ALUMINIUM pad — which is the common industrial combination, because die pads are aluminium — forms gold-aluminium intermetallic compounds. Several form, at different rates, with different densities. AuAl2 is the purple one that gives the effect its name; the brittle, void-forming one is Au5Al2. Because the compounds occupy different volumes than the metals they replace, voids form at the interface, and the joint slowly loses strength while looking perfectly normal.
It is thermally accelerated, so bake some gold-on-aluminium bonds at 175 degrees for a few hours and pull-test them against unbaked controls. The strength loss is measurable in an afternoon and it models years in service. This is a genuine field failure mechanism, it is why bonding temperature and metallurgy are specified so carefully, and it is invisible to inspection.
このステップの材料:
金ボンディングワイヤ1 個 アルミ箔1 個
 注射器 - Luer2 個
必要な工具:
 精密デジタルスケールデジタル顕微鏡精密ピンセットセット
 手縫い針
手縫い針3
3
Three methods, one joint — and how to choose
Three methods, one joint — and how to choose
Jupyter ノートブックを読み込み中…
必要な工具:
 デスクトップパソコン
材料
5- 1 個プレースホルダー
- 10 個プレースホルダー
- 2 個プレースホルダー
- 1 個プレースホルダー
- 2 個プレースホルダー
関連ブループリント
これらのブループリントは知識を共有しています — 技術、材料、原理


CC0 パブリックドメイン
このブループリントはCC0で公開されています。許可を求めずに、自由にコピー、修正、配布、あらゆる目的で使用できます。
メイカーを応援するには、ブループリント経由で製品を購入してください。メイカーには メイカーコミッション がベンダーにより設定されています。または、このブループリントの新しいイテレーションを作成し、自分のブループリントにコネクションとして含めて収益を共有できます。