

Hand-Sectioning a Plant Stem
A microscope can only show you what light gets through. A plant stem is opaque, so before you can see its internal architecture you have to cut a slice thin enough for light to pass — and "thin enough" means one or two cells, on the order of tens of micrometres.
Professionals use a microtome. You can get remarkably close by hand, and the trick that makes it possible is support: a soft stem crushes under a blade, so you hold it inside something soft but firm — traditionally elder pith, or a split carrot, or a rolled slip of polystyrene — and cut through both together. The support takes the compression and the specimen keeps its shape.
The second half is staining. Plant tissue is nearly colourless, and untreated sections show geometry but not chemistry. Stains bind selectively: iodine turns starch grains blue-black, so you can see exactly which cells are storing food and which are not.
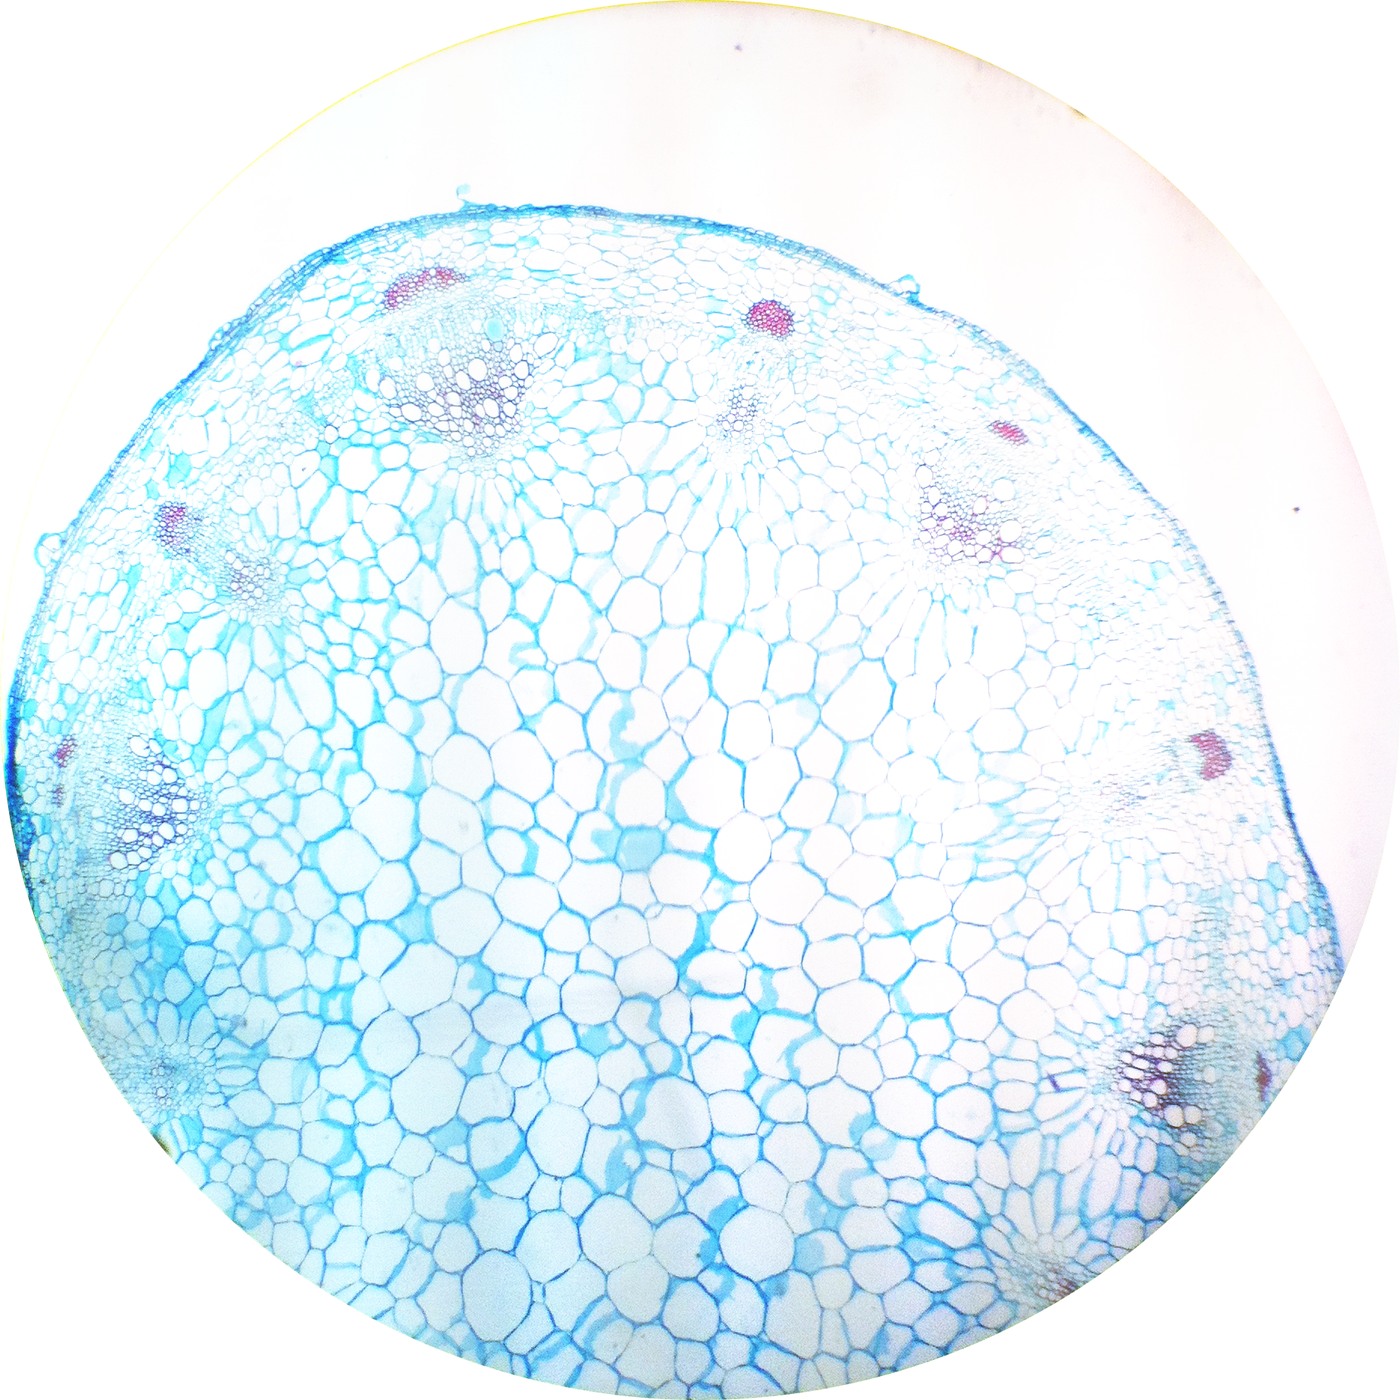
What you are looking for is real anatomy. A ring of vascular bundles, each with xylem towards the centre and phloem towards the outside; a skin of epidermis; and a bulk of thin-walled parenchyma that stores and supports.
Cut fifty sections, keep three, and you will understand why the technique is a skill rather than a step.
Maagizo
Choose a specimen and a support
Choose a specimen and a support
Pick a young, firm, non-woody stem — celery, a buttercup, a dandelion flower stalk. Split a piece of soft pith or a carrot lengthwise, lay the stem in the groove and close it.
Wet everything.
Cutting dry is the single commonest failure. A dry section curls the instant it is free and cannot be flattened again without tearing.
Vifaa kwa hatua hii:
 Kijiti cha mbao (dauli)1 kipande
Zana zinazohitajika:
 Kibano chenye ncha nyembamba
Cut many sections, fast and shallow
Cut many sections, fast and shallow
Hold the blade almost flat and draw it across the supported stem in one smooth slicing motion — do not press down. Cut thirty or more sections into a dish of water without stopping to inspect.
Only then look through them.
Hand-sectioning is a numbers game. Most sections are too thick or torn; you are producing a population and selecting from it, not making one good cut.
Zana zinazohitajika:
 Msumeno mdogo wa mkono
 Bakuli la kioo
Select by transparency, not by shape
Select by transparency, not by shape
Float the sections and look through them against light. Pick the ones you can see through, even if they are wedge-shaped or incomplete.
Discard thick, opaque, tidy-looking ones.
A complete thick section shows you nothing and a partial thin one shows you everything. A wedge is a gift — one edge of it will be a single cell thick.
Mount and look before staining
Mount and look before staining
Transfer a section to a slide in a drop of water with a brush or tweezers, lower a cover slip from one edge to avoid bubbles, and examine at low power first.
Map the whole section before going to high power.
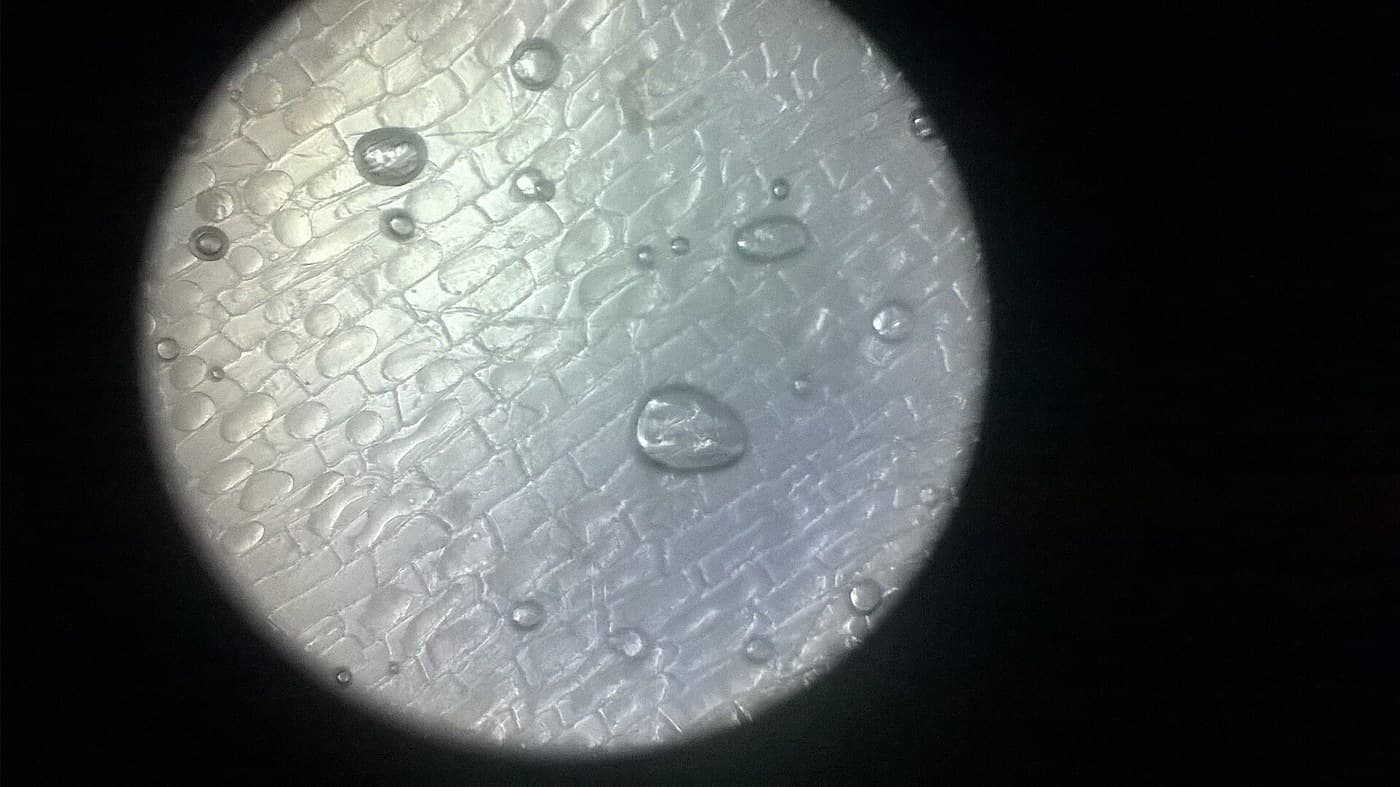
Expect an outer epidermis, a ring or scatter of vascular bundles, and bulk parenchyma. Low power first, every time — high power on an unmapped section is how people spend an hour looking at one cell and miss the architecture.
Zana zinazohitajika:
 Kioo cha maabara cha kuwekea sampuli
 Hadubini
Stain for starch and see chemistry appear
Stain for starch and see chemistry appear
Draw dilute iodine solution under the cover slip from one edge with a tissue at the other. Watch as it arrives.
Expect starch grains to go blue-black in some cells and not others.
Map which tissue stores starch and which does not.
You have just made an invisible chemical distribution visible, which is the entire purpose of histological staining and the reason it was worth inventing.
Vifaa kwa hatua hii:
 Fuwele za iodini1 g
Compare a monocot and a dicot
Compare a monocot and a dicot
Section a grass or maize stem alongside a buttercup or sunflower stem and put the two side by side.
Expect the dicot to have a tidy ring of bundles and the monocot to have bundles scattered throughout.
Photograph both.
That single difference is one of the oldest and most reliable divisions in flowering-plant classification, and you can see it in a slice of vegetable.
Zana zinazohitajika:
 Lupu ya Kukuza
Compendium — why sectioning built biology
Compendium — why sectioning built biology
The microscope was useless for solid tissue until somebody solved slicing. Early microscopists could look at pond water, blood and thin membranes because those are already thin; anything solid was opaque. The microtome, developed through the nineteenth century, mechanised the production of uniform thin sections, and it is not an exaggeration to say that histology, pathology and cell theory all waited on it. Hand-sectioning with a pith support is the technique the microtome replaced, and it still works.
What you are actually looking at. Xylem carries water upward in dead, hollow, lignified cells — which is why it is stiff and why it is the tissue that becomes wood. Phloem carries dissolved sugars in living cells, in both directions. In a dicot stem the two sit in bundles with xylem inside and phloem outside, arranged in a ring; the cambium between them is the growth layer that adds a ring each year in woody plants. Every annual ring you have ever counted is the record of one season of that cambium working.
Stains are selective chemistry, not dye. Iodine binds inside the helical structure of starch and produces the blue-black complex, so it reports on storage. Toluidine blue distinguishes lignified from non-lignified walls by colour. Phloroglucinol with acid turns lignin red. Safranin and fast green together — the classic botanical double stain — separate lignified from cellulosic tissue in one preparation. Choosing a stain is choosing a question, and a section stained with the wrong one is not a failed slide, it is an answer to something you did not ask.
Honest limits and safe practice. Hand sections are wedge-shaped, variable and rarely complete — for measurement work a microtome is genuinely necessary. Fresh unfixed tissue changes within minutes as cells lose turgor, so work quickly and keep everything wet. The blade is the hazard in this blueprint and it is a real one: a section blade is far sharper than a kitchen knife, cuts are deep and clean, and the danger moment is cutting towards yourself or steadying the specimen with a bare finger. Cut away from the hand, use a support you can hold at the ends, and dispose of blades in a sealed container. Iodine stains skin and clothing, is a mild irritant, and should not be splashed near eyes.
Vifaa
2- 1 kipandeKishikilia Nafasi
- Kishikilia Nafasi
Zana Zinazohitajika
6- Kishikilia Nafasi
- Kishikilia Nafasi
- Kishikilia Nafasi
- Kishikilia Nafasi
- Kishikilia Nafasi
- Kishikilia Nafasi
Vifaa vya Michoro Iliyounganishwa

Mchoro huu unatengeneza
Blueprint zinazohusiana
Blueprint hizi zinashiriki maarifa — mbinu, vifaa au kanuni
CC0 Umma Wote
Mchoro huu umetolewa chini ya CC0. Uko huru kunakili, kubadilisha, kusambaza, na kutumia kazi hii kwa madhumuni yoyote, bila kuomba ruhusa.
Saidia Mtengenezaji kwa kununua bidhaa kupitia Mchoro wao ambapo wanapata Kamisheni ya Mtengenezaji iliyowekwa na Wachuuzi, au unda marudio mapya ya Mchoro huu na uiunganishe kama kiungo katika Mchoro wako kuchangia mapato.