Knitting a Flat Swatch on Two Needles — The Knit Stitch and Garter Stitch
Knitting — the interlocking of continuous yarn into rows of loops using two or more pointed needles — first appears in the archaeological record around the 11th century CE in Egypt. The earliest confirmed knitted textiles are Coptic cotton socks from Egyptian tombs, worked in a technique called 'nalbinding-to-knitting transition' that shows the shift from single-needle looping to the two-needle method. By the 13th century, knitting had spread across the Islamic world and into Europe, where knitting guilds formed in cities like Paris and Florence.
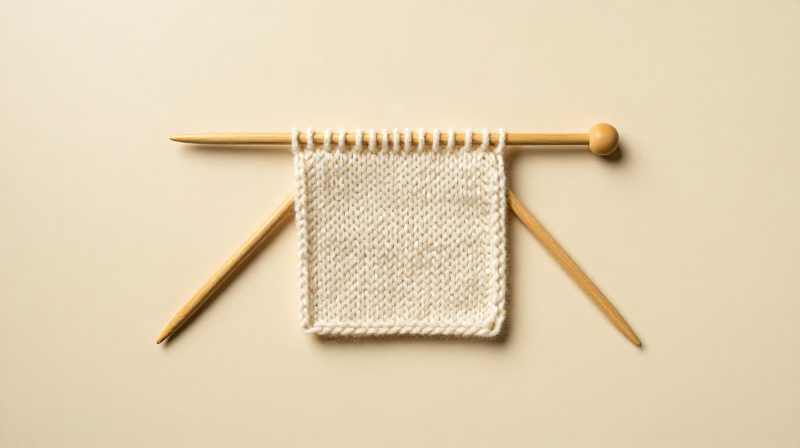
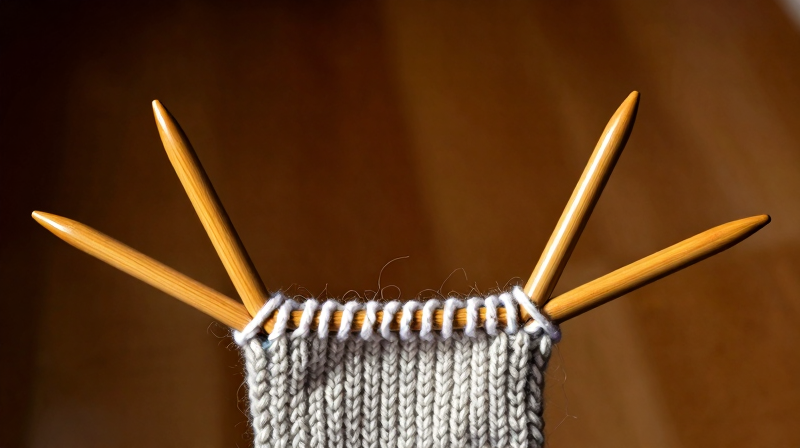
Unlike nålbinding, which uses short yarn lengths and cannot unravel, knitting uses a continuous yarn and forms interlocking loops that can be pulled out row by row. This makes knitting faster but also more fragile — a dropped stitch can 'run' and unravel the fabric. The simplest knitted fabric is garter stitch: every row worked as knit stitches, producing a bumpy, elastic, reversible fabric that lies flat without curling.
This blueprint teaches the three foundational skills of two-needle knitting: casting on (creating the first row of stitches), the knit stitch (the single movement that builds every row), and casting off (securing the final row). Mastering these three actions is sufficient to knit scarves, washcloths, and blanket squares.
Maagizo
Select yarn and matching needles
Select yarn and matching needles
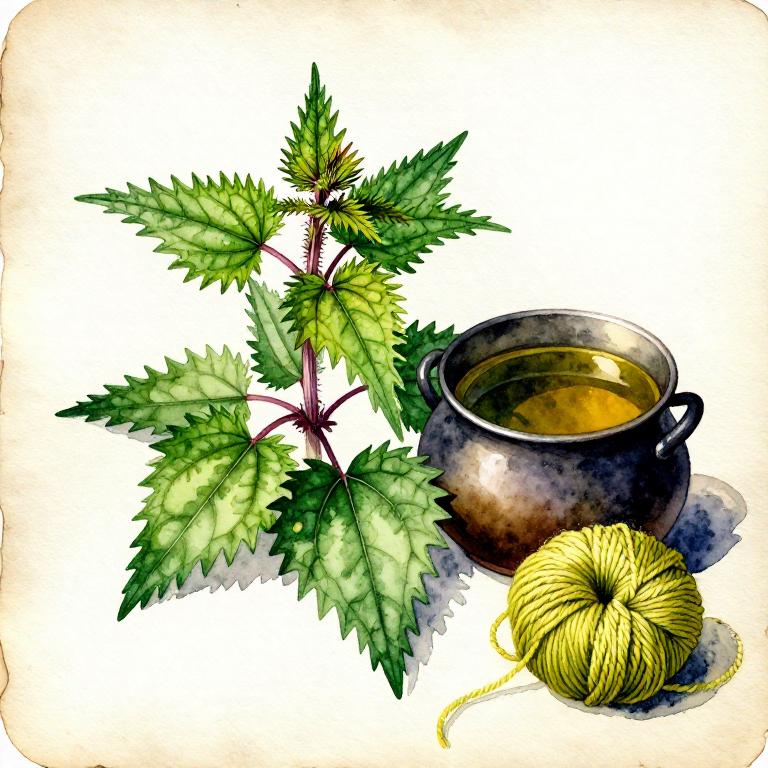
Choose a medium-weight (worsted or aran) wool yarn in a light color — light yarn makes it easier to see individual stitches while learning. Select straight knitting needles sized to match the yarn; for worsted weight, 4.5–5.5 mm needles are standard. Wooden or bamboo needles grip the yarn better than metal, which helps prevent dropped stitches for beginners.
Vifaa kwa hatua hii:
 Wool Yarn Skein (Undyed)50 g
Zana zinazohitajika:
 Knitting Needles
Make a slip knot for the first stitch
Make a slip knot for the first stitch
Pull about 60 cm of yarn from the ball (this tail feeds the cast-on stitches). Make a loop near the tail end, reach through the loop and pull the working yarn through to form a slip knot. Slide the slip knot onto one needle and tighten gently. This counts as your first stitch.
Cast on using the long-tail method
Cast on using the long-tail method
Hold the needle with the slip knot in your right hand. Drape the tail yarn over your left thumb and the working yarn over your left index finger, holding both strands in your left palm. Insert the needle tip upward through the thumb loop, catch the index finger strand, and pull it back through the thumb loop. Release the thumb loop and tighten. This creates one cast-on stitch. Repeat until you have 20 stitches on the needle.
Check the cast-on row
Check the cast-on row
Hold the needle up and examine the 20 stitches. Each should sit evenly on the needle without twisting. The bottom edge should form a neat chain of interlocking loops. If stitches are uneven (some tight, some loose), pull them off and re-cast at consistent tension. The cast-on row sets the tension for the entire swatch.
Hold the needles and yarn for knitting
Hold the needles and yarn for knitting
Transfer the needle with stitches to your left hand. Hold the empty needle in your right hand like a pencil or knife (both grips work — use whichever feels natural). Wrap the working yarn around the fingers of your right hand to maintain tension: over the index finger, under the middle finger, and over the ring finger. The yarn should feed smoothly without pulling too tight or hanging slack.
Insert the right needle into the first stitch
Insert the right needle into the first stitch
Push the tip of the right needle into the first stitch on the left needle, entering from left to right (front to back). The right needle passes behind the left needle, forming an X shape with the right needle underneath. The stitch should open slightly around both needles.
Wrap the yarn around the right needle
Wrap the yarn around the right needle
With the right needle still inserted through the stitch, wrap the working yarn counterclockwise around the right needle tip — bring the yarn behind the right needle, over the top, and back toward you between the two needle tips. This wrap creates the new loop that will become the next stitch.
Pull the new loop through the old stitch
Pull the new loop through the old stitch
Use the right needle tip to catch the wrapped yarn and draw it forward through the old stitch on the left needle. The new loop now sits on the right needle. This motion — insert, wrap, pull through — is the complete knit stitch. It takes practice to coordinate smoothly.
Slide the old stitch off the left needle
Slide the old stitch off the left needle
Once the new loop is secure on the right needle, slide the old stitch off the tip of the left needle. One stitch has moved from the left needle to the right needle. The old stitch now hangs below the new loop, forming the interlocking structure of knitted fabric.
Knit across the entire row
Knit across the entire row
Repeat the knit stitch (insert, wrap, pull through, slide off) into each stitch on the left needle. When all 20 stitches have been transferred to the right needle, the left needle is empty and one row is complete. Count your stitches — you should still have exactly 20. A missing stitch means you accidentally dropped one; an extra stitch means you split a stitch or added a yarn-over.
Turn the work and begin the next row
Turn the work and begin the next row
Swap the needles between hands: the full needle (now your working needle) goes to the left hand, the empty needle goes to the right hand. The fabric hangs below the left needle with the working yarn trailing from the last stitch on the right side. You are now ready to knit the next row from right to left — knitting always works from the left needle to the right.
Continue knitting rows to build garter stitch
Continue knitting rows to build garter stitch
Knit every stitch of every row. After 4–5 rows, the fabric begins to take shape: horizontal ridges appear on both sides, and the fabric feels bumpy and elastic. This is garter stitch — the simplest and oldest knitted fabric pattern. It lies flat, does not curl at the edges, and stretches equally in all directions. Continue until you have completed 30 rows.
Maintain even tension throughout
Maintain even tension throughout
Consistency matters more than tightness. Each stitch should slide freely on the needle without bunching or gapping. If your stitches are so tight they barely move on the needle, relax your grip. If they slide off on their own, tighten slightly. Tension improves naturally with practice — most beginners knit too tightly at first.
Count stitches periodically
Count stitches periodically
Every 5–10 rows, pause and count the stitches on your needle. You should always have 20. If the count has changed, examine the most recent rows for mistakes. Common errors: accidentally knitting into the yarn between stitches (adds a stitch), or letting a stitch slide off the needle unworked (loses a stitch). Catching mistakes early is easier than fixing them later.
Begin casting off on the final row
Begin casting off on the final row
When the swatch reaches your desired length (approximately 15 cm after 30 rows), begin the cast-off row. Knit the first two stitches normally onto the right needle. Then use the left needle tip to lift the first stitch on the right needle over the second stitch and off the needle. One stitch has been cast off.
Continue casting off across the row
Continue casting off across the row
Knit one more stitch (two stitches on right needle again), then lift the first over the second and off. Repeat this sequence — knit one, lift one over — across the entire row. Keep tension relaxed during cast-off; a tight cast-off edge will pucker. When one stitch remains on the right needle, cut the yarn leaving a 15 cm tail and pull it through the final loop to secure.
Zana zinazohitajika:
 Sharp Scissors
Weave in the yarn tails
Weave in the yarn tails
Thread each loose tail onto a blunt tapestry needle. Weave the tail through the backs of 5–6 stitches along the edge of the fabric, following the path of existing yarn so the weaving is invisible from the front. Trim the excess close to the fabric surface. Both the cast-on tail and the cast-off tail must be secured this way.
Zana zinazohitajika:
 Nålbinding Needle
Block the finished swatch
Block the finished swatch
Soak the swatch in lukewarm water for 10 minutes, gently squeeze out excess water (do not wring), and lay flat on a towel. Pin the corners to the desired dimensions and let it dry completely. Blocking evens out the stitches and sets the final shape. Wool yarn responds dramatically to blocking — uneven beginner stitches smooth out considerably after a good soak.
Vifaa
1- Kishikilia Nafasi
Zana Zinazohitajika
3- Kishikilia Nafasi
- Kishikilia Nafasi
- Kishikilia Nafasi
Vifaa vya Michoro Iliyounganishwa
Required Equipment
Equipment this kind of build typically needs — buy from any maker below.
- RecommendedDust Mask / Respirator·
 Full-Face Gas Mask (ABEK multi-gas cartridge)
 Dust Mask
 Venetian Mask Blank (Papier-Mache)
 Full-Face Respirator
 Respirator Fit Test Kit
 Respirator with Acid Gas Cartridge
 - RecommendedSafety Glasses·
 Safety Sign (Caution/Warning)
 Splash-Proof Safety Goggles
 Reflective Safety Vest Kit (DIY)
 Chemical Splash Goggles
 Safety Netting for Rockfall
 Steel-Toed Safety Boots
 - RecommendedWork Gloves·
 Boxing Gloves (Training)
 Leather Gauntlet Gloves
 Cotton Gloves
 Welding Gloves
 Heavy-Duty Gloves
 Leather Work Gloves
 - OptionalFire Extinguisher·
 ABC Fire Extinguisher
 Fire Extinguisher
 - OptionalFirst Aid Kit·
 First Aid Kit
 Mountain First Aid Kit (Altitude)
 Workshop First Aid Kit
 Bow Release Aid
You can swap these in
Can't get one of the materials? Swap it for an equivalent — these work just as well.
- Instead of Nålbinding Needle, try:
 Large-Eye Needle
 Piercing Needle Set (Sterile, 50-Pack)
 Nalbinding Needle
 Taxidermy Thread & Needle Set
 Sewing Needle (large)
 Metal Needle
 Sewing Needle Set
 Sack Sewing Needle (curved)
 - Instead of Sharp Scissors, try:
 Small Sharp Scissors
 Kitchen Scissors
 - Instead of Wool Yarn Skein (Undyed), try:
 Yarn Skein
 - Instead of Knitting Needles, try:
 Hand Sewing Needles (Assorted, 30-Pack)
Recommended for this build
Products makers often use with builds like this one.
 Stock PotFrequently used with this build's materials
 Cooking Thermometer (0-200°C)Frequently used with this build's materials
 Wooden Stirring SpoonFrequently used with this build's materials
 Digital Kitchen ScaleFrequently used with this build's materials
 Alum (Potassium Alum)Frequently used with this build's materials
 Fine Mesh StrainerFrequently used with this build's materials
 WaterFrequently used with this build's materials
 Dried ReedFrequently used with this build's materials
Blueprint zinazohusiana
Blueprint hizi zinashiriki maarifa — mbinu, vifaa au kanuni
Related blueprints
Other builds that share materials, tools, or techniques with this one.
CC0 Umma Wote
Mchoro huu umetolewa chini ya CC0. Uko huru kunakili, kubadilisha, kusambaza, na kutumia kazi hii kwa madhumuni yoyote, bila kuomba ruhusa.
Saidia Mtengenezaji kwa kununua bidhaa kupitia Mchoro wao ambapo wanapata Kamisheni ya Mtengenezaji iliyowekwa na Wachuuzi, au unda marudio mapya ya Mchoro huu na uiunganishe kama kiungo katika Mchoro wako kuchangia mapato.