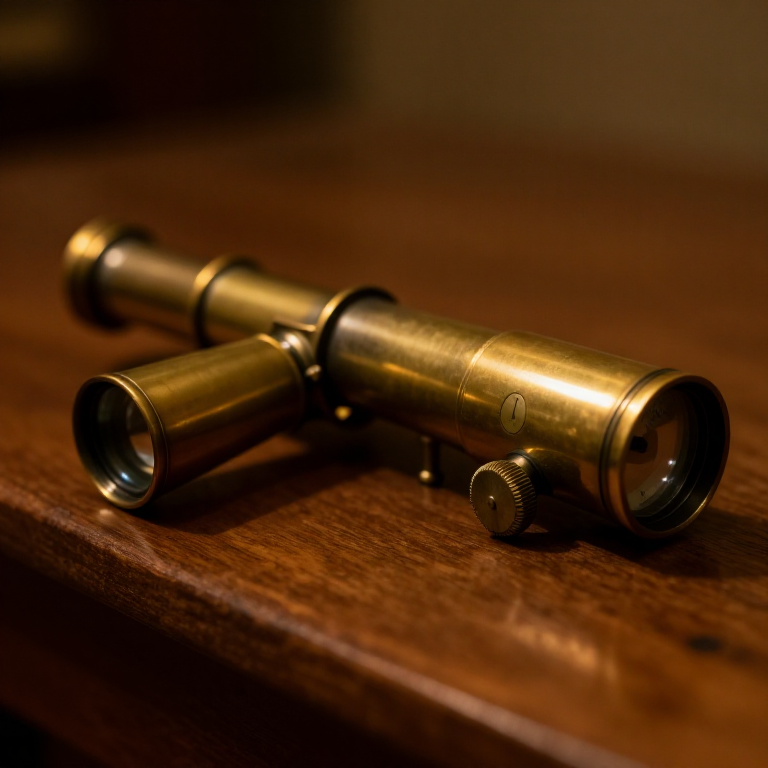


Optical Pyrometer
Maagizo
Build the optical path with the filament in the image plane
Build the optical path with the filament in the image plane
The filament and the target must appear at the same focus, or you cannot compare them.
- Fit an objective lens at one end of a blackened tube, focusing the target onto a plane inside.
- Mount a small tungsten filament lamp at exactly that plane, so the filament sits IN the focused image.
- Add an eyepiece behind it, focused on the filament.
- Look through and confirm you see the filament sharply, superimposed on a sharp image of whatever the objective is pointed at.
Both must be sharp together. If the filament is in focus and the target is not, you are comparing a bright wire against a blur and the match point becomes vague. Getting the two into one plane is the whole optical design, and it is why the instrument has a fixed working distance range.
Blacken the tube's interior thoroughly. Stray light reaching the eyepiece raises the apparent background brightness and makes the filament vanish too early, reading low.Vifaa kwa hatua hii:
 Fito ya akriliki1 kipande
 Mrija wa shaba kipenyo cha nje inchi 1/21 kipande
 LED ya mm 51 kipande
Zana zinazohitajika:
 Kekee cha Betri
 Seti ya vichimbuzi
 Seti ya tupa
 Kipima-unene cha dijitali cha inchi 6
 Fremu ya msumeno wa chuma na mabapa
Wire the filament current control and read it
Wire the filament current control and read it
Filament current is the measurement. Everything else is optics.
- Power the filament from an adjustable supply through a fine potentiometer.
- Put an ammeter in series so the current is read precisely.
- Turn the knob and watch the filament go from black through dull red to bright yellow.
- Note the current at several visible colours.
The dial reads current and is LABELLED in temperature. There is no thermal sensor anywhere in the instrument — the scale is a calibration, established once by pointing the pyrometer at sources of known temperature. That is the same arrangement as the airspeed indicator in the pitot blueprint: a pressure gauge with a velocity scale printed on it.
Use a fine potentiometer and a stable supply. The match point is judged by eye and the eye is very sensitive to brightness differences, so a coarse control that jumps past the match makes the instrument far less precise than it could be.Vifaa kwa hatua hii:
 Kifurushi cha Vipinga vya 1/4 W1 kifaa
 Waya wa Shaba1 rolii
Zana zinazohitajika:
 Mita-nyingi ya dijitali ya maabara
 Multimita ya AnalogiKipima-unene cha dijitali cha inchi 6
 Chanzo cha Umeme cha Meza Kinachorekebishwa
Add the red filter — and understand why it is essential
Add the red filter — and understand why it is essential
Comparing brightness across different colours is unreliable. Remove the colour.
- Fit a deep red filter between the filament and the eyepiece.
- Look again: both the filament and the target now appear in the same narrow band of red.
- Compare the ease of judging the match with and without the filter.
Without the filter you are comparing an orange filament against a yellow furnace and guessing. With it, both are red and only their BRIGHTNESS differs, which the eye judges far better than it judges colour. There is a second reason too: the physics relating brightness to temperature depends on wavelength, so the calibration is only valid if the instrument always looks at the same wavelength. The filter enforces that.
This is a general instrumentation move — remove every variable except the one you are measuring. The filter throws away most of the light and makes the instrument better.Vifaa kwa hatua hii:
 Bamba la Akriliki1 karatasi
 Rangi ya chakula1 chupa
Zana zinazohitajika:
Seti ya tupaKipima-unene cha dijitali cha inchi 6 Msumeno wa kukata mikunjo
Calibrate, then find the emissivity error
Calibrate, then find the emissivity error
The instrument assumes the target radiates like a perfect black body. Real surfaces do not.
- Point it at a kiln with a known thermocouple reading and set your scale against it.
- Now heat two objects to the same temperature: one dull black oxidised steel, one bright polished steel.
- Read both with the pyrometer.
- Compare against a thermocouple touching each.
Vifaa kwa hatua hii:
 Ubao bapa wa alumini1 kipande
 Karatasi ya gridi1 pad
Zana zinazohitajika:
 Kipimajoto cha infraredMita-nyingi ya dijitali ya maabara
 TanuruKipima-unene cha dijitali cha inchi 6
The null method, and history
The null method, and history
Ludwig Holborn and Ferdinand Kurlbaum published the disappearing-filament pyrometer in 1901 at the Physikalisch-Technische Reichsanstalt, the German national standards laboratory. Earlier optical pyrometers compared brightness against a standard lamp side by side; putting the filament INTO the image so it visually disappears is what made the judgement easy and the instrument practical.
Null methods are the most accurate kind of measurement, and this is a fine example. You are not asking the observer to judge how bright something is — a hopeless task — but only whether two things are the SAME brightness, which the eye does extremely well. The Wheatstone bridge in the resistance thermometer works identically: it does not measure resistance, it detects when a difference is zero. Whenever you can turn a measurement into the detection of a null, do it.
Where it sits in the chain: Wedgwood's pyrometer read a permanent effect after the fact. The thermocouple gave a live signal but had to be inserted into the process and eventually degrades there. The optical pyrometer removes contact entirely, so it can read a steel ladle, a glass furnace or a filament in a vacuum tube — anything visible and hot enough to glow.
Its honest limits: it only works above roughly 700 °C, where objects glow visibly; it depends on emissivity, which is often unknown; smoke, dust and dirty windows between instrument and target all read low; and the classic version depends on an observer's eye, so two operators may differ slightly. Modern radiation pyrometers replace the eye with a detector but inherit the emissivity problem completely.
Vifaa
9- 1 kipandeKishikilia Nafasi
- Kishikilia Nafasi
- Kishikilia Nafasi
- Kishikilia Nafasi
- 1 roliiKishikilia Nafasi
- 1 karatasiKishikilia Nafasi
- 1 chupaKishikilia Nafasi
- 1 kipandeKishikilia Nafasi
- 1 padKishikilia Nafasi
Zana Zinazohitajika
11- 1 vendor sell this, none ship to you yetKishikilia Nafasi
- Kishikilia Nafasi
- Kishikilia Nafasi
- Kishikilia Nafasi
- Kishikilia Nafasi
- Kishikilia Nafasi
- Kishikilia Nafasi
- Kishikilia Nafasi
- Kishikilia Nafasi
- Kishikilia Nafasi
- Kishikilia Nafasi
Blueprint zinazohusiana
Blueprint hizi zinashiriki maarifa — mbinu, vifaa au kanuni

CC0 Umma Wote
Mchoro huu umetolewa chini ya CC0. Uko huru kunakili, kubadilisha, kusambaza, na kutumia kazi hii kwa madhumuni yoyote, bila kuomba ruhusa.
Saidia Mtengenezaji kwa kununua bidhaa kupitia Mchoro wao ambapo wanapata Kamisheni ya Mtengenezaji iliyowekwa na Wachuuzi, au unda marudio mapya ya Mchoro huu na uiunganishe kama kiungo katika Mchoro wako kuchangia mapato.