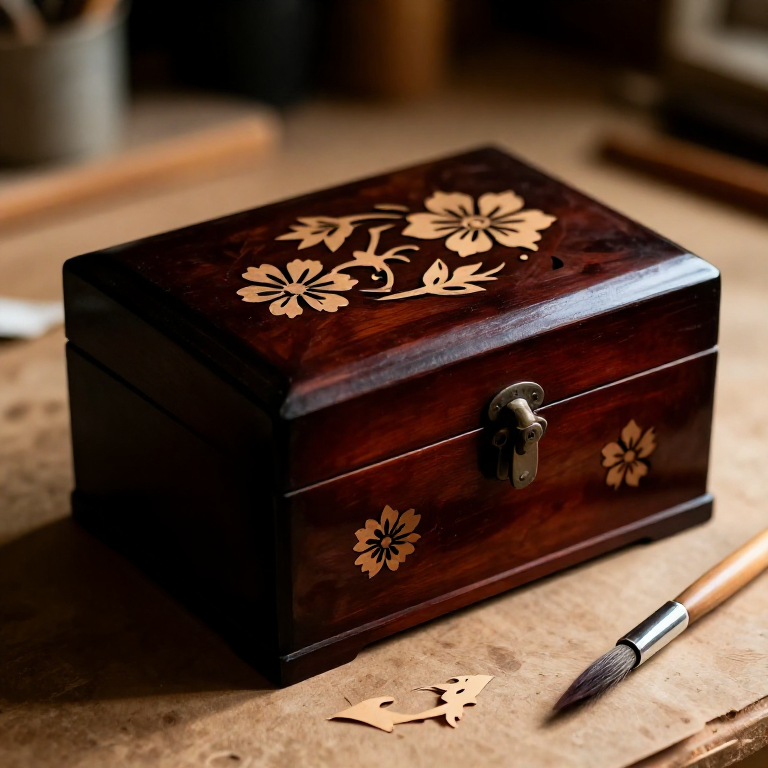


Decoupage
Decoupage is cutting out paper pictures, gluing them to furniture, and then burying them under so many coats of varnish that the surface goes completely smooth. Done properly, you cannot feel a single edge — the picture looks painted on or inlaid.
It began as forgery, more or less. Eighteenth-century Venice had a huge appetite for imported lacquered furniture from China and Japan, and it could not be met. Venetian workshops cut out and coloured printed motifs, applied them to furniture, and varnished them until they passed. The Italians called it arte del povero, poor man's art — the trade in imitation lacquer.
The craft is almost entirely in the varnishing. Cutting and gluing take an afternoon; the coats that make the edges disappear take days of patient sanding.
안내
Prepare the surface
Prepare the surface
Sand the wooden object smooth through 120 then 220 grit and wipe off the dust. Every lump under the paper will show through and grow more obvious with each varnish coat.
이 단계의 재료:
 경목 블록1 개
 사포1 장사포1 장
Seal the wood
Seal the wood
Brush on a thin coat of diluted glue as a sealer and let it dry. Unsealed wood drinks the glue out of the paper and the motif lifts at the edges later.
이 단계의 재료:
 아교100 ml
Choose thin paper
Choose thin paper
Use thin printed paper. Thick card needs many more varnish coats to bury and the edge stays visible however long you work at it.
이 단계의 재료:
 카드지1 장
Cut precisely, moving the paper
Cut precisely, moving the paper
Cut out each motif with small sharp scissors, turning the paper into the blade rather than swinging the blade. This gives a cleaner edge and is far easier to control on curves.
필요한 도구:
 재단 가위
재단 가위Bevel the cut edge
Bevel the cut edge
Hold the scissors at a slight angle so the cut undercuts the printed face. A bevelled edge is thinner where it meets the surface and disappears under varnish far sooner.
Lay the composition out dry
Lay the composition out dry
Arrange all the pieces on the object without glue and look at it from a distance. Once glued they cannot be repositioned without tearing.
Glue from the centre outward
Glue from the centre outward
Brush glue on the back of a motif, place it, and smooth from the middle to the edges to drive out air. Trapped air becomes a permanent bubble under the varnish.
Wipe off squeeze-out immediately
Wipe off squeeze-out immediately
Wipe surplus glue off the surrounding surface with a damp cloth at once. Dried glue shows as a shiny patch under varnish and cannot be removed later.
Dry fully before varnishing
Dry fully before varnishing
Leave it overnight. Varnishing over damp glue traps moisture and the paper goes milky.
Build up thin varnish coats
Build up thin varnish coats
Brush on thin coats of shellac or varnish, drying between each. Thin and many, never thick and few — a heavy coat sags, and sagging over a paper edge is impossible to sand out.
이 단계의 재료:
 셸락 바니시250 ml
Sand back every few coats
Sand back every few coats
After every third or fourth coat, sand lightly with 400 grit and wipe clean. Sanding is what actually levels the edge — the varnish just fills what the sanding opens up.
이 단계의 재료:
사포1 장Test with a fingertip, not your eyes
Test with a fingertip, not your eyes
Close your eyes and run a fingertip across the motif edge. Keep coating and sanding until you cannot feel it. Traditional work ran to twelve coats and more — the finish is the craft.
History & Context
History & Context
Imitation lacquer. Decoupage as a European furniture craft flourished in eighteenth-century Venice, driven by demand for East Asian lacquered furniture that far outran supply. Workshops cut out printed motifs, coloured them, applied them to furniture and varnished them heavily to imitate imported lacquer. The Italian name for the trade, arte del povero — poor man's art — is candid about what it was.
Why so many coats. The illusion depends entirely on the paper edge vanishing. Paper has thickness; varnish must build up to at least that thickness around the motif and then be levelled flat. There is no shortcut, and the number of coats in historical work — often a dozen or more — is a direct measure of how well the imitation had to hold up.
It was a fashionable pastime too. Alongside the workshops, decoupage became a genteel amusement for aristocratic women across Europe, with printers selling sheets of motifs specifically to be cut up. So the same technique existed simultaneously as a commercial imitation trade and as a drawing-room hobby — a pattern that repeats across craft history.
Related, not the same. Decoupage is often confused with collage. The difference is the finish: collage leaves the assembled edges visible as part of the work, decoupage exists precisely to eliminate them. One celebrates the join, the other conceals it.
Why it keeps coming back. The materials are paper, glue and varnish, and the skill required is patience rather than dexterity. Every generation rediscovers it for the same reason the Venetians used it — it gets a rich decorative result from almost nothing.
재료
7- 1 개플레이스홀더
- 1 장플레이스홀더
- 1 장플레이스홀더
- 100 ml플레이스홀더
- 1 장플레이스홀더
- 250 ml플레이스홀더
- 1 장플레이스홀더
CC0 퍼블릭 도메인
이 블루프린트는 CC0로 공개되었습니다. 어떤 목적으로든 자유롭게 복사, 수정, 배포 및 사용할 수 있습니다.
제품 구매를 통해 메이커를 지원하세요. 판매자가 설정한 메이커 커미션 을 받거나, 이 블루프린트의 새로운 반복을 만들어 연결로 포함시킬 수 있습니다.