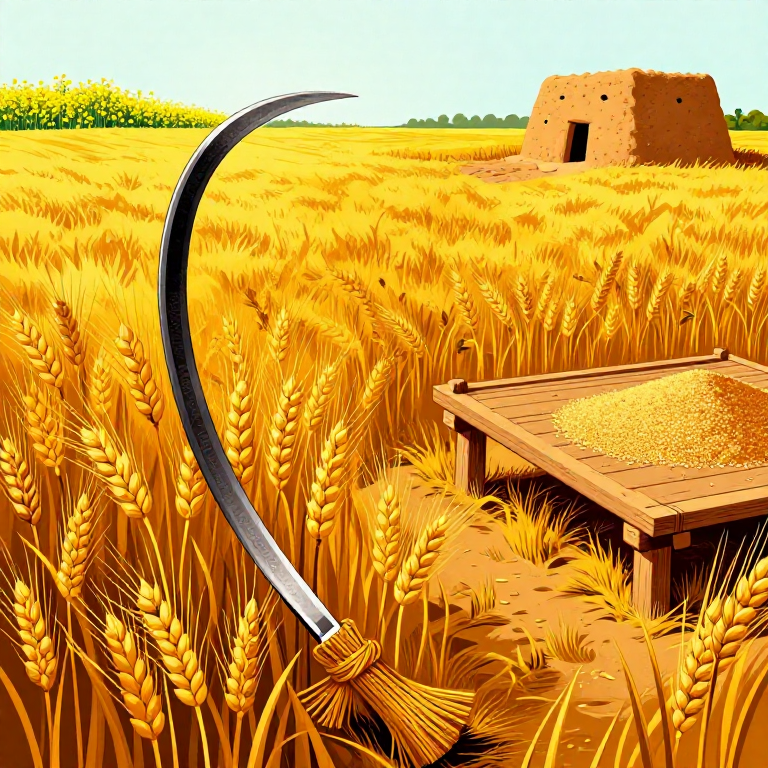
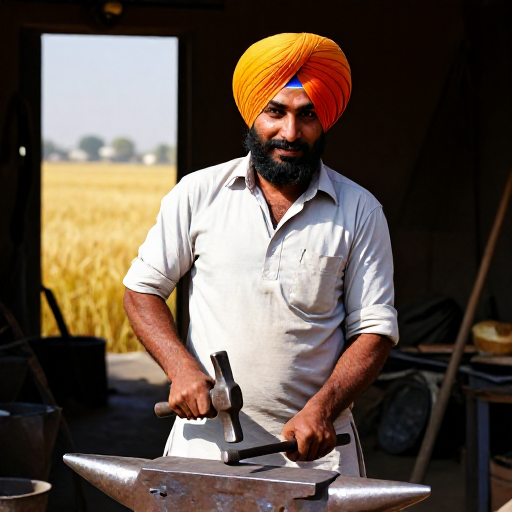

ਕਣਕ ਦੀ ਵਾਢੀ — ਪੰਜਾਬ ਦੀ ਰਵਾਇਤੀ ਕਣਕ ਕਟਾਈ ਅਤੇ ਪ੍ਰੋਸੈਸਿੰਗ
안내
ਕਣਕ ਦੇ ਪੌਦੇ ਨੂੰ ਸਮਝਣਾ
ਕਣਕ ਦੇ ਪੌਦੇ ਨੂੰ ਸਮਝਣਾ
ਕਣਕ (Triticum aestivum) ਘਾਹ ਪਰਿਵਾਰ (Poaceae) ਦੀ ਇੱਕ ਮੁੱਖ ਅਨਾਜ ਵਾਲੀ ਫ਼ਸਲ ਹੈ। ਪੰਜਾਬ ਵਿੱਚ ਕਣਕ ਦੀ ਬਿਜਾਈ ਅਕਤੂਬਰ-ਨਵੰਬਰ ਵਿੱਚ ਹੁੰਦੀ ਹੈ ਅਤੇ ਵਾਢੀ ਅਪ੍ਰੈਲ-ਮਈ ਵਿੱਚ। ਪੌਦਾ ੬੦-੧੨੦ ਸੈਂਟੀਮੀਟਰ ਉੱਚਾ ਹੁੰਦਾ ਹੈ। ਹਰੇਕ ਸਿੱਟੇ (ਬੱਲੀ) ਵਿੱਚ ੨੫-੫੦ ਦਾਣੇ ਹੁੰਦੇ ਹਨ। ਪੰਜਾਬ ਦੀਆਂ ਮੁੱਖ ਕਿਸਮਾਂ ਵਿੱਚ HD-2967, PBW-725, ਅਤੇ WH-1105 ਸ਼ਾਮਲ ਹਨ। ਪੰਜਾਬ ਭਾਰਤ ਦੀ ਲਗਭਗ ੩੫% ਕਣਕ ਪੈਦਾ ਕਰਦਾ ਹੈ — ਇਹ ਪ੍ਰਤੀ ਹੈਕਟੇਅਰ ੫੦-੫੫ ਕੁਇੰਟਲ ਝਾੜ ਦਿੰਦਾ ਹੈ ਜੋ ਰਾਸ਼ਟਰੀ ਔਸਤ ੩੪ ਕੁਇੰਟਲ ਤੋਂ ਕਾਫ਼ੀ ਵੱਧ ਹੈ।
ਪੱਕਣ ਦੀ ਪਛਾਣ ਕਰਨਾ
ਪੱਕਣ ਦੀ ਪਛਾਣ ਕਰਨਾ
ਕਣਕ ਪੱਕਣ ਦੇ ਕਈ ਸੰਕੇਤ ਹਨ ਜੋ ਧਿਆਨ ਨਾਲ ਪਰਖਣੇ ਚਾਹੀਦੇ ਹਨ। ਪਹਿਲਾ: ਪੌਦੇ ਅਤੇ ਬੱਲੀਆਂ ਦਾ ਰੰਗ ਹਰੇ ਤੋਂ ਸੁਨਹਿਰੀ ਪੀਲਾ ਹੋ ਜਾਂਦਾ ਹੈ — ਜਦੋਂ ਪੂਰਾ ਖੇਤ ਸੁਨਹਿਰਾ ਦਿਖੇ ਤਾਂ ਵਾਢੀ ਦਾ ਸਮਾਂ ਨੇੜੇ ਹੈ। ਦੂਜਾ: ਬੱਲੀ ਵਿੱਚੋਂ ਇੱਕ ਦਾਣਾ ਕੱਢ ਕੇ ਦੰਦਾਂ ਨਾਲ ਦਬਾਓ — ਜੇ ਕੜਕ ਆਵਾਜ਼ ਨਾਲ ਟੁੱਟੇ ਤਾਂ ਪੱਕਿਆ ਹੋਇਆ ਹੈ, ਜੇ ਨਰਮ ਹੈ ਤਾਂ ਅਜੇ ਕੱਚਾ ਹੈ। ਤੀਜਾ: ਦਾਣੇ ਦੀ ਨਮੀ ੧੨-੧੪% ਹੋਣੀ ਚਾਹੀਦੀ ਹੈ। ਤਣੇ ਸੁੱਕੇ ਅਤੇ ਭੁਰਭੁਰੇ ਹੋ ਜਾਂਦੇ ਹਨ। ਬਹੁਤ ਜਲਦੀ ਕੱਟਣ ਨਾਲ ਦਾਣੇ ਸੁੰਗੜ ਜਾਂਦੇ ਹਨ ਅਤੇ ਬਹੁਤ ਦੇਰ ਕਰਨ ਨਾਲ ਦਾਣੇ ਬੱਲੀ ਵਿੱਚੋਂ ਝੜ ਕੇ ਜ਼ਮੀਨ ਤੇ ਡਿੱਗ ਜਾਂਦੇ ਹਨ।
필요한 도구:
 곡물 수분계
ਦਾਤਰੀ ਤਿਆਰ ਕਰਨਾ
ਦਾਤਰੀ ਤਿਆਰ ਕਰਨਾ
ਦਾਤਰੀ (daranti) ਪੰਜਾਬ ਦੀ ਰਵਾਇਤੀ ਕਣਕ ਕੱਟਣ ਦੀ ਔਜ਼ਾਰ ਹੈ — ਇੱਕ ਅਰਧ-ਚੰਦਰ ਆਕਾਰ ਦਾ ਧਾਰਦਾਰ ਬਲੇਡ ਜਿਸ ਨਾਲ ਲੱਕੜ ਦਾ ਹੈਂਡਲ ਜੁੜਿਆ ਹੁੰਦਾ ਹੈ। ਕਟਾਈ ਤੋਂ ਪਹਿਲਾਂ ਦਾਤਰੀ ਦੀ ਧਾਰ ਤੇਜ਼ ਕਰੋ — ਸਾਣ ਦੇ ਪੱਥਰ ਨੂੰ ਪਾਣੀ ਨਾਲ ਗਿੱਲਾ ਕਰੋ ਅਤੇ ਬਲੇਡ ਨੂੰ ੨੦-੨੫ ਡਿਗਰੀ ਦੇ ਕੋਣ ਤੇ ਇੱਕ ਪਾਸੇ ਖਿੱਚੋ। ੫-੧੦ ਵਾਰ ਦੋਵੇਂ ਪਾਸਿਆਂ ਤੋਂ ਤੇਜ਼ ਕਰੋ। ਹੈਂਡਲ ਚੈੱਕ ਕਰੋ ਕਿ ਢਿੱਲਾ ਤਾਂ ਨਹੀਂ — ਢਿੱਲੇ ਹੈਂਡਲ ਨਾਲ ਸੱਟ ਲੱਗ ਸਕਦੀ ਹੈ। ਧਾਰ ਦੀ ਜਾਂਚ: ਕਾਗਜ਼ ਤੇ ਚਲਾਓ, ਜੇ ਸਾਫ਼ ਕੱਟੇ ਤਾਂ ਤਿਆਰ ਹੈ।
필요한 도구:
 낫
낫 숫돌
숫돌ਹੱਥੀਂ ਕਣਕ ਕੱਟਣਾ
ਹੱਥੀਂ ਕਣਕ ਕੱਟਣਾ
ਕਣਕ ਕੱਟਣ ਦਾ ਕੰਮ ਸਵੇਰੇ ਜਲਦੀ ਸ਼ੁਰੂ ਕਰੋ ਜਦੋਂ ਤਣੇ ਵਿੱਚ ਤ੍ਰੇਲ ਦੀ ਹਲਕੀ ਨਮੀ ਹੋਵੇ — ਇਸ ਨਾਲ ਤਣੇ ਲਚਕੀਲੇ ਰਹਿੰਦੇ ਹਨ ਅਤੇ ਦਾਣੇ ਘੱਟ ਝੜਦੇ ਹਨ। ਖੱਬੇ ਹੱਥ ਨਾਲ ਤਣਿਆਂ ਦਾ ਮੁੱਠ ਭਰ ਕੇ ਫੜੋ ਅਤੇ ਸੱਜੇ ਹੱਥ ਦੀ ਦਾਤਰੀ ਨਾਲ ਜ਼ਮੀਨ ਤੋਂ ੧੦-੧੫ ਸੈਂਟੀਮੀਟਰ ਉੱਪਰ ਕੱਟੋ। ਦਾਤਰੀ ਨੂੰ ਆਪਣੇ ਵੱਲ ਖਿੱਚ ਕੇ ਕੱਟੋ — ਧੱਕ ਕੇ ਨਹੀਂ। ਕੱਟੇ ਹੋਏ ਤਣੇ ਇੱਕ ਪਾਸੇ ਕਤਾਰ ਵਿੱਚ ਰੱਖਦੇ ਜਾਓ। ਇੱਕ ਤਜਰਬੇਕਾਰ ਕਿਸਾਨ ਰੋਜ਼ਾਨਾ ੦.੧-੦.੨ ਏਕੜ ਹੱਥੀਂ ਕੱਟ ਸਕਦਾ ਹੈ। ਹੱਥਾਂ ਦੀ ਰੱਖਿਆ ਲਈ ਕੱਪੜੇ ਦੇ ਦਸਤਾਨੇ ਪਾਓ।
이 단계의 재료:
 면장갑1 pair
필요한 도구:
낫ਭਰੀਆਂ (ਪੂਲੇ) ਬੰਨ੍ਹਣਾ
ਭਰੀਆਂ (ਪੂਲੇ) ਬੰਨ੍ਹਣਾ
ਕੱਟੇ ਹੋਏ ਕਣਕ ਦੇ ਤਣਿਆਂ ਨੂੰ ਛੋਟੀਆਂ-ਛੋਟੀਆਂ ਭਰੀਆਂ (ਪੂਲੇ/sheaves) ਵਿੱਚ ਬੰਨ੍ਹੋ। ਹਰੇਕ ਭਰੀ ਵਿੱਚ ਇੰਨੇ ਤਣੇ ਹੋਣ ਜਿੰਨੇ ਦੋਵੇਂ ਹੱਥਾਂ ਨਾਲ ਫੜੇ ਜਾ ਸਕਣ — ਲਗਭਗ ੨੫-੩੦ ਸੈਂਟੀਮੀਟਰ ਘੇਰੇ ਦਾ ਬੰਡਲ। ਬੰਨ੍ਹਣ ਲਈ ਕਣਕ ਦੇ ਕੁਝ ਤਣੇ ਹੀ ਵਰਤੋ — ਉਹਨਾਂ ਨੂੰ ਮਰੋੜ ਕੇ ਬੰਡਲ ਦੇ ਵਿਚਕਾਰ ਵਲ੍ਹੇਟ ਕੇ ਬੰਨ੍ਹੋ। ਬੱਲੀਆਂ ਸਾਰੀਆਂ ਇੱਕ ਪਾਸੇ ਰੱਖੋ। ਭਰੀਆਂ ਨੂੰ ਖੜ੍ਹੀਆਂ ਕਰਕੇ ੪-੬ ਦੀਆਂ ਟਾਲੀਆਂ (stooks) ਵਿੱਚ ਲਗਾਓ ਤਾਂ ਜੋ ਹਵਾ ਲੱਗੇ ਅਤੇ ਨਮੀ ਘਟੇ।
ਭਰੀਆਂ ਖਲਿਹਾਣ ਤੱਕ ਲਿਜਾਣਾ
ਭਰੀਆਂ ਖਲਿਹਾਣ ਤੱਕ ਲਿਜਾਣਾ
ਖੁੱਲ੍ਹੇ ਖੇਤ ਤੋਂ ਭਰੀਆਂ ਨੂੰ ਖਲਿਹਾਣ (threshing floor) ਤੱਕ ਲਿਜਾਓ। ਪੰਜਾਬ ਵਿੱਚ ਰਵਾਇਤੀ ਤੌਰ ਤੇ ਭਰੀਆਂ ਬੈਲ ਗੱਡੀ ਤੇ ਲੱਦ ਕੇ ਲਿਜਾਈਆਂ ਜਾਂਦੀਆਂ ਸਨ। ਅੱਜ-ਕੱਲ੍ਹ ਟ੍ਰੈਕਟਰ-ਟ੍ਰਾਲੀ ਵਰਤੀ ਜਾਂਦੀ ਹੈ। ਭਰੀਆਂ ਨੂੰ ਟ੍ਰਾਲੀ ਵਿੱਚ ਇੱਕ ਦੇ ਉੱਪਰ ਇੱਕ ਲਗਾ ਕੇ ਰੱਸੀ ਨਾਲ ਬੰਨ੍ਹੋ ਤਾਂ ਕਿ ਰਾਹ ਵਿੱਚ ਡਿੱਗਣ ਨਾ। ਜੇ ਖਲਿਹਾਣ ਖੇਤ ਵਿੱਚ ਹੀ ਹੈ ਤਾਂ ਭਰੀਆਂ ਸਿੱਧੀਆਂ ਸਿਰ ਤੇ ਚੁੱਕ ਕੇ ਲਿਜਾਈਆਂ ਜਾ ਸਕਦੀਆਂ ਹਨ।
이 단계의 재료:
 황마 밧줄10 미터
필요한 도구:
 트랙터 트레일러
ਖਲਿਹਾਣ ਤਿਆਰ ਕਰਨਾ
ਖਲਿਹਾਣ ਤਿਆਰ ਕਰਨਾ
ਖਲਿਹਾਣ (khalihan) ਉਹ ਖੁੱਲ੍ਹੀ ਥਾਂ ਹੈ ਜਿੱਥੇ ਗਹਾਈ (threshing) ਕੀਤੀ ਜਾਂਦੀ ਹੈ। ਇੱਕ ਪੱਧਰੀ, ਸਾਫ਼ ਜ਼ਮੀਨ ਚੁਣੋ — ਲਗਭਗ ੧੦-੧੫ ਮੀਟਰ ਵਿਆਸ ਦਾ ਗੋਲ ਥਾਂ। ਜ਼ਮੀਨ ਨੂੰ ਪਾਣੀ ਛਿੜਕ ਕੇ ਗਿੱਲਾ ਕਰੋ ਅਤੇ ਮੋਗਰੇ ਨਾਲ ਕੁੱਟ ਕੇ ਪੱਧਰਾ ਅਤੇ ਸਖ਼ਤ ਕਰੋ। ਸੁੱਕਣ ਤੋਂ ਬਾਅਦ ਗੋਹੇ ਦੇ ਪਾਣੀ ਦਾ ਲੇਪ ਕਰੋ — ਇਹ ਰਵਾਇਤੀ ਤਰੀਕਾ ਹੈ ਜੋ ਜ਼ਮੀਨ ਨੂੰ ਚਿਕਣੀ ਬਣਾ ਦਿੰਦਾ ਹੈ ਤਾਂ ਜੋ ਦਾਣੇ ਮਿੱਟੀ ਵਿੱਚ ਨਾ ਖੁੱਭਣ। ਖਲਿਹਾਣ ਨੂੰ ੧-੨ ਦਿਨ ਸੁੱਕਣ ਦਿਓ।
이 단계의 재료:
 쇠똥20 kg
 물50 리터
필요한 도구:
 나무 망치
나무 망치 빗자루와 쓰레받기
ਗਹਾਈ — ਦਾਣੇ ਅਲੱਗ ਕਰਨਾ
ਗਹਾਈ — ਦਾਣੇ ਅਲੱਗ ਕਰਨਾ
ਗਹਾਈ (threshing) ਵਿੱਚ ਦਾਣੇ ਬੱਲੀਆਂ ਤੋਂ ਅਲੱਗ ਕੀਤੇ ਜਾਂਦੇ ਹਨ। ਰਵਾਇਤੀ ਤਰੀਕਾ: ਭਰੀਆਂ ਖਲਿਹਾਣ ਵਿੱਚ ੧੫-੨੦ ਸੈਂਟੀਮੀਟਰ ਮੋਟੀ ਪਰਤ ਵਿੱਚ ਫੈਲਾਓ। ਬੈਲਾਂ ਨੂੰ ਇਸ ਉੱਤੇ ਗੋਲ-ਗੋਲ ਘੁਮਾਓ — ਉਹਨਾਂ ਦੇ ਖੁਰਾਂ ਹੇਠ ਦੱਬ ਕੇ ਦਾਣੇ ਬੱਲੀਆਂ ਤੋਂ ਵੱਖ ਹੋ ਜਾਂਦੇ ਹਨ। ਇਹ ਪ੍ਰਕਿਰਿਆ ੨-੩ ਘੰਟੇ ਚੱਲਦੀ ਹੈ। ਵਿਚਕਾਰ-ਵਿਚਕਾਰ ਪੰਜੇ (pitchfork) ਨਾਲ ਤੂੜੀ ਪਲਟੋ ਤਾਂ ਕਿ ਹੇਠਲੇ ਦਾਣੇ ਵੀ ਵੱਖ ਹੋ ਜਾਣ। ਅੱਜ-ਕੱਲ੍ਹ ਛੋਟੇ ਕਿਸਾਨ ਥ੍ਰੈਸ਼ਰ ਮਸ਼ੀਨ ਵੀ ਵਰਤਦੇ ਹਨ ਪਰ ਰਵਾਇਤੀ ਤਰੀਕਾ ਅਜੇ ਵੀ ਛੋਟੀਆਂ ਪੈਲੀਆਂ ਵਿੱਚ ਪ੍ਰਚਲਿਤ ਹੈ।
필요한 도구:
 쇠스랑
쇠스랑ਤੂੜੀ ਅਲੱਗ ਕਰਨਾ
ਤੂੜੀ ਅਲੱਗ ਕਰਨਾ
ਗਹਾਈ ਤੋਂ ਬਾਅਦ ਖਲਿਹਾਣ ਵਿੱਚ ਦਾਣੇ, ਤੂੜੀ (ਤੋੜੀ/straw) ਅਤੇ ਭੂ (chaff) ਦਾ ਮਿਸ਼ਰਣ ਹੁੰਦਾ ਹੈ। ਪਹਿਲਾਂ ਵੱਡੀ ਤੂੜੀ ਨੂੰ ਪੰਜੇ ਨਾਲ ਚੁੱਕ ਕੇ ਅਲੱਗ ਕਰੋ — ਤੂੜੀ ਨੂੰ ਹੌਲੀ-ਹੌਲੀ ਝਟਕਾ ਦਿਓ ਤਾਂ ਕਿ ਉਸ ਵਿੱਚ ਫਸੇ ਦਾਣੇ ਹੇਠਾਂ ਡਿੱਗ ਜਾਣ। ਤੂੜੀ ਨੂੰ ਅਲੱਗ ਢੇਰ ਲਗਾਓ — ਪੰਜਾਬ ਵਿੱਚ ਤੂੜੀ ਪਸ਼ੂਆਂ ਦੀ ਖੁਰਾਕ ਅਤੇ ਬਿਸਤਰ ਲਈ ਵਰਤੀ ਜਾਂਦੀ ਹੈ — ਇਹ ਬੇਕਾਰ ਨਹੀਂ ਹੈ। ਬਾਕੀ ਰਹਿੰਦੇ ਦਾਣੇ ਅਤੇ ਬਾਰੀਕ ਭੂ ਦੇ ਮਿਸ਼ਰਣ ਨੂੰ ਇੱਕ ਥਾਂ ਇਕੱਠਾ ਕਰੋ।
필요한 도구:
쇠스랑ਛੰਨਣਾ — ਹਵਾ ਨਾਲ ਦਾਣੇ ਸਾਫ਼ ਕਰਨਾ
ਛੰਨਣਾ — ਹਵਾ ਨਾਲ ਦਾਣੇ ਸਾਫ਼ ਕਰਨਾ
ਛੰਨਣਾ (winnowing) ਪੰਜਾਬ ਦੀ ਸਦੀਆਂ ਪੁਰਾਣੀ ਕਲਾ ਹੈ। ਦੁਪਹਿਰ ਤੋਂ ਬਾਅਦ ਜਦੋਂ ਤੇਜ਼ ਹਵਾ ਚੱਲਦੀ ਹੈ, ਛੱਜ (winnowing tray) ਵਿੱਚ ਦਾਣੇ ਅਤੇ ਭੂ ਦਾ ਮਿਸ਼ਰਣ ਲਓ ਅਤੇ ਉੱਪਰ ਸਿਰ ਤੋਂ ਹੌਲੀ-ਹੌਲੀ ਡੋਲ੍ਹੋ। ਭਾਰੇ ਦਾਣੇ ਸਿੱਧੇ ਹੇਠਾਂ ਡਿੱਗਦੇ ਹਨ ਅਤੇ ਹਲਕੀ ਭੂ ਹਵਾ ਨਾਲ ਦੂਰ ਉੱਡ ਜਾਂਦੀ ਹੈ। ਇਹ ਪ੍ਰਕਿਰਿਆ ੩-੪ ਵਾਰ ਦੁਹਰਾਓ ਜਦੋਂ ਤੱਕ ਦਾਣੇ ਪੂਰੀ ਤਰ੍ਹਾਂ ਸਾਫ਼ ਨਾ ਹੋ ਜਾਣ। ਇੱਕ ਸਾਫ਼ ਚਾਦਰ ਹੇਠਾਂ ਵਿਛਾ ਕੇ ਰੱਖੋ ਤਾਂ ਕਿ ਦਾਣੇ ਮਿੱਟੀ ਵਿੱਚ ਨਾ ਰਲਣ।
이 단계의 재료:
 면 바닥천1 개
필요한 도구:
 키
키ਧੁੱਪ ਵਿੱਚ ਦਾਣੇ ਸੁਕਾਉਣਾ
ਧੁੱਪ ਵਿੱਚ ਦਾਣੇ ਸੁਕਾਉਣਾ
ਛੰਨਣ ਤੋਂ ਬਾਅਦ ਸਾਫ਼ ਦਾਣਿਆਂ ਨੂੰ ਪੱਕੇ ਫ਼ਰਸ਼ ਤੇ ੩-੫ ਸੈਂਟੀਮੀਟਰ ਮੋਟੀ ਪਰਤ ਵਿੱਚ ਫੈਲਾ ਕੇ ਧੁੱਪ ਵਿੱਚ ਸੁਕਾਓ। ਦਿਨ ਵਿੱਚ ੩-੪ ਵਾਰ ਕਿਸੇ ਲੱਕੜੀ ਦੇ ਫੱਟੇ ਨਾਲ ਪਲਟੋ ਤਾਂ ਕਿ ਸਾਰੇ ਦਾਣੇ ਬਰਾਬਰ ਸੁੱਕਣ। ੨-੩ ਦਿਨ ਧੁੱਪ ਵਿੱਚ ਰੱਖੋ। ਰਾਤ ਨੂੰ ਅਤੇ ਮੀਂਹ ਵੇਲੇ ਤਰਪਾਲ ਨਾਲ ਢਕ ਦਿਓ। ਭੰਡਾਰਨ ਲਈ ਨਮੀ ੧੨% ਤੋਂ ਘੱਟ ਹੋਣੀ ਚਾਹੀਦੀ ਹੈ — ਦੰਦਾਂ ਨਾਲ ਦੱਬਣ ਤੇ ਕੜਕ ਟੁੱਟਣਾ ਚਾਹੀਦਾ ਹੈ। ਜ਼ਿਆਦਾ ਨਮੀ ਵਿੱਚ ਉੱਲੀ ਲੱਗ ਜਾਂਦੀ ਹੈ ਅਤੇ ਦਾਣੇ ਖ਼ਰਾਬ ਹੋ ਜਾਂਦੇ ਹਨ।
이 단계의 재료:
 방수포1 개
필요한 도구:
 나무 고르개 판
ਦਾਣਿਆਂ ਦੀ ਛਾਂਟੀ ਅਤੇ ਸਫ਼ਾਈ
ਦਾਣਿਆਂ ਦੀ ਛਾਂਟੀ ਅਤੇ ਸਫ਼ਾਈ
ਸੁੱਕੇ ਹੋਏ ਦਾਣਿਆਂ ਨੂੰ ਛਾਣਨੀ (sieve) ਨਾਲ ਛਾਣੋ ਤਾਂ ਕਿ ਬਾਰੀਕ ਧੂੜ, ਟੁੱਟੇ ਦਾਣੇ ਅਤੇ ਛੋਟੇ ਕੰਕਰ ਅਲੱਗ ਹੋ ਜਾਣ। ਪਹਿਲਾਂ ਮੋਟੀ ਛਾਣਨੀ ਵਰਤੋ ਤਾਂ ਕਿ ਤੂੜੀ ਦੇ ਟੁਕੜੇ ਅਤੇ ਵੱਡੇ ਕੂੜ-ਕਰਕਟ ਅਲੱਗ ਹੋਣ। ਫਿਰ ਬਾਰੀਕ ਛਾਣਨੀ ਨਾਲ ਧੂੜ ਕੱਢੋ। ਟੁੱਟੇ, ਰੰਗ ਬਦਲੇ, ਕੀੜੇ ਲੱਗੇ ਦਾਣੇ ਹੱਥ ਨਾਲ ਚੁਣ ਕੇ ਅਲੱਗ ਕਰੋ। ਸਾਫ਼ ਦਾਣੇ ਚਮਕੀਲੇ ਸੁਨਹਿਰੇ ਰੰਗ ਦੇ, ਇੱਕੋ ਆਕਾਰ ਦੇ ਅਤੇ ਕਿਸੇ ਬਦਬੂ ਤੋਂ ਮੁਕਤ ਹੋਣੇ ਚਾਹੀਦੇ ਹਨ।
필요한 도구:
 굵은 철망 체
 고운 철망 체
ਕੋਠੀ ਵਿੱਚ ਭੰਡਾਰਨ
ਕੋਠੀ ਵਿੱਚ ਭੰਡਾਰਨ
ਕੋਠੀ (kothi) ਪੰਜਾਬ ਦਾ ਰਵਾਇਤੀ ਅਨਾਜ ਭੰਡਾਰ ਹੈ — ਮਿੱਟੀ, ਤੂੜੀ ਅਤੇ ਗੋਹੇ ਦੇ ਮਿਸ਼ਰਣ ਨਾਲ ਬਣਿਆ ਵੱਡਾ ਬਰਤਨ ਜੋ ੫੦੦ ਕਿਲੋ ਤੋਂ ੨ ਟਨ ਤੱਕ ਅਨਾਜ ਰੱਖ ਸਕਦਾ ਹੈ। ਛੋਟੇ ਰੂਪ ਨੂੰ ਭਰੋਲਾ (bharola) ਕਹਿੰਦੇ ਹਨ। ਦਾਣੇ ਪਾਉਣ ਤੋਂ ਪਹਿਲਾਂ ਕੋਠੀ ਦੇ ਅੰਦਰ ਨਿੰਮ ਦੀਆਂ ਸੁੱਕੀਆਂ ਪੱਤੀਆਂ ਦੀ ਪਰਤ ਲਗਾਓ — ਇਹ ਕੁਦਰਤੀ ਕੀਟ-ਰੋਕੂ ਦਾ ਕੰਮ ਕਰਦੀ ਹੈ। ਦਾਣੇ ਧੀਰੇ-ਧੀਰੇ ਭਰੋ ਅਤੇ ਹਰ ੫੦ ਕਿਲੋ ਤੋਂ ਬਾਅਦ ਨਿੰਮ ਦੀਆਂ ਪੱਤੀਆਂ ਦੀ ਪਤਲੀ ਪਰਤ ਪਾਓ। ਮੂੰਹ ਮਿੱਟੀ ਦੀ ਢੱਕਣੀ ਨਾਲ ਬੰਦ ਕਰੋ। ਕੋਠੀ ਨੂੰ ਉੱਚੀ, ਸੁੱਕੀ ਥਾਂ ਤੇ ਰੱਖੋ ਜਿੱਥੇ ਪਾਣੀ ਨਾ ਲੱਗੇ।
이 단계의 재료:
 말린 님 잎2 kg
필요한 도구:
 흙 곳간
흙 곳간 계량 저울
계량 저울ਭੰਡਾਰ ਦੀ ਨਿਗਰਾਨੀ ਅਤੇ ਸੰਭਾਲ
ਭੰਡਾਰ ਦੀ ਨਿਗਰਾਨੀ ਅਤੇ ਸੰਭਾਲ
ਸਟੋਰ ਕੀਤੀ ਕਣਕ ਦੀ ਨਿਯਮਿਤ ਜਾਂਚ ਜ਼ਰੂਰੀ ਹੈ। ਹਰ ੨-੩ ਹਫ਼ਤੇ ਬਾਅਦ ਕੋਠੀ ਖੋਲ੍ਹ ਕੇ ਦੇਖੋ: ਕੀੜੇ (ਖਾਸ ਕਰਕੇ ਸੁੰਡੀ ਅਤੇ ਘੁਣ) ਦੀ ਜਾਂਚ ਕਰੋ, ਨਮੀ ਦੀ ਬਦਬੂ ਤਾਂ ਨਹੀਂ, ਦਾਣੇ ਜੁੜ ਤਾਂ ਨਹੀਂ ਰਹੇ। ਜੇ ਕੀੜੇ ਦਿਖਣ ਤਾਂ ਦਾਣੇ ੨-੩ ਦਿਨ ਧੁੱਪ ਵਿੱਚ ਫੈਲਾ ਕੇ ਸੁਕਾਓ — ਧੁੱਪ ਦੀ ਗਰਮੀ ਕੀੜਿਆਂ ਨੂੰ ਮਾਰ ਦਿੰਦੀ ਹੈ। ਸਹੀ ਤਰ੍ਹਾਂ ਸਟੋਰ ਕੀਤੀ ਕਣਕ ੬-੧੨ ਮਹੀਨੇ ਤੱਕ ਚੰਗੀ ਰਹਿੰਦੀ ਹੈ। ਤਾਪਮਾਨ ੨੫ ਡਿਗਰੀ ਸੈਲਸੀਅਸ ਤੋਂ ਘੱਟ ਅਤੇ ਨਮੀ ੬੦% ਤੋਂ ਘੱਟ ਰੱਖੋ। ਕੋਠੀ ਵਿੱਚ ਤਰੇੜਾਂ ਹੋਣ ਤਾਂ ਮਿੱਟੀ ਅਤੇ ਗੋਹੇ ਦੇ ਲੇਪ ਨਾਲ ਬੰਦ ਕਰੋ।
이 단계의 재료:
 흙·똥 미장 배합5 kg
재료
8- 1 pair플레이스홀더
- 10 미터플레이스홀더
- 20 kg플레이스홀더
- 50 리터플레이스홀더
- 1 개플레이스홀더
- 1 개플레이스홀더
- 2 kg플레이스홀더
- 5 kg플레이스홀더
이 블루프린트로 만드는 것

CC0 퍼블릭 도메인
이 블루프린트는 CC0로 공개되었습니다. 어떤 목적으로든 자유롭게 복사, 수정, 배포 및 사용할 수 있습니다.
제품 구매를 통해 메이커를 지원하세요. 판매자가 설정한 메이커 커미션 을 받거나, 이 블루프린트의 새로운 반복을 만들어 연결로 포함시킬 수 있습니다.