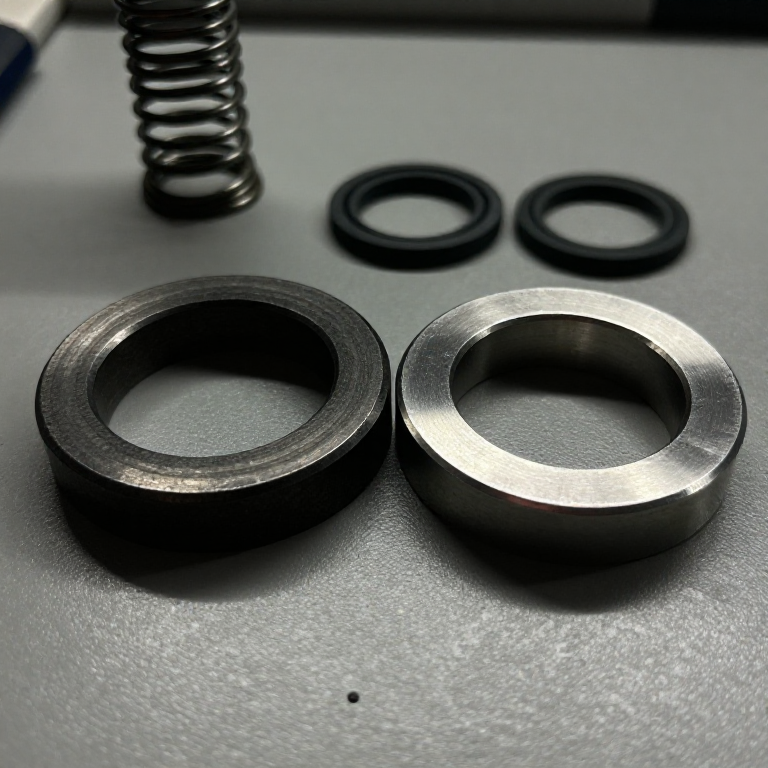


Mechanical Face Seal
안내
Make the two seal rings
Make the two seal rings
Two flat annular faces — and flatness here is the entire specification.
- Cut two rings from 40 mm aluminium bar, each 12 mm long, bored 16.5 mm.
- Face both mating ends as flat and square as you can achieve.
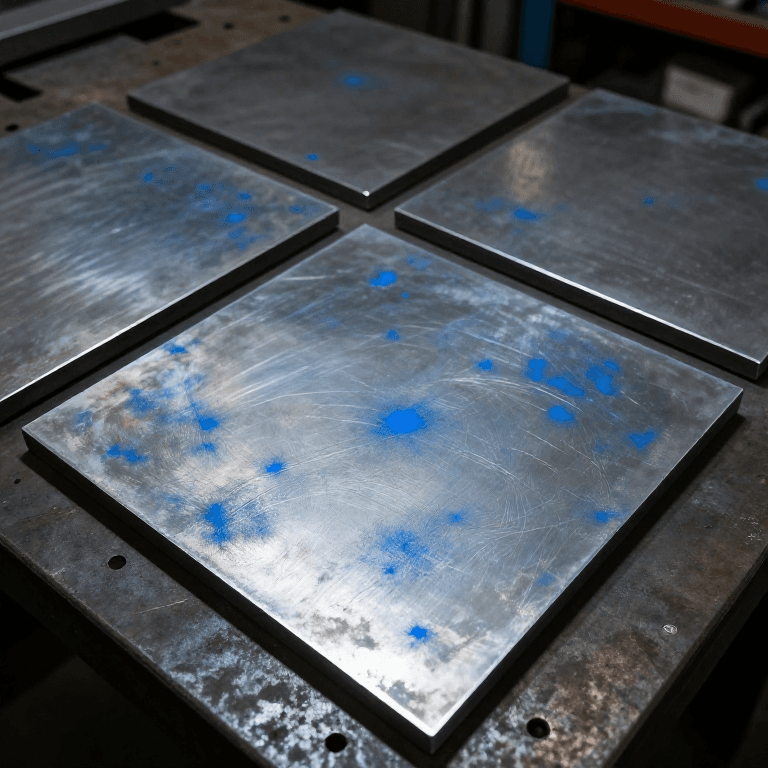
- Lap the two faces against each other with fine abrasive on a flat plate, rotating and reversing them regularly.
- Check the result with a marker transfer — contact should be continuous all the way round the annulus.
This is the three-plate method's lesson applied. Lapping two rings against each other alone can produce a matched convex-and-concave pair that mate perfectly and are both wrong. Lapping BOTH against a third flat surface — your surface plate — is what forces them toward true flatness. Real seal faces are lapped to optical flatness and inspected with a monochromatic light and an optical flat.
Do not skip the marker check. A partial contact ring means the faces touch on a band rather than everywhere, and a face seal that touches on a band leaks and wears through fast.이 단계의 재료:
 알루미늄 환봉2 개
 알루미늄 판1 개
필요한 도구:
 쇠톱 프레임과 톱날
 바이스(만력)
 줄 세트
줄 세트 무선 드릴
무선 드릴 드릴 비트 세트
 디지털 캘리퍼스 6인치
 조합 직각자
Fit the static O-rings — the sealing that is NOT at the faces
Fit the static O-rings — the sealing that is NOT at the faces
Each ring needs sealing to its own part, and those joints never move.
- Cut a shallow O-ring groove in the bore of the rotating ring, where it sits on the shaft.
- Cut a matching groove on the outside of the stationary ring, where it sits in the housing.
- Fit an O-ring in each.
- Check both rings still slide axially a little — they must be free to follow face wear.
This is the clever division of labour. The hard problem — sealing across relative rotation — is handled by the lapped faces. The two easy problems — sealing each ring to a part that never moves relative to it — are handled by ordinary O-rings, doing the static job they are perfect at. The design uses each element only where it excels.
Axial freedom is essential. As the faces wear, the spring must be able to push the rings together to take up the loss. An O-ring that grips too hard locks the ring and the seal opens up as it wears.이 단계의 재료:
 무명 모슬린1 metre
필요한 도구:
줄 세트디지털 캘리퍼스 6인치무선 드릴Add the spring and set the face load
Add the spring and set the face load
Enough force to keep the faces closed, and not one newton more.
- Fit a compression spring behind the rotating ring, bearing against a collar on the shaft.
- Fix the collar with M5 cup point set screws × 2.
- Set the spring so the faces are held together with light, even pressure.
- Turn the shaft — it should turn easily, with a faint smooth drag and no squeal.
Face load is a genuine balance. Too little and pressure inside opens the faces and it leaks. Too much and the fluid film between them is squeezed out, the faces run dry, and they heat-check and crack. Commercial seals are engineered so that fluid pressure itself contributes part of the closing force — a balanced seal — so the load stays right across a range of pressures.
A squeal means the faces are running dry. Stop immediately; a dry face seal destroys itself in seconds rather than minutes.이 단계의 재료:
 압축 스프링 세트1 세트
 컵 포인트 멈춤 나사2 개알루미늄 환봉1 개
필요한 도구:
 육각 렌치 세트디지털 캘리퍼스 6인치줄 세트무선 드릴
Compare leakage and drag against the gland
Compare leakage and drag against the gland
Three seals, one shaft, measured the same way.
- Assemble the face seal on the test rig, fill with water and turn the shaft for five minutes.
- Collect and measure any leakage.
- Repeat with the packing gland from blueprint 1 at its correct drip setting.
- Repeat with the labyrinth.
- Tabulate leakage, turning torque and temperature rise for all three.
필요한 도구:
 스톱워치디지털 캘리퍼스 6인치
Why it fails all at once, and history
Why it fails all at once, and history
Mechanical seals replaced packed glands through the twentieth century wherever leakage became unacceptable — chemical plants handling anything toxic, refrigeration compressors that must not lose refrigerant, and eventually the ordinary domestic water pump. The driver was rarely efficiency; it was that a drip of water is a nuisance and a drip of ammonia or benzene is not.
The failure mode is genuinely different from everything else in this batch. A gland tells you it needs attention by dripping faster. A lip seal weeps and then leaks. A labyrinth simply keeps doing what it always did. A mechanical seal runs perfectly until the film breaks down, then the faces touch, heat, crack, and it goes from sealed to open in seconds. Modern plants monitor them precisely because there is no gradual warning.
Its economics are the reverse of the gland's: expensive to buy, cheap to run, and it needs no attention at all until it dies. The gland is cheap, endlessly repairable with a few pence of cord, and demands regular adjustment. Choosing between them is a maintenance-philosophy decision as much as an engineering one — which is a real and underappreciated category of engineering choice.
Honest limit of this build: aluminium lapped by hand will not achieve a true fluid film. Expect it to demonstrate the geometry, the spring loading and the O-ring division of labour, and to leak more than a real seal by a wide margin. Commercial faces are carbon against silicon carbide or tungsten carbide, lapped to a flatness this workshop cannot reach.
재료
5- 3 개플레이스홀더
- 1 개플레이스홀더
- 1 metre플레이스홀더
- 1 세트플레이스홀더
- 2 개플레이스홀더
관련 블루프린트
이 블루프린트들은 지식을 공유합니다 — 기술, 재료 또는 원리
CC0 퍼블릭 도메인
이 블루프린트는 CC0로 공개되었습니다. 어떤 목적으로든 자유롭게 복사, 수정, 배포 및 사용할 수 있습니다.
제품 구매를 통해 메이커를 지원하세요. 판매자가 설정한 메이커 커미션 을 받거나, 이 블루프린트의 새로운 반복을 만들어 연결로 포함시킬 수 있습니다.