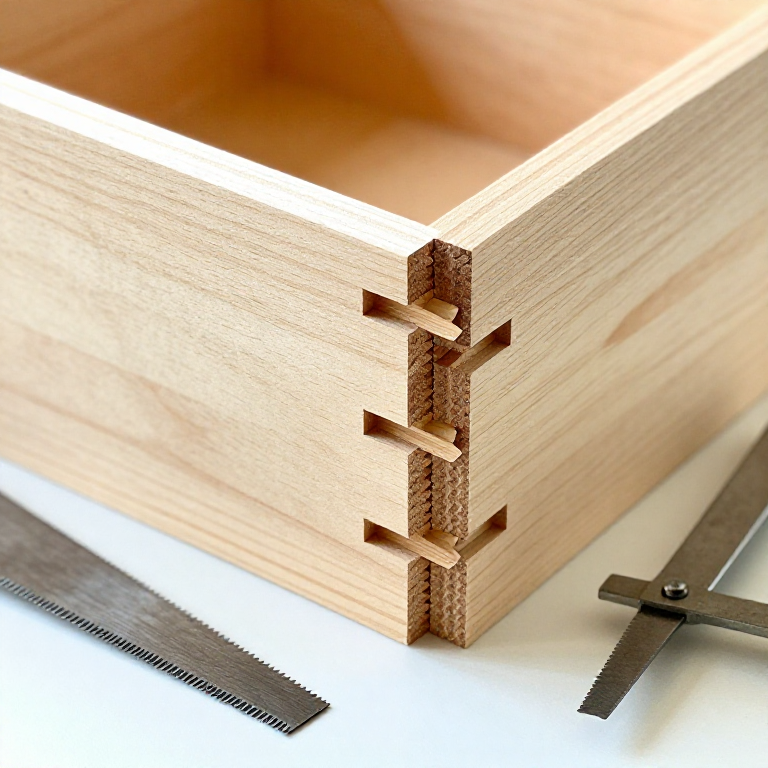


Cutting Hand-Cut Dovetail Joints for a Box — Through Dovetails
안내
Mark the Baseline and Layout the Tails
Mark the Baseline and Layout the Tails
Set the marking gauge to the exact thickness of the mating board and scribe a baseline around the end of each board (on both faces and both edges). This baseline marks the depth of the joint — all saw cuts stop at this line. On the tail board, mark the dovetail angles using a dovetail marker set to a 1:8 ratio for hardwood (approximately 7 degrees from square). Space the tails evenly across the board width, with half-pins at each edge for strength. The tail spacing is aesthetic — narrower pins and wider tails create a more refined look. Mark the waste areas with an X so you know which sections to remove.
Saw the Tails
Saw the Tails
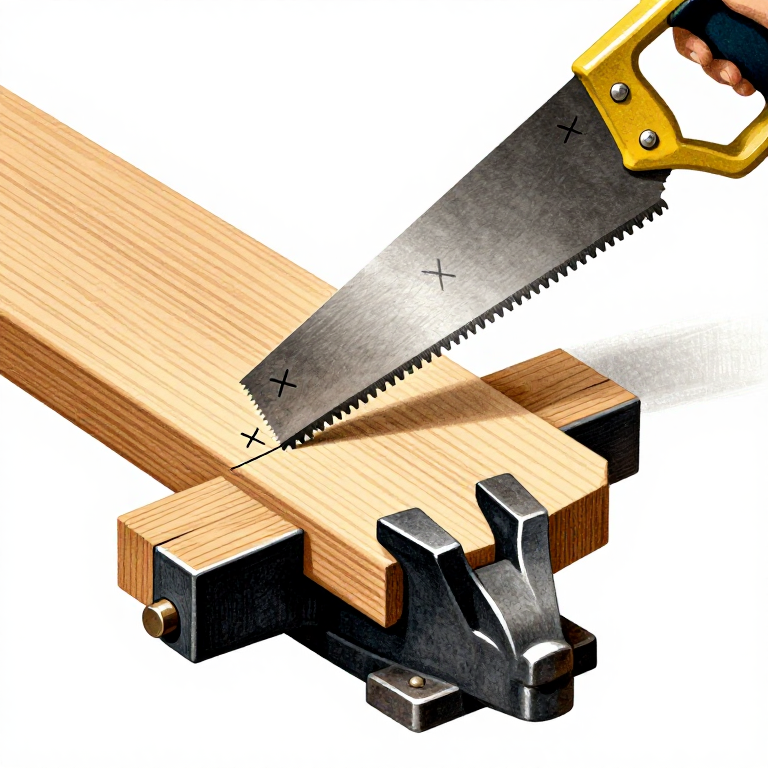
Clamp the tail board vertically in a vise. Using a dovetail saw (a fine-toothed backsaw), cut along the marked angle lines down to the baseline, staying on the waste side of each line. The saw kerf should split the line — leaving the full marked line on the tail side. Saw straight and perpendicular to the board face. To remove the waste between tails, use a coping saw to cut close to the baseline, then pare exactly to the baseline with a sharp chisel. Work from both faces toward the centre to prevent blowout. The baseline shoulder must be flat and square — this is the visible face of the finished joint.
Transfer and Cut the Pins
Transfer and Cut the Pins
Place the cut tail board on top of the end grain of the pin board, aligning it precisely with the baseline and outside face. Using a sharp marking knife, trace the outline of each tail onto the end grain of the pin board. Square these marks down to the baseline using a small square. Mark the waste areas. Saw along the marked lines with the dovetail saw, cutting on the waste side. Remove the waste between pins with a chisel, working from both faces. The pins must match the tails precisely — test-fit by pressing the two boards together dry. A correctly cut dovetail requires firm hand pressure to assemble but does not require a mallet. Gaps indicate the pins are too narrow; inability to assemble indicates they are too wide.
Test-Fit and Adjust
Test-Fit and Adjust
Dry-assemble all four corners simultaneously to ensure the box is square and all joints close fully. Check squareness by measuring both diagonals — they should be equal. If a joint is too tight at a specific point, identify the contact point (look for shiny burnish marks on the end grain) and pare a thin shaving from that spot with a sharp chisel. Do not force tight joints with a mallet — the wedging action of the dovetail can split the pin board. If a joint is slightly loose, it can often be saved with a thin shim glued into the gap, but the goal is a joint that fits from the saw with no adjustment needed.
Glue, Assemble, and Finish
Glue, Assemble, and Finish
Apply a thin layer of wood glue to all mating surfaces (both tails and pins). Assemble the four corners simultaneously, tapping gently with a mallet if needed (protect the wood surface with a scrap block). Clamp across both diagonals or use a band clamp to pull the box square while the glue sets. Before the glue dries, check squareness again and adjust clamp pressure to correct any racking. After the glue cures, plane or sand the joints flush — the end grain of the tails and pins should be perfectly level with the face of the pin board. Install the bottom panel in a groove (pre-cut before assembly) or nail it to the underside. Sand to 220 grit and apply the finish of your choice. A well-cut dovetail joint is both the strongest corner construction and one of the most visually appealing elements in woodworking.
이 단계의 재료:
 경목 판재4 boards 개
 합판1 panel, 5-6mm thick 개
 목공용 접착제small amount 병
재료
4- 4 boards 개플레이스홀더
- 1 panel, 5-6mm thick 개플레이스홀더
- small amount 병플레이스홀더
- Plywood or solid wood (for box bottom)1 panel, 5-6mm thick 개
이 블루프린트로 만드는 것

CC0 퍼블릭 도메인
이 블루프린트는 CC0로 공개되었습니다. 어떤 목적으로든 자유롭게 복사, 수정, 배포 및 사용할 수 있습니다.
제품 구매를 통해 메이커를 지원하세요. 판매자가 설정한 메이커 커미션 을 받거나, 이 블루프린트의 새로운 반복을 만들어 연결로 포함시킬 수 있습니다.