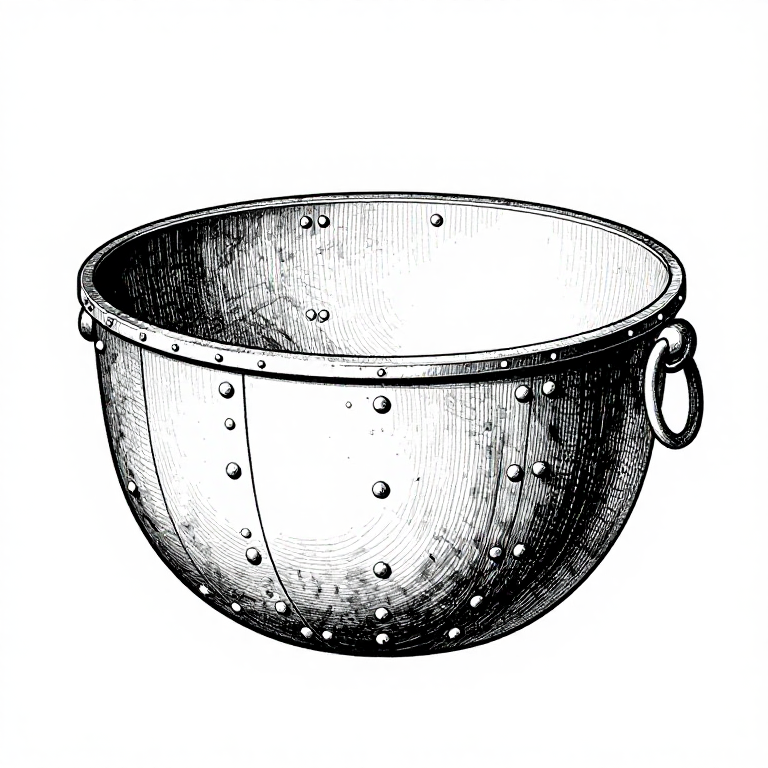
Riveting Lorica Squamata Scale Armour — Roman Scale Mail
안내
Cut and Shape Individual Scales
Cut and Shape Individual Scales
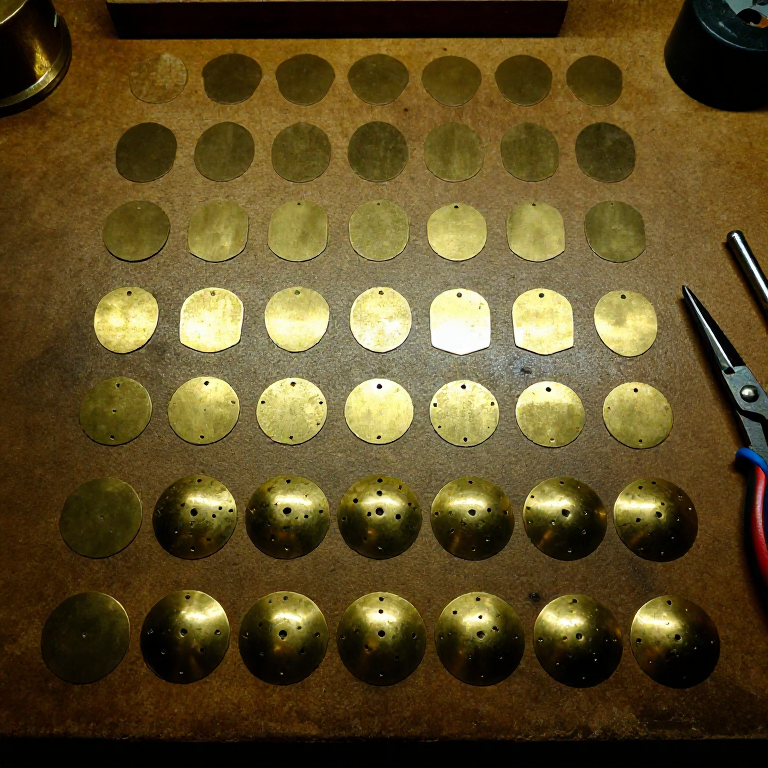
Cut the metal sheet into rectangular blanks approximately 1.5 cm wide and 2.5 cm long using tin snips or jeweller's shears. File all edges smooth to remove burrs that could cut the backing fabric or the wearer. Shape each scale by rounding the bottom edge with snips and file to create a gentle U or pointed leaf shape — surviving Roman squamae vary in shape from rectangular to rounded to pointed, depending on the unit and period. Slightly dome each scale by placing it on a leather pad and tapping the centre with a ball-peen hammer. This doming causes the scales to overlap more snugly and adds rigidity. Punch two holes near the top edge of each scale, spaced approximately 5 mm apart, and one hole in each upper corner, for a total of four holes per scale.
Prepare the Backing Fabric
Prepare the Backing Fabric
Cut the linen or leather backing to the shape of the armour panel being constructed. For a simple demonstration piece, a rectangle approximately 30 by 40 cm is sufficient to practice the technique. Mark horizontal guide lines across the backing at intervals equal to approximately two-thirds of the scale length — this determines how much each row overlaps the row below. For 2.5 cm scales, mark lines every 1.5 to 1.7 cm. These lines ensure straight, even rows. If using linen, fold the edges under and stitch a hem to prevent fraying. The backing must be strong enough to support the weight of hundreds of metal scales without tearing at the attachment points.
Attach the First Row of Scales
Attach the First Row of Scales
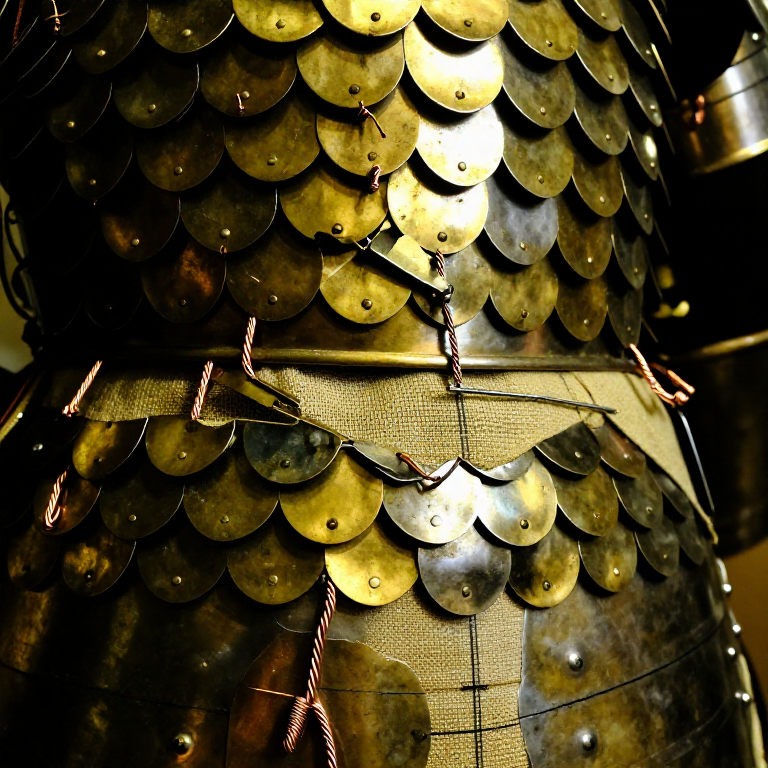
Begin at the bottom of the armour piece and work upward, so that each successive row overlaps the tops of the scales below. Thread a length of copper or brass wire through the two top-centre holes of a scale, pass the wire through the backing fabric at the bottom guide line, and twist or loop the wire on the reverse side to secure it. Alternatively, use a separate short wire for each scale, passing it through both holes and the fabric, then twisting it flat on the back. Place scales side by side along the row so that their edges just touch or overlap by 1-2 mm. The corner holes are used to wire adjacent scales to each other horizontally, linking them into a continuous row. Complete the entire bottom row before moving to the next line above.
Build Successive Overlapping Rows
Build Successive Overlapping Rows
Attach the second row of scales on the next guide line up, offset by half a scale width so that each scale in the upper row covers the vertical gap between two scales in the row below — this is the same bricklaying offset pattern used in fish-scale roofing. The upper row's scales should overlap the lower row by approximately one-third to one-half of the scale height, covering the attachment wires of the lower row. Continue wiring scales row by row, working upward. Each new row hides the attachment points of the row beneath, producing a clean exterior surface of overlapping scales with no visible wires on the outside. Check periodically that the rows remain straight and that scales lie flat without bunching.
이 단계의 재료:
 Copper50 metres 개
Finish Edges and Inspect
Finish Edges and Inspect
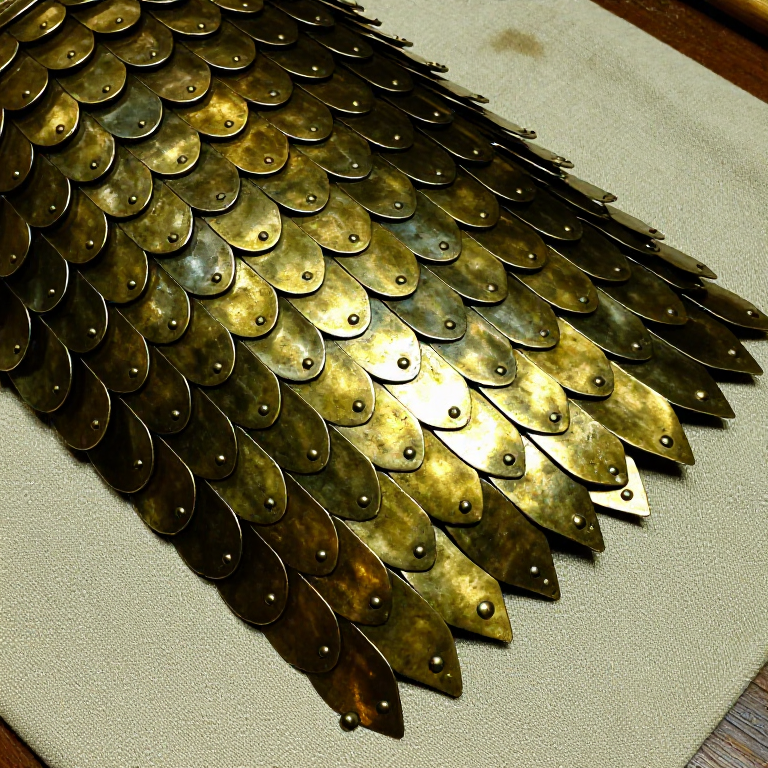
At the top edge of the armour piece, fold the last row of scales' upper portion over a strip of leather or fold the backing fabric over the top scale edges and stitch through to create a clean, finished border that will not snag or cut the wearer. Bind the side edges similarly with a leather strip sewn over the exposed scale ends. Turn the piece over and press all wire ends flat against the backing, filing any sharp points smooth. Flex the completed panel — properly made lorica squamata should drape and move with the body, each scale sliding slightly over its neighbours. The finished armour provides effective protection against slashing cuts while the overlapping layers can also deflect thrusting attacks to some degree, though it is less effective against direct thrusts than solid plate or mail armour.
재료
3- enough for 400-600 scales 개플레이스홀더
- area of armour + 5 cm margin 개플레이스홀더
필요 도구
7- 플레이스홀더
- 플레이스홀더
- 플레이스홀더
- 플레이스홀더
Related blueprints
Other builds that share materials, tools, or techniques with this one.
CC0 퍼블릭 도메인
이 블루프린트는 CC0로 공개되었습니다. 어떤 목적으로든 자유롭게 복사, 수정, 배포 및 사용할 수 있습니다.
제품 구매를 통해 메이커를 지원하세요. 판매자가 설정한 메이커 커미션 을 받거나, 이 블루프린트의 새로운 반복을 만들어 연결로 포함시킬 수 있습니다.