예술
뷰티 및 웰니스
공예
문화 및 역사
엔터테인먼트
환경
음식 및 음료
그린 퓨처
역공학
과학
스포츠
기술
웨어러블
Reading a Potentiometer — SIK Circuit 2
Learn to read analog input from a potentiometer and use it to control LED blink speed. Turn the knob to make the LED blink faster or slower — your first step into analog sensors!
안내
1
1
Parts & Introduction
Parts & Introduction
In this experiment you'll use a potentiometer (a variable resistor with a knob) to control how fast an LED blinks. This introduces analogRead() — reading voltage levels between 0 and 5V as values from 0 to 1023.
Parts Needed
- 1x Arduino Uno + USB cable
- 1x Breadboard
- 1x Potentiometer (10K)
- 1x LED (any color)
- 1x 330Ω Resistor
- 6x Jumper Wires
이 단계의 재료:
 SparkFun Inventors Kit - V3.21 키트
Arduino Uno R31 개
Breadboard1 개
Potentiometer (10K)1 개
5mm LED1 개
 330 Ohm Resistor1 개
 Jumper Wires6 개
필요한 도구:
Computer with Arduino IDE
2
2
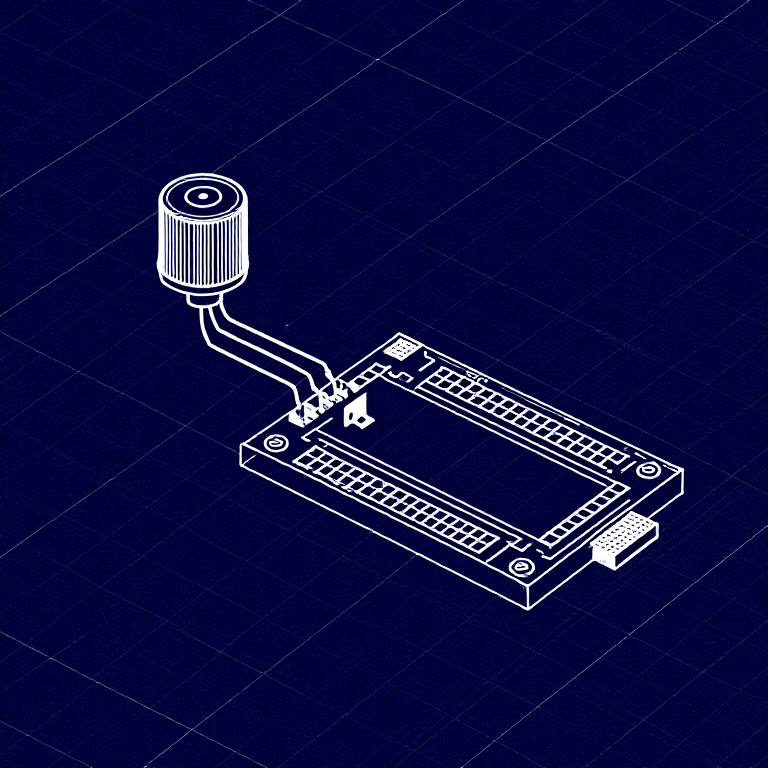
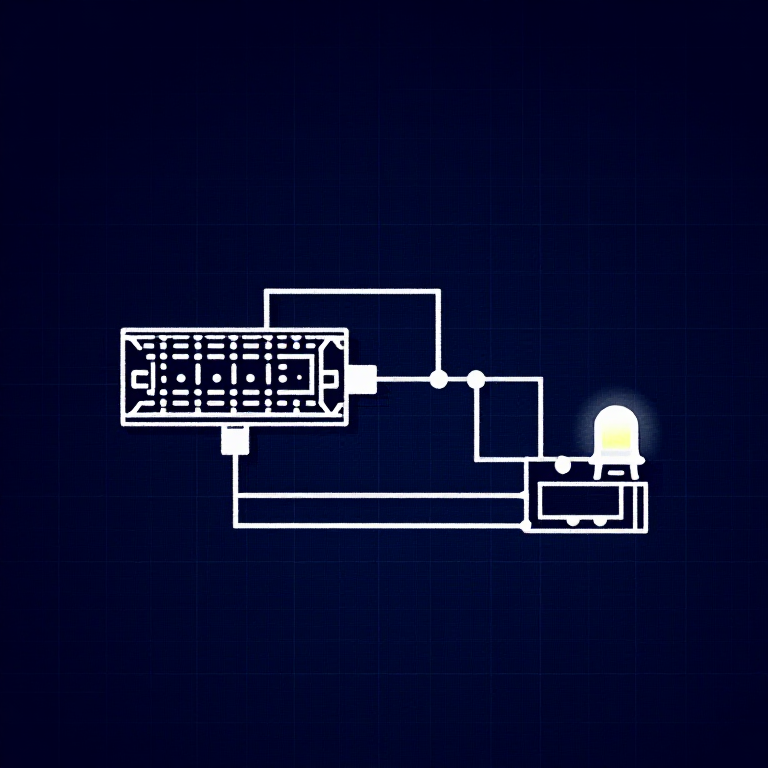
Hardware Hookup
Hardware Hookup
Wiring Instructions
- Place the potentiometer in the breadboard. It has three pins.
- Connect the left pin to GND and the right pin to 5V (or vice versa).
- Connect the middle pin (wiper) to Analog Pin A0.
- Place an LED in the breadboard. Connect the positive leg (longer) to Digital Pin 13.
- Connect the negative leg (shorter) through a 330Ω resistor to GND.
- Connect the 5V and GND rails on the breadboard to the Arduino.
이 단계의 재료:
Potentiometer (10K)1 개
5mm LED1 개
330 Ohm Resistor1 개Breadboard1 개
Jumper Wires6 개3
3
Arduino Code
Arduino Code
Open the Arduino IDE and upload the following sketch to your Arduino board.
potentiometer.inoarduino
이 단계의 재료:
Arduino Uno R31 개
필요한 도구:
Computer with Arduino IDE
4
4
Test & Experiment
Test & Experiment
What You Should See
The LED blinks faster or slower as you turn the potentiometer knob. At one extreme it blinks very fast, at the other it blinks slowly.
Troubleshooting
- Sporadically working: The potentiometer pins may not be making good contact. Press it firmly into the breadboard.
- Not working: Make sure the wiper (middle pin) goes to Analog pin 0, not Digital pin 0.
- LED not lighting: LEDs only work in one direction. Flip it around.
Experiments to Try
- Open the Serial Monitor and print the
sensorValueto see the raw numbers (0-1023). - Use
map()to convert the sensor range to a brightness range and control LED brightness withanalogWrite().
재료
7- ₩1,530
예상 총액
₩1,926Related blueprints
Other builds that share materials, tools, or techniques with this one.

Reading a Soft Potentiometer — SIK Circuit 10electronics/passive1 shared material
Reading a Photoresistor — SIK Circuit 6electronics/passive1 shared material

Driving a Servo Motor — SIK Circuit 8electronics/electromech1 shared material

Driving a Motor — SIK Circuit 12electronics/electromech1 shared material

Reading a Temperature Sensor — SIK Circuit 7electronics/electromech1 shared material

Using a Flex Sensor — SIK Circuit 9electronics/electromech1 shared material
CC0 퍼블릭 도메인
이 블루프린트는 CC0로 공개되었습니다. 어떤 목적으로든 자유롭게 복사, 수정, 배포 및 사용할 수 있습니다.
제품 구매를 통해 메이커를 지원하세요. 판매자가 설정한 메이커 커미션 을 받거나, 이 블루프린트의 새로운 반복을 만들어 연결로 포함시킬 수 있습니다.