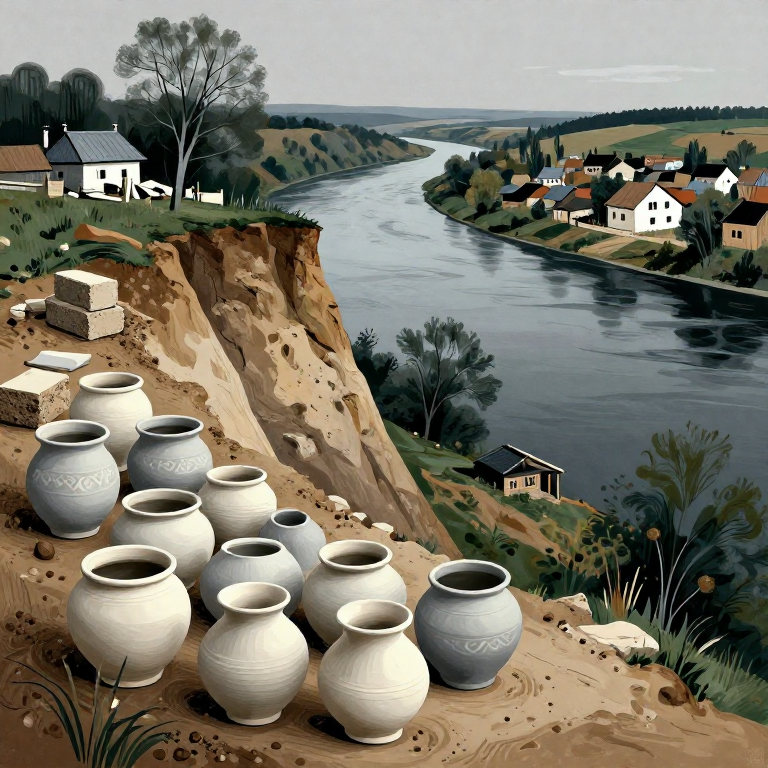

Збирання гончарної глини з річкових урвищ — Українська традиція Опішнянської кераміки
안내
Зрозуміти, що таке глина
Зрозуміти, що таке глина
Глина — це дрібнозернистий природний матеріал, що складається переважно з гідратованих силікатів алюмінію (Al2Si2O5(OH)4 — каолініт). Вона утворюється внаслідок вивітрювання польових шпатів та інших мінералів протягом тисячоліть. Частинки глини менші за 0,002 мм. У вологому стані глина пластична і піддається формуванню. Після випалу при температурі понад 600 градусів Цельсія вона стає незворотно твердою.
Визначити місця залягання глини
Визначити місця залягання глини
Шукайте глину на розмитих річкових урвищах, зрізах доріг, будівельних котлованах та схилах ярів. В Україні найбагатші поклади гончарної глини знаходяться в Полтавській області (Опішнянський район), на берегах Дніпра, Ворскли та Псла. Глина зазвичай виглядає як щільний, гладкий шар однорідного кольору — червоного, жовтого, сірого або білого — під верхнім шаром грунту з рослинністю.
Провести польове випробування — кулька
Провести польове випробування — кулька
Візьміть жменю матеріалу з оголеного шару, злегка зволожте і спробуйте скачати кульку розміром з апельсин. Якщо кулька тримає форму без тріщин і поверхню можна загладити великим пальцем до блиску, це глина з достатньою пластичністю для гончарства. Якщо кулька кришиться або тріскається, матеріал занадто піщаний.
Провести випробування джгутом
Провести випробування джгутом
Скачайте з вологої глини джгут (ковбаску) діаметром 1 см і довжиною 15 см. Підніміть за один кінець: якщо джгут витримує власну вагу на довжині щонайменше 5 см без розриву, пластичність достатня для гончарства. Якщо одразу рветься — потрібно шукати інше місце або додавати пластичну глину (ball clay) як добавку.
Зняти верхній шар грунту
Зняти верхній шар грунту
Лопатою або сапкою зніміть верхній шар грунту з рослинністю (10 — 20 см). Цей шар містить корені, комах та органічні залишки, які забруднюють глину. Чиста глина залягає нижче. Відкладайте верхній шар окремо — після збору глини поверніть його на місце для збереження довкілля.
필요한 도구:
 삽
삽 밭 괭이
밭 괭이Накопати глину
Накопати глину
Копайте глину великими шматками і складайте у відра. Обирайте глину однорідного кольору — не змішуйте різні шари, бо вони мають різний хімічний склад і по-різному поводяться при випалі. Зберіть щонайменше 10 — 15 кг, оскільки значна частина втрачається під час очищення. Уникайте шматків з камінням або піщаними прошарками.
이 단계의 재료:
 강가 절벽의 생점토15 kilogram
필요한 도구:
삽 20리터 양동이
Висушити шматки глини
Висушити шматки глини
Розкладіть шматки глини на брезенті або плівці на сонці на 2 — 3 дні до повного висихання. Суха глина легко ламається на менші шматки. Розбийте її на фрагменти розміром з волоський горіх — чим дрібніше, тим швидше розчиняється у воді. Глина вважається достатньо сухою, коли не залишає вологих слідів на руках.
필요한 도구:
 방수 천막
방수 천막Замочити глину у воді (шлікер)
Замочити глину у воді (шлікер)
Покладіть сухі фрагменти глини у велике відро і залийте водою. Пропорція: 1 частина сухої глини на 2 частини води. Залиште на 24 — 48 годин. Глина поступово розчиняється, утворюючи рідку масу — шлікер (slip). Ретельно перемішайте палицею до однорідної консистенції без грудок.
이 단계의 재료:
 증류수30 리터
필요한 도구:
 큰 반죽 통
 나무 젓개
나무 젓개Просіяти шлікер
Просіяти шлікер
Пропустіть рідкий шлікер через сито з дрібною сіткою (60 mesh, 0,25 мм). Це видаляє камінці, корінці, грубий пісок та органічні залишки. Чиста глина проходить через сито разом з водою. Те, що залишається на ситі — відходи, їх можна викинути. За потреби повторіть з дрібнішим ситом (80 mesh) для тоншої глини.
필요한 도구:
 고운 체
고운 체Відстояти глину
Відстояти глину
Залиште просіяний шлікер у відрі на 24 години. Глина осідає на дно, чиста вода залишається зверху. Обережно злийте або відсифонуйте прозору воду, не торкаючись осаду глини на дні. Повторіть процес — залийте свіжою водою, перемішайте, дайте відстоятися і знову злийте воду. Це видаляє розчинні солі та найдрібніший пісок.
필요한 도구:
 사이펀 호스
Зневоднити глину на гіпсовій плиті
Зневоднити глину на гіпсовій плиті
Вилийте глинистий осад на гіпсову плиту (bat) або розстеліть на полотняну тканину. Гіпс швидко вбирає надлишок води — за кілька годин глина набуває робочої консистенції. Якщо гіпсу немає, розстеліть тканину на сонці і вилийте глину тонким шаром. Перевертайте масу кожні кілька годин. Глина готова, коли за консистенцією нагадує пластилін — піддається формуванню, але не липне до рук.
필요한 도구:
 도예용 석고판
Вимісити глину
Вимісити глину
Покладіть глину на рівну дошку або кам'яну поверхню. Тисніть основою долонь, складайте навпіл і повертайте на чверть обороту. Повторюйте 5 — 10 хвилин. Цей процес (wedging) видаляє бульбашки повітря, які можуть призвести до розриву виробу під час випалу, та вирівнює вологість у всій масі. Готова глина має гладку, однорідну текстуру без тріщин.
필요한 도구:
 반죽대
반죽대Перевірити пластичність
Перевірити пластичність
Повторіть випробування джгутом: джгут діаметром 1 см повинен витримати щонайменше 8 см без розриву. Зігніть джгут у дугу — якщо не тріскається на згині, пластичність достатня для Опішнянського стилю гончарства. Якщо тріскається, глина потребує більшого часу замочування або додавання ball clay (пластичної глини). Добре підготовлена українська глина придатна для виготовлення мисок, горщиків, глечиків та Опішнянських розписних виробів.
Зберегти глину
Зберегти глину
Сформуйте готову глину в блоки по 2 — 3 кг. Загорніть кожен блок щільно у харчову плівку, видаливши все повітря. Зберігайте у прохолодному затіненому місці. Правильно загорнута глина зберігає вологість місяцями. Перед використанням повторно вимішуйте 2 — 3 хвилини. Запишіть місце збору, колір, результати польових випробувань та дату — глини з різних місць мають різний склад, що впливає на колір після випалу та температуру плавлення.
이 단계의 재료:
 랩 필름1 롤
필요한 도구:
 야장(현장 수첩)
이 블루프린트로 만드는 것
CC0 퍼블릭 도메인
이 블루프린트는 CC0로 공개되었습니다. 어떤 목적으로든 자유롭게 복사, 수정, 배포 및 사용할 수 있습니다.
제품 구매를 통해 메이커를 지원하세요. 판매자가 설정한 메이커 커미션 을 받거나, 이 블루프린트의 새로운 반복을 만들어 연결로 포함시킬 수 있습니다.