ART
BEAUTY & WELLNESS
CRAFT
CULTURE & HISTORY
ENTERTAINMENT
ENVIRONMENT
FOOD & DRINKS
GREEN FUTURE
REVERSE ENGINEERING
SCIENCES
SPORTS
TECHNOLOGY
WEARABLES

පරිවර්තනය කර ඇත
BLUEPRINT NFT

Blinking LED — ඔබේ පළමු Arduino Project
සම්භාව්ය පළමු ඉලෙක්ට්රොනික් ව්යාපෘතිය! Arduino, breadboard, resistor එකක් සහ LED එකක් භාවිතා කර ඔප්පු LED පරිපථයක් සාදන්න. සම්පූර්ණ ආරම්භකයින්ට පරිපූර්ණයි — සෝල්ඩරින් අවශ්ය නැත.
උපදෙස්
1
1
ඔබේ සංරචක එකතු කරන්න
ඔබේ සංරචක එකතු කරන්න
පහත ලේඛනගත සියලුම සංරචක එකතු කරන්න. කිසිදු焊接 අවශ්ය නොවේ — සෑම දෙයක්ම බ්රෙඩ්බෝඩ්එ එකතු වේ.
Materials for this step:
 SparkFun Inventor's Kit - V3.21 kit
Arduino Uno R31 piece
5mm LED (any color)1 piece
 220 ohm Resistor (1/4W)1 piece
Breadboard1 piece
Jumper Wires (Male-to-Male)2 pieces
USB-B Cable1 piece
Tools needed:
Computer with Arduino IDE
2
2
පරිපථ योजनाबद्ध
පරිපථ योजनाबद्ध
සිංහල මගින් අර්ඩුයිනෝ පින් 13 → 220Ω 저항 (R1) → LED (D1) → GND. 저항은 LEDను रक्षा करने के लिए करंट को सीमित करता है।
Materials for this step:
Arduino Uno R31 piece
5mm LED (any color)1 piece
220 ohm Resistor (1/4W)1 piece3
3
එය නැවත සම්බන්ධ කරන්න
එය නැවත සම්බන්ධ කරන්න
- LED බ්රෙඩ්බෝර්ඩ් එකට ඇතුල් කරන්න — දිගු පාද (anode +) එක පෙළකින්, කෙටි පාද (cathode −) ඊට පස්සේ පෙළකින්.
- 220Ω 저항 එর එක පාදය LED cathode ට සමාන පෙළට ඇතුල් කරන්න. අනෙක් පාදය වෙනස් පෙළකට.
- Jumper wire LED anode පෙළից → Arduino Pin 13 වෙත.
- Jumper wire 저항 නිදහස් පෙළ → Arduino GND වෙත.
Materials for this step:
5mm LED (any color)1 piece
220 ohm Resistor (1/4W)1 pieceBreadboard1 piece
Jumper Wires (Male-to-Male)2 pieces
4
4
Blink කේතය උඩුගත කරන්න
Blink කේතය උඩුගත කරන්න
USB හරහා Arduino සම්බන්ධ කරන්න. Arduino IDE විවෘත කර, Tools → Board → Arduino Uno තෝරා, කේතය ඇලවීම කර Upload ක්ලික් කරන්න.
blink.inoarduino
Materials for this step:
Arduino Uno R31 piece
USB-B Cable1 piece
Tools needed:
Computer with Arduino IDE
5
5
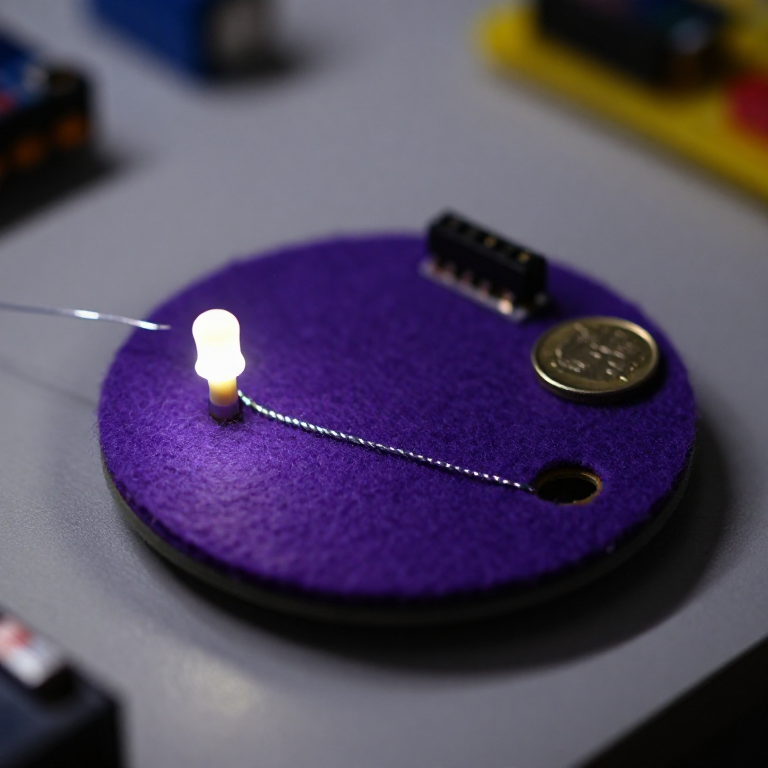
PCB සැරසිලි (යොමුව)
PCB සැරසිලි (යොමුව)
මෙය PCB සැරසිලි ලෙස පරිපථ පෙන්වයි. මෙම ව්යාපෘතිය සඳහා අවශ්ය නොවේ — ඉතිරිවලුන් පරිපථ පරිපූර්ණයි — නමුත් සැබෑ තලක ලෙස නිෂ්පාදනය කළ නම් එම පරිපථ කෙබඳු ලෙස දිස්වනු ඇතිදැයි පෙන්වයි.
6
6
පරීක්ෂණ සහ පර්යේෂණ
පරීක්ෂණ සහ පර්යේෂණ
LED දැල්වෙනවාද? පිළිවෙතින්! ඔබ දැන් දෘඩ උපකරණ ක්රමලේඛනය කර ඇත.
ගැටළු විසඳීම:
ඉදිරි පර්යේෂණ:
ගැටළු විසඳීම:
- LED ආලෝකිත නොවනවාද? LED පෙරලන්න — දිගු දෙපැත්ත Pin 13 දෙසට.
- LED සක්රිය ව ඉන්නවාද? කේතය සফලව උඩුගත වී ඇතිදැයි පරීක්ෂා කරන්න.
- කිසිවක් සිදු නොවේද? තාරයම් 2 පියවරේ ස්කිමාටිකයට ගැලපෙන්නේදැයි තහවුරු කරන්න.
ඉදිරි පර්යේෂණ:
delay()අගයන් වෙනස් කර දැල්වීමේ වේගය පාලනය කරන්න- Pin 12 හි දෙවන LED එක් කරන්න
- RGB LED සමඟ ප්රතිස්ථාපනය කරන්න (SIK Circuit 3 බලන්න)
ද්රව්ය
7- $105.00
- ස්ථානගත
Estimated Total
$105.00Related blueprints
Other builds that share materials, tools, or techniques with this one.

Using a Shift Register — SIK Circuit 14electronics/active
Blinking an LED with LilyPad Arduinoelectronics

Making Charcoal — The First Chemical Processmaterials

The Spinning Jenny — Multi-Spindle Yarn Productiontextiles

Starting Seeds Indoors — Raising Seedlings for a Head Start

Driving a Motor — SIK Circuit 12electronics/electromech
CC0 පොදු වසම
මෙම බ්ලූප්රින්ට් CC0 යටතේ නිකුත් කර ඇත. ඔබට අවසර නොමැතිව පිටපත් කිරීම, වෙනස් කිරීම, බෙදා හැරීම සහ භාවිතා කිරීම කළ හැක.
බ්ලූප්රින්ට් හරහා නිෂ්පාදන මිලදී ගැනීමෙන් නිර්මාතෘට සහාය වන්න නිර්මාතෘ කොමිසම විකුණුම්කරුවන් විසින් නියම කළ, හෝ මෙම බ්ලූප්රින්ට්හි නව අනුවාදයක් සාදා ආදායම බෙදා ගැනීමට ඔබේ බ්ලූප්රින්ට්හි සම්බන්ධතාවයක් ලෙස ඇතුළත් කරන්න.