සහයෝගීතාව
කලාව
රූපලාවණ්ය සහ සුවතාව
ශිල්පය
සංස්කෘතිය සහ ඉතිහාසය
විනෝදාස්වාදය
පරිසරය
ආහාර සහ පාන
ප්රතිලෝම ඉංජිනේරු
විද්යාවන්
ක්රීඩා
තාක්ෂණය
පැළඳිය හැකි
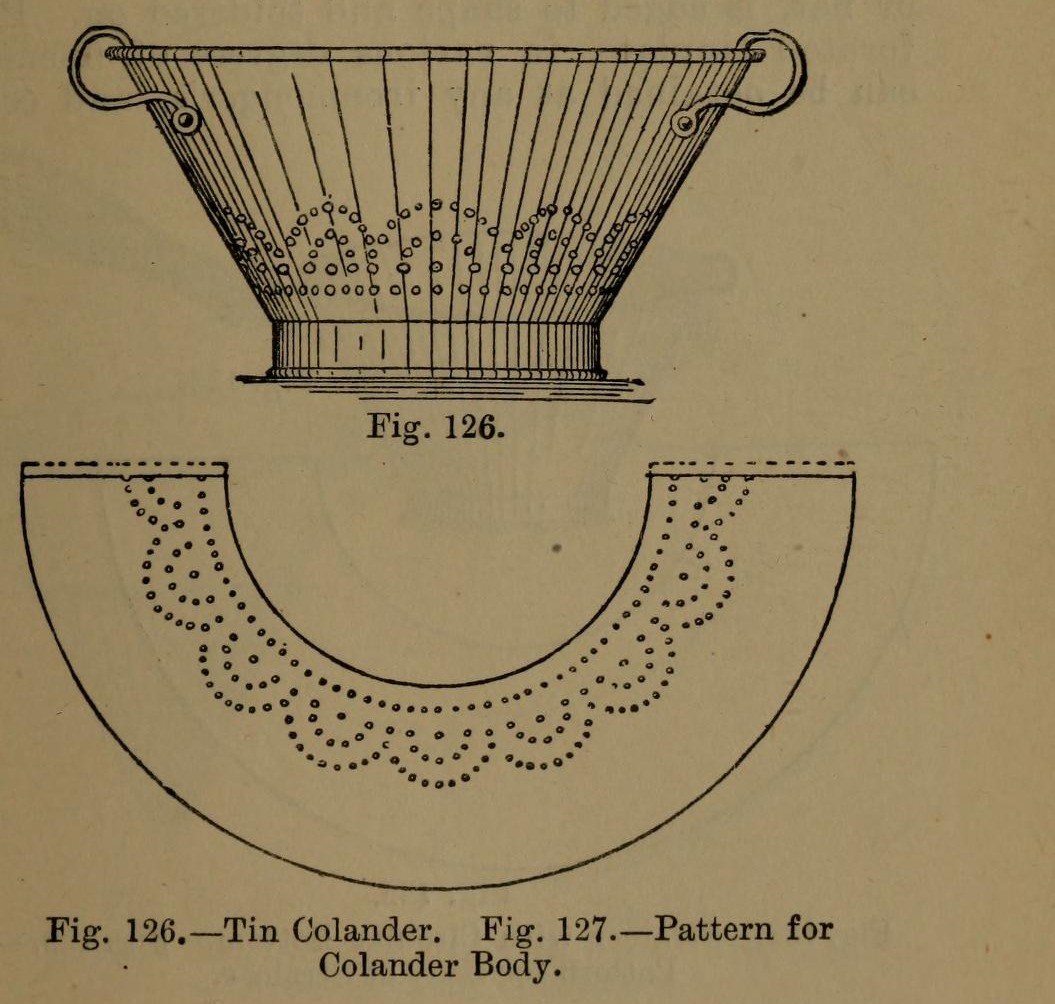


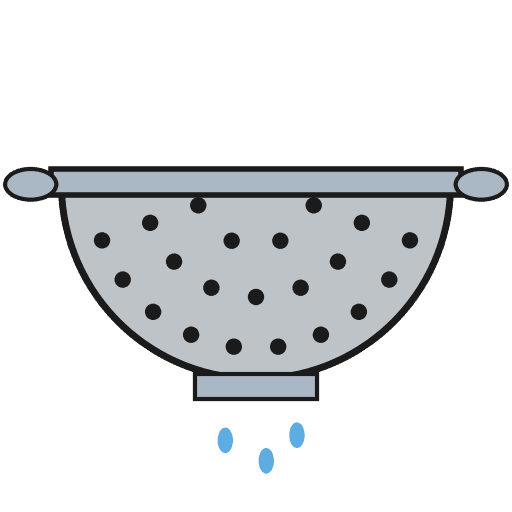
Colander: a Tinplate Colander with Perforated Body and Bottom (Hasluck, 1907)
A tinsmith's colander for straining: a tapered tinplate body and a hollowed bottom, both punched full of holes, standing on a wired hoop, with two bow handles.
The body pattern is a ring segment: outer radius = top diameter, inner radius = bottom diameter, which gives sides at 60 degrees.
Source: Paul N. Hasluck, Tinplate Work (1907), pp. 50-51. Unknown: sizes, solder. Picture: Figs. 126-127 of the book.
මධ්යම
Unknown
උපදෙස්
1
1
Set out the body pattern
Set out the body pattern
Choose the top and bottom diameters. On tinplate, strike an arc with radius equal to the top diameter and, from the same centre, one equal to the bottom diameter (Fig. 127); the sides then slope at 60 degrees. Mark the rows of holes, add edges for a grooved seam and the wire, and cut it out.
මෙම පියවර සඳහා ද්රව්ය:
 ටින් ආලේපිත තහඩුව1 body
අවශ්ය මෙවලම්:
 තුඩු දෙකේ මිනුම් කවකටුව
 ඉරි අඳින උල
 තහඩු කපන කතුර
2
2
Break, punch and planish the body
Break, punch and planish the body
'Break' the pattern through the rollers, turning it the opposite way each pass, so it won't crease when bent. Punch the holes on a hardwood block, then flatten and planish the burrs.
අවශ්ය මෙවලම්:
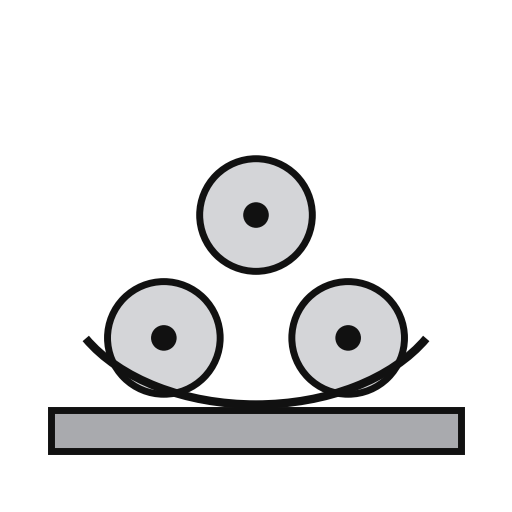 තහඩු නැමීමේ රෝලර්
 තහඩු සිදුරු කරන උපකරණය
 දැඩි දැව කුට්ටිය
 සමතලා කරන මිටිය
3
3
Seam and wire the body
Seam and wire the body
Set off the edges for a grooved seam, bend the body to shape and seam it. Solder the seam inside. Set off an edge on the wide end and wire it with No. 10 B.W.G. wire. If you like, raise a swage about 1 1/2 in below the wired edge: it stiffens the colander and looks better.
මෙම පියවර සඳහා ද්රව්ය:
 යකඩ කම්බි1 No. 10 B.W.G.
 ටින්-ඊයම් පෑස්සුම1 seam
අවශ්ය මෙවලම්:
 දැව මිටිය
 කණුව
 විදුලි පාස්සන යකඩය
 ෆ්ලක්ස්
4
4
Make and fit the bottom
Make and fit the bottom
Cut out the bottom, hollow it and edge it to fit the small end. Inside, mark circles from 1 in across at the centre, each 1 in wider than the last, out to the edge. Punch holes at short intervals round them and flatten the burrs on an upturned hollowing hammer. Solder the bottom on.
මෙම පියවර සඳහා ද්රව්ය:
ටින් ආලේපිත තහඩුව1 bottomටින්-ඊයම් පෑස්සුම1 bottomඅවශ්ය මෙවලම්:
තුඩු දෙකේ මිනුම් කවකටුවතහඩු කපන කතුරතහඩු සිදුරු කරන උපකරණයසමතලා කරන මිටියවිදුලි පාස්සන යකඩයෆ්ලක්ස්5
5
Add the hoop and handles
Add the hoop and handles
Cut a strip 1 1/2 in wide, as long as the circumference of the bottom. Wire it with No. 10 B.W.G., round it, seam it and solder it on as the foot. Rivet a pair of bow handles opposite each other at the top.
මෙම පියවර සඳහා ද්රව්ය:
ටින් ආලේපිත තහඩුව1 hoopයකඩ කම්බි1 hoopටින්-ඊයම් පෑස්සුම1 hoop මිට2 bow handles
 යකඩ රිවට්1 number not given
අවශ්ය මෙවලම්:
තහඩු කපන කතුරවිදුලි පාස්සන යකඩයෆ්ලක්ස් රිවට් මිටිය
6
6
Clean and scald
Clean and scald
Clean with turpentine and whiting, then polish with dry whiting. Before first use, steep it a short time in boiling water, as for any metal article for the kitchen.
අවශ්ය මෙවලම්:
 තර්පන්ටයින්
 කැල්සියම් කාබනේට් (සුදු හුණු)
 ජලය
ද්රව්ය
5- 1 hoopස්ථානගත
- 1 hoopස්ථානගත
- 1 hoopස්ථානගත
- 2 bow handlesස්ථානගත
- 1 number not givenස්ථානගත
අවශ්ය මෙවලම්
15- ස්ථානගත
- ස්ථානගත
- ස්ථානගත
- ස්ථානගත
- ස්ථානගත
- ස්ථානගත
- ස්ථානගත
- ස්ථානගත
- ස්ථානගත
- ස්ථානගත
- ස්ථානගත
- ස්ථානගත
- ස්ථානගත
- ස්ථානගත
සම්බන්ධිත සැලසුම්වල ද්රව්ය


මෙම සැලසුම සාදන්නේ
CC0 පොදු වසම
මෙම බ්ලූප්රින්ට් CC0 යටතේ නිකුත් කර ඇත. ඔබට අවසර නොමැතිව පිටපත් කිරීම, වෙනස් කිරීම, බෙදා හැරීම සහ භාවිතා කිරීම කළ හැක.
බ්ලූප්රින්ට් හරහා නිෂ්පාදන මිලදී ගැනීමෙන් නිර්මාතෘට සහාය වන්න නිර්මාතෘ කොමිසම විකුණුම්කරුවන් විසින් නියම කළ, හෝ මෙම බ්ලූප්රින්ට්හි නව අනුවාදයක් සාදා ආදායම බෙදා ගැනීමට ඔබේ බ්ලූප්රින්ට්හි සම්බන්ධතාවයක් ලෙස ඇතුළත් කරන්න.