

Pressed Flowers
Pressing a flower is drying it fast enough that it keeps its colour, and flat enough that it keeps its shape. Those two requirements pull against each other, and almost every failure is one of them winning.
Colour is lost to slow drying: the longer a petal stays damp, the more its pigments break down and the browner it goes. Shape is lost to inconsistent pressure or to trapped moisture, which brings mould. So the method is simply even pressure plus absorbent paper changed often — the changing is what makes the difference, and it is the step people skip.
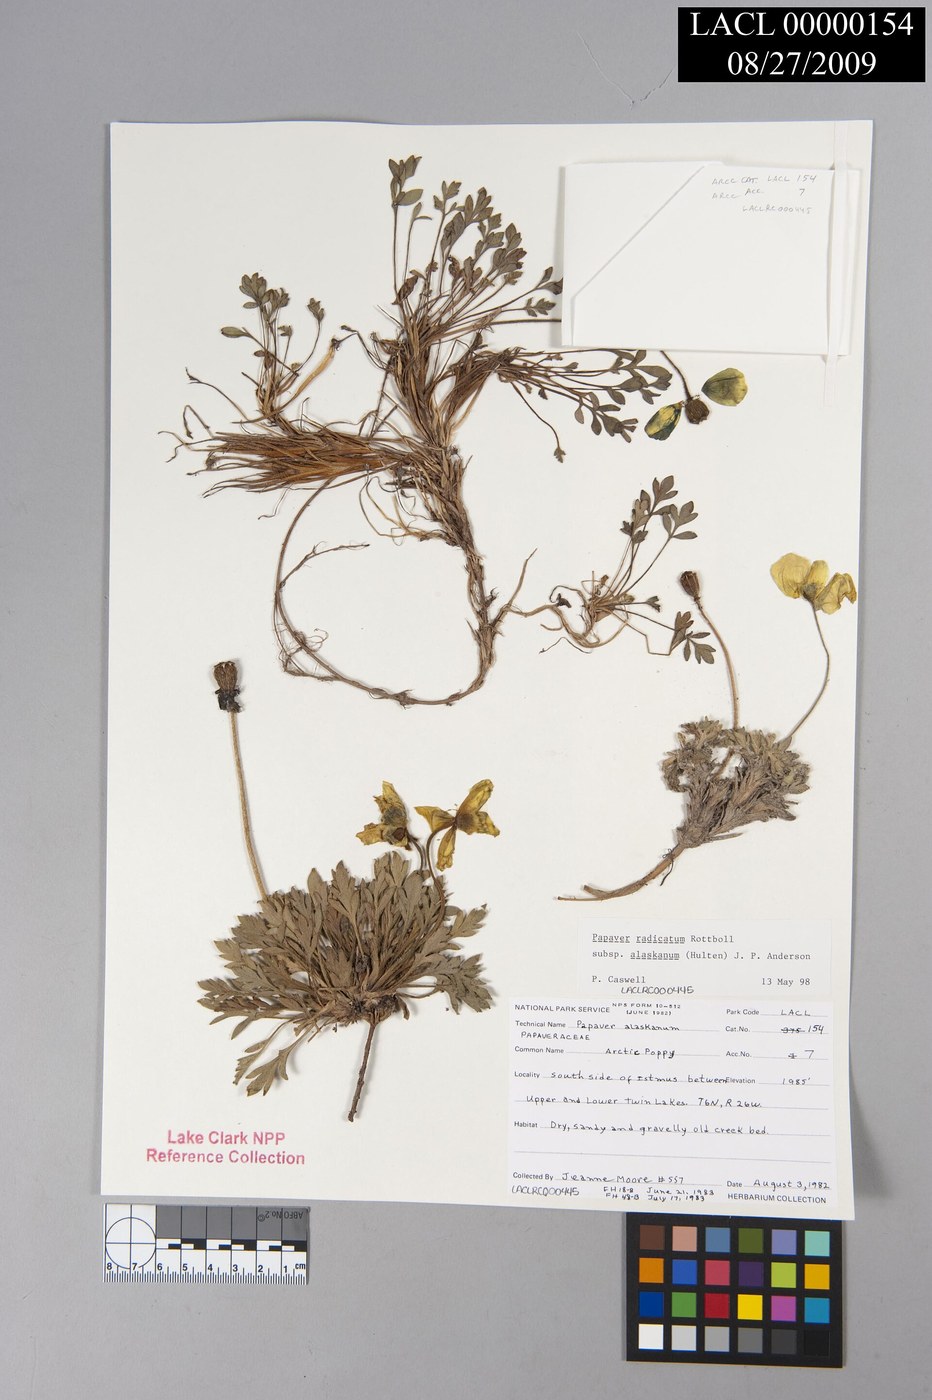
The same technique makes a herbarium sheet, and a well-pressed specimen lasts centuries. Collections from the 1700s are still consulted, and modern researchers extract DNA and pollen from them.
උපදෙස්
Pick in dry conditions
Pick in dry conditions
Collect in late morning, after dew has gone and before the afternoon heat. Surface water is the enemy — a flower picked wet is already losing the race against browning.
Take only what you may
Take only what you may
Pick from your own garden or with permission, and never take protected species. Many wild plants are legally protected, and picking rare ones for a craft project is not defensible.
Choose flat or thin-petalled flowers
Choose flat or thin-petalled flowers
Pansies, ferns, cosmos and grasses press beautifully. Thick fleshy heads like roses and tulips hold too much water and go brown — split them or press single petals instead.
මෙම පියවර සඳහා ද්රව්ය:
 නැවුම් මල්20 කැබලි
Build the press
Build the press
Two flat boards with bolts at the corners, or simply the heaviest books you own. What matters is that the pressure is even across the whole area.
මෙම පියවර සඳහා ද්රව්ය:
 දැඩි දැව කුට්ටිය2 කැබලි
Layer absorbent paper
Layer absorbent paper
Build up: board, several sheets of blotting or newspaper, the flowers, more paper, board. The paper does the drying; the boards only apply pressure.
මෙම පියවර සඳහා ද්රව්ය:
 පුවත්පත් කඩදාසි (පිරවුම)1 කැබැල්ල
Arrange each flower before closing
Arrange each flower before closing
Set petals and leaves exactly as you want them and spread anything folded. Whatever shape it goes in with is the shape it keeps — there is no adjusting later.
Do not let specimens touch
Do not let specimens touch
Leave a gap between flowers. Touching specimens share moisture, dry more slowly, and mould spreads from one to the next.
Apply firm even pressure
Apply firm even pressure
Tighten the bolts or stack the weight. Firm and even — heavy pressure on one corner crushes those specimens translucent while the others stay damp.
Change the paper after 24 hours
Change the paper after 24 hours
Open the press the next day and replace all the paper with dry sheets. This single step does more for colour than anything else — the first day's paper is carrying most of the water out.
Change again every few days
Change again every few days
Replace the paper every two or three days for two weeks. Damp paper left in place stops absorbing and starts holding moisture against the petals.
Test for dryness by feel
Test for dryness by feel
A finished specimen feels papery and cool, not leathery. Any flexibility means water is still in there — put it back, because a half-dry flower will mould in a frame.
Mount and label
Mount and label
Fix each specimen to card with small paper strips or a trace of glue, and write the species, date and place it was collected. An unlabelled pressed flower is decoration; a labelled one is a record.
මෙම පියවර සඳහා ද්රව්ය:
 ඝන කඩදාසි1 පත්රය
History & Context
History & Context
Why speed preserves colour. Petal colour comes largely from pigments that degrade with moisture, warmth and time. A flower dried quickly locks its colour in before much breakdown occurs; one dried slowly browns. That is the whole reason for changing the paper — you are not tidying, you are removing the water that is destroying the pigment.
Herbarium sheets. The same method makes formal botanical specimens, and herbaria hold millions of them. Some date from the 1500s and 1600s and are still consulted. Modern work extracts DNA, pollen and chemical residues from centuries-old sheets, and specimens are used to track flowering times against climate records. As with bird study skins, the label is what makes a pressed plant scientific rather than merely pretty.
Anna Atkins again. Her cyanotypes of British algae are the photographic cousin of this technique — specimens laid on sensitised paper rather than between blotting sheets. Both were solving the same problem in the 1840s: how to record a plant's exact form without drawing it.
The Victorian craze, and its cost. Pressed flower albums were an enormous nineteenth-century enthusiasm, and so was fern collecting — pteridomania — which stripped some British sites of rare species entirely. It is a genuine cautionary tale for step 2: a harmless-sounding hobby practised by enough people caused real damage.
What pressing cannot do. Pressing flattens. Anything whose interest is three-dimensional — a trumpet flower, a thick bud — loses the very thing that made it worth keeping. For those, drying in silica gel preserves the form at the cost of the flat mounting. Choosing the method means deciding which property you are prepared to lose.
ද්රව්ය
4- 20 කැබලිස්ථානගත
- 2 කැබලිස්ථානගත
- 1 කැබැල්ලස්ථානගත
- 1 පත්රයස්ථානගත
මෙම සැලසුම සාදන්නේ

CC0 පොදු වසම
මෙම බ්ලූප්රින්ට් CC0 යටතේ නිකුත් කර ඇත. ඔබට අවසර නොමැතිව පිටපත් කිරීම, වෙනස් කිරීම, බෙදා හැරීම සහ භාවිතා කිරීම කළ හැක.
බ්ලූප්රින්ට් හරහා නිෂ්පාදන මිලදී ගැනීමෙන් නිර්මාතෘට සහාය වන්න නිර්මාතෘ කොමිසම විකුණුම්කරුවන් විසින් නියම කළ, හෝ මෙම බ්ලූප්රින්ට්හි නව අනුවාදයක් සාදා ආදායම බෙදා ගැනීමට ඔබේ බ්ලූප්රින්ට්හි සම්බන්ධතාවයක් ලෙස ඇතුළත් කරන්න.