සහයෝගීතාව
කලාව
රූපලාවණ්ය සහ සුවතාව
ශිල්පය
සංස්කෘතිය සහ ඉතිහාසය
විනෝදාස්වාදය
පරිසරය
ආහාර සහ පාන
ප්රතිලෝම ඉංජිනේරු
විද්යාවන්
ක්රීඩා
තාක්ෂණය
පැළඳිය හැකි
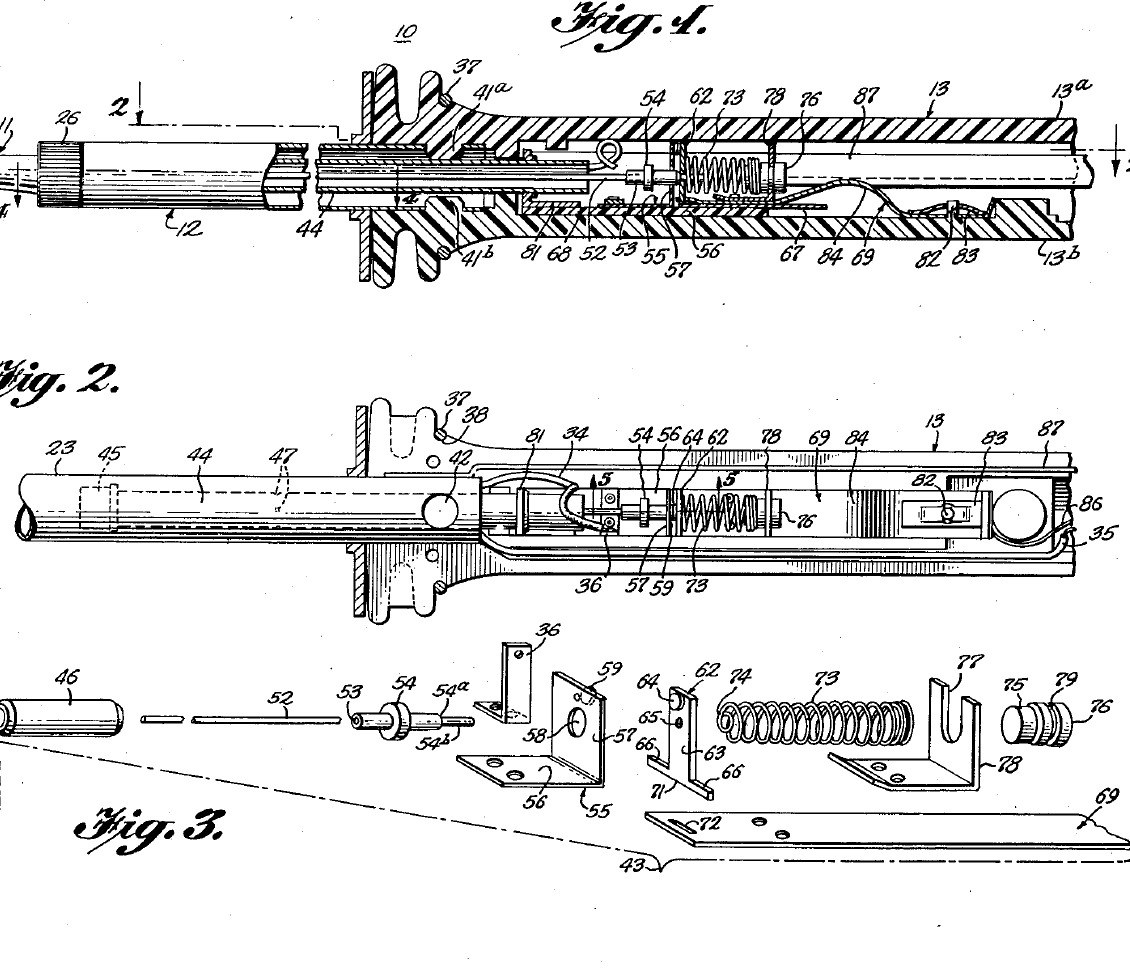


Soldering Iron: Temperature Controlled by a Curie-Point Tip and a Magnet Switch (Weller, US 3,188,448, 1965)
A soldering iron that holds its own tip temperature. At the back of the copper tip sits a slug of nickel-iron alloy that stops being magnetic above a set temperature (its Curie point). A small Alnico magnet behind it is pulled forward while the slug is cool, closing a switch that feeds the heater; once the tip is hot the slug lets go, a steel bushing pulls the magnet back and the switch opens. Swap tips to choose 600, 700 or 800 °F.
Result: a 55-watt temperature-controlled iron idling near 700 °F instead of running ever hotter.
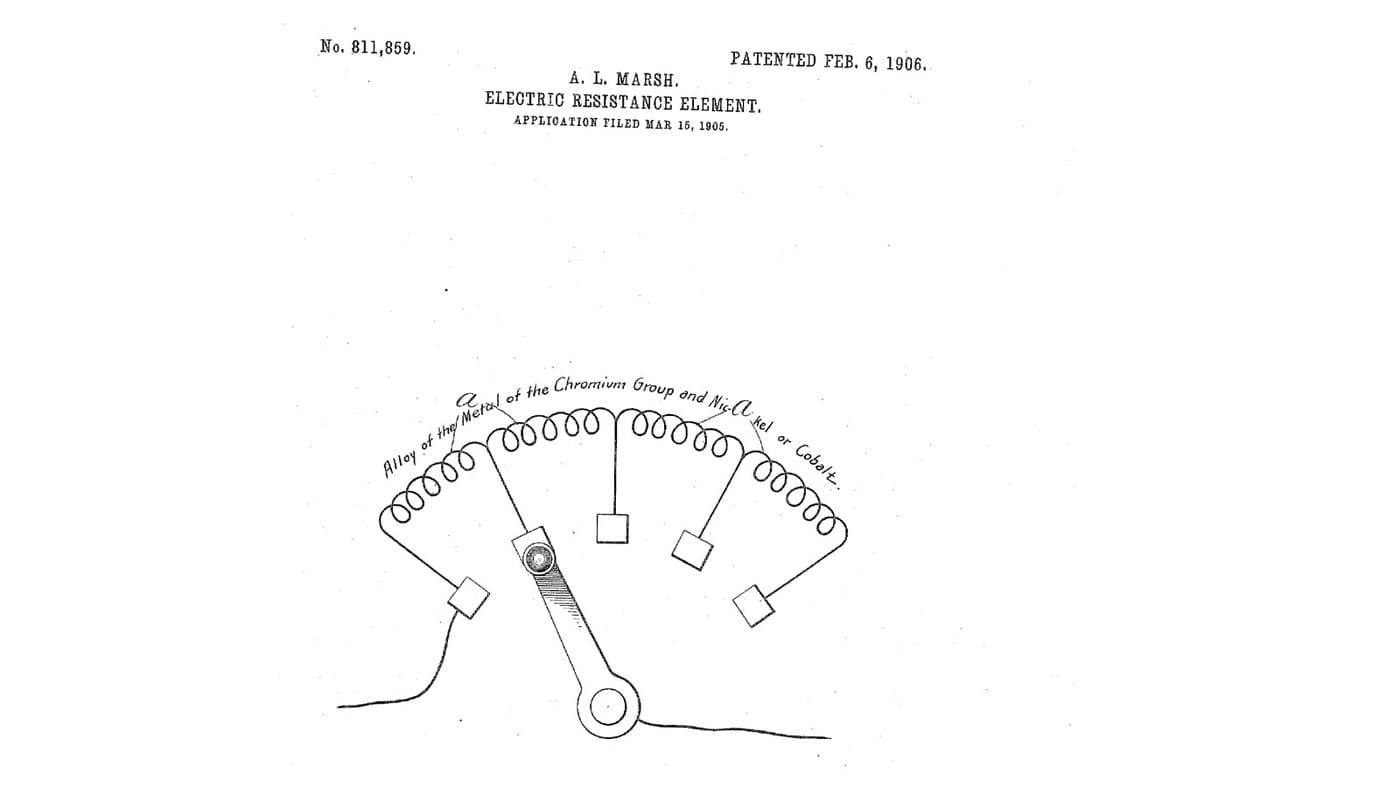
Source: C. E. Weller, US 3,188,448 (1965). Unknown: the plating baths, the heater wire and insulation, most sizes. Picture: the patent drawing.
උසස්
Unknown
උපදෙස්
1
1
Make the tip and control slug
Make the tip and control slug
Turn the tip from tellurium copper: a cylindrical body, a taper and a chisel end (any shape suits the work). Plate it first with iron, which keeps the copper out of the molten solder, then with nickel, which shuts out the air. Bore its rear end and fit tightly into it the shank of a slug of thermomagnetic nickel-iron alloy, such as 48 % nickel, 3 % molybdenum and the rest iron, or about 43 % nickel and the rest iron. The alloy sets the control point: make tips for 600, 700 and 800 °F. Not given: the plating baths, sizes.
මෙම පියවර සඳහා ද්රව්ය:
 ටෙලූරියම් තඹ දණ්ඩ1 tip
 තාප චුම්බක නිකල්-යකඩ මිශ්ර ලෝහය1 control slug
අවශ්ය මෙවලම්:
 ලෝහ කරකැවුම් යන්ත්රය
 විද්යුත් ආලේපන කට්ටලය
 නොදන්නා මිනුම්
2
2
Wind the heater barrel
Wind the heater barrel
Make the barrel of two stainless steel tubes: an inner spool the tip slides into snugly, and an outer cover tube joined to it at the front, with a thread and screw cap to hold the tip. In the space between them wind the heater from one length of resistance wire: an inner layer, then an outer layer wound the opposite way so their fields cancel, with insulating sheet inside, between and outside the layers. Silver-solder heat-resistant leads to its ends. Ours: nichrome wire. Not given: the insulating sheet, the turns.
මෙම පියවර සඳහා ද්රව්ය:
 මල නොබැඳෙන වානේ නළය2 spool and cover tube
 නික්රෝම් කම්බිය1 heater
 නොදන්නා පරිවාරක ද්රව්යය1 three sheet layers
 නොදන්නා ලෝහය1 leads
 රිදී පාස්සන මිශ්ර ලෝහය1 as needed
අවශ්ය මෙවලම්:
 ප්රොපේන් පන්දමලෝහ කරකැවුම් යන්ත්රය
3
3
Build the magnet switch
Build the magnet switch
In a stainless steel sleeve about 2.4 in long, close the front with a non-magnetic thermal bushing. Behind it slides a cylindrical Alnico V magnet, then a non-magnetic spacer about 0.032 in thick, then a cold-drawn steel bushing about 0.50 in long held by dents in the sleeve; the magnet's stroke is about 0.015 in. A push rod runs from the magnet through the bushing to an insulator. On a melamine plate, hinge a moving contact between a thin conducting strip and a holding strip, facing a flexible contact; a spring of fourteen coils of 0.010 in music wire, 0.210 in across, presses the moving contact toward the flexible one. Rivet the spring bracket to the holding strip. Not given: the contact metals.
මෙම පියවර සඳහා ද්රව්ය:
මල නොබැඳෙන වානේ නළය1 sleeve ඇල්නිකෝ චුම්බකය1 කැබැල්ල
 මෘදු වානේ වටකුරු දණ්ඩ1 magnetic bushing, push rodනොදන්නා ලෝහය1 thermal bushing, spacer, contacts, strips, brackets
 නොදන්නා ද්රව්යය1 insulator
 මෙලමයින් තහඩුව1 base plate
 පෙන වානේ කම්බිය1 0.010 in music wire spring
අවශ්ය මෙවලම්:
ලෝහ කරකැවුම් යන්ත්රය රිවට් කට්ටලය
 වටකුරු තුඩු අඬුව
4
4
Assemble the handle and use
Assemble the handle and use
Mould the handle in two plastic halves with a socket at the front whose bosses lock the cover tube. Lay in the switch unit, held only by the bowed tail of its holding strip on an anchor pin with a speed nut, so it floats and its thermal bushing presses on the tip's slug. Wire the heater, the switch and a ground lead from the cover tube to the cord. Rivet the halves near the butt and fit a split ring near the front. In use, below the control point the slug pulls the magnet forward and the spring closes the contacts; above it the steel bushing pulls the magnet back and the push rod opens them. At idle the heater runs only about 30 to 40 % of the time. Not given: the plastic.
මෙම පියවර සඳහා ද්රව්ය:
නොදන්නා ද්රව්යය1 handle halvesනොදන්නා ලෝහය1 rivet, split ring, speed nut ප්ලග් සහිත නම්යශීලී රැහැන1 කැබැල්ල
අවශ්ය මෙවලම්:
 එන්නත් අච්චු යන්ත්රයරිවට් කට්ටලය
ද්රව්ය
13- 1 tipස්ථානගත
- 1 control slugස්ථානගත
- 1 sleeveස්ථානගත
- 1 heaterස්ථානගත
- 1 three sheet layersස්ථානගත
- 1 rivet, split ring, speed nutස්ථානගත
- 1 as neededස්ථානගත
- 1 කැබැල්ලස්ථානගත
- 1 magnetic bushing, push rodස්ථානගත
- 1 handle halvesස්ථානගත
- 1 base plateස්ථානගත
- 1 0.010 in music wire springස්ථානගත
- 1 කැබැල්ලස්ථානගත
අවශ්ය මෙවලම්
7- ස්ථානගත
- ස්ථානගත
- ස්ථානගත
- ස්ථානගත
- ස්ථානගත
- ස්ථානගත
- ස්ථානගත
සම්බන්ධිත සැලසුම්වල ද්රව්ය

මෙම සැලසුම සාදන්නේ

CC0 පොදු වසම
මෙම බ්ලූප්රින්ට් CC0 යටතේ නිකුත් කර ඇත. ඔබට අවසර නොමැතිව පිටපත් කිරීම, වෙනස් කිරීම, බෙදා හැරීම සහ භාවිතා කිරීම කළ හැක.
බ්ලූප්රින්ට් හරහා නිෂ්පාදන මිලදී ගැනීමෙන් නිර්මාතෘට සහාය වන්න නිර්මාතෘ කොමිසම විකුණුම්කරුවන් විසින් නියම කළ, හෝ මෙම බ්ලූප්රින්ට්හි නව අනුවාදයක් සාදා ආදායම බෙදා ගැනීමට ඔබේ බ්ලූප්රින්ට්හි සම්බන්ධතාවයක් ලෙස ඇතුළත් කරන්න.