ART
BEAUTY & WELLNESS
CRAFT
CULTURE & HISTORY
ENTERTAINMENT
ENVIRONMENT
FOOD & DRINKS
GREEN FUTURE
REVERSE ENGINEERING
SCIENCES
SPORTS
TECHNOLOGY
WEARABLES
Tapping Pine Trees for Resin — Collecting Naval Stores from Longleaf Pine
English
MrYankee

Created by

MrYankee

23. අප්‍රේල් 2026US
2
0
0
0
0

Tapping Pine Trees for Resin — Collecting Naval Stores from Longleaf Pine

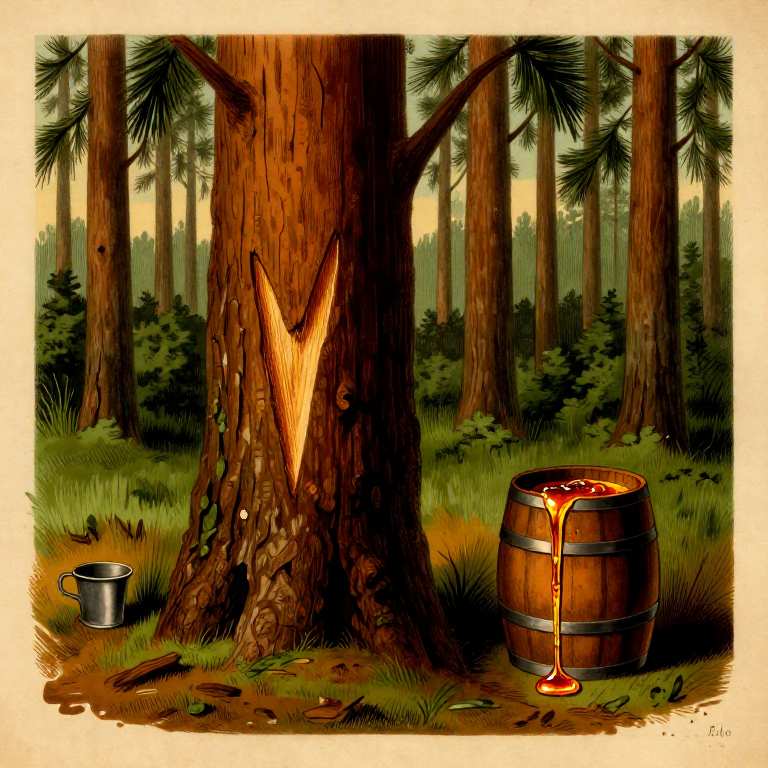
A detailed guide to tapping longleaf pine (Pinus palustris) and other Southern pine species for oleoresin — the raw material that yields turpentine and rosin, historically known as naval stores. The US Southeast (Georgia, Florida, the Carolinas) was the world's largest producer of naval stores from the 18th through 20th centuries. Oleoresin is a natural mixture of volatile terpenes (turpentine, approximately 20%) and solid diterpene acids (rosin, approximately 80%). This blueprint covers the complete process: selecting mature trees, cutting the catface, installing collection gutters and cups, applying sulfuric acid stimulant to increase resin flow, collecting and straining the oleoresin over multiple rounds through the tapping season (March through November), and preparing for the next season.

මධ්‍යම
1-2 hours per tree setup, weeks of collection

Instructions

1

Understanding Pine Oleoresin and Naval Stores

Pine oleoresin is a sticky, viscous substance produced by pine trees as a defense mechanism against insects and fungal pathogens. When a pine tree's bark is wounded, resin canals in the sapwood release oleoresin to seal the wound. Oleoresin is a mixture of two main components: turpentine (volatile monoterpenes and sesquiterpenes, primarily alpha-pinene and beta-pinene, comprising approximately 20% of fresh oleoresin) and rosin (solid diterpene resin acids, primarily abietic acid and pimaric acid, comprising approximately 80%). The term "naval stores" originates from the historical use of tar, pitch, turpentine, and rosin in wooden shipbuilding — for caulking seams, waterproofing hulls, and treating ropes and rigging. The longleaf pine (Pinus palustris) was the primary species tapped in the American naval stores industry, along with slash pine (Pinus elliottii). One tree yields approximately 2 to 4 kilograms of oleoresin per tapping season.

2

Selecting Suitable Pine Trees

Select healthy longleaf pine (Pinus palustris) or slash pine (Pinus elliottii) trees with a diameter at breast height (DBH) of at least 30 centimeters. The tree should have a straight trunk, healthy crown, and no signs of severe insect damage or disease. Avoid trees near roads or structures that could be weakened by tapping. In a managed stand, trees are typically 20 to 30 years old before first tapping. Mark selected trees with paint or flagging tape at eye level. Plan to tap no more than two faces on trees 30 to 40 cm DBH, and up to three faces on larger trees above 40 cm DBH. Overtapping stresses the tree and reduces resin quality and yield over time.

Materials for this step:

Flagging TapeFlagging Tape1 roll

Tools needed:

Diameter Tape (DBH Tape)Diameter Tape (DBH Tape)
3

Preparing Tools and Equipment

Gather all necessary tools before heading to the pine stand. The bark hack (also called a bark chipper or puller) is the primary tool — a specialized tool with a curved blade approximately 3 to 4 centimeters wide used to shave a thin strip of bark and expose fresh resin canals. You will also need metal gutters (galvanized tin strips approximately 20 cm long, bent into a V-shape) to channel resin flow, ceramic or metal collection cups (capacity approximately 0.5 to 1 liter), nails or brackets to attach gutters and cups to the tree, and a flat-bottomed scraping tool (the "dipper") for removing accumulated resin from cups. Ensure the bark hack blade is sharp — a dull blade tears bark rather than shaving it cleanly, which damages the tree and reduces resin flow.

Materials for this step:

Metal Gutter (Galvanized Tin Strip)Metal Gutter (Galvanized Tin Strip)2 piece
Ceramic Collection CupCeramic Collection Cup2 piece
Galvanized Nails (7 cm)Galvanized Nails (7 cm)10 piece

Tools needed:

Bark Hack (Bark Chipper)Bark Hack (Bark Chipper)
Claw HammerClaw Hammer
Sharpening FileSharpening File
4

Making the Initial Catface Cut

The "catface" is the scarred area on the tree trunk where bark is removed to expose resin canals. Begin approximately 15 to 20 centimeters above ground level. Using the bark hack, shave a thin strip of bark (approximately 1 to 2 millimeters deep into the cambium) in a V-shaped chevron pattern. The catface is typically 25 to 35 centimeters wide, centered on the trunk. The initial streak (the first V-cut) should have arms angling downward at approximately 30 to 45 degrees, meeting at a point at the bottom center. Cut just deep enough to sever the outermost resin canals in the sapwood — cutting too deep damages the cambium and creates excessive wound tissue. The exposed surface should appear moist and pale yellowish as resin begins to flow within minutes.

Tools needed:

Bark Hack (Bark Chipper)Bark Hack (Bark Chipper)
5

Installing the Gutter and Collection Cup

Position the metal gutter directly below the lowest point of the V-cut (the apex of the chevron). The gutter is a V-shaped galvanized tin strip that channels flowing resin into the collection cup. Drive one or two galvanized nails into the bark at a slight downward angle to hold the gutter in place, with the open end protruding outward. Hang the ceramic or metal collection cup on a nail below the gutter's outlet, or use a wire bracket to hold it securely against the trunk. The cup should sit snugly beneath the gutter so resin drips directly in. Ensure the cup is stable and will not be knocked off by wind or animals. In commercial operations, a clay or metal apron is sometimes installed below the cup to catch overflow.

Materials for this step:

Metal Gutter (Galvanized Tin Strip)Metal Gutter (Galvanized Tin Strip)1 piece
Ceramic Collection CupCeramic Collection Cup1 piece
Galvanized Nails (7 cm)Galvanized Nails (7 cm)3 piece
Wire BracketWire Bracket1 piece

Tools needed:

Claw HammerClaw Hammer
6

Applying Acid Stimulant to the Fresh Cut

Applying a dilute sulfuric acid paste to the freshly cut bark surface significantly increases resin flow — typically 2 to 3 times more than an untreated face. The standard stimulant is a paste made from approximately 50% sulfuric acid by weight mixed with an inert powder (kaolin clay or ground calcium carbonate) to form a thick, spreadable consistency. Using a long-handled acid applicator (a squeeze bottle with a narrow nozzle or a dauber), apply a thin band of the acid paste along the freshly exposed streak, approximately 1 to 2 centimeters wide. The acid slows wound healing in the bark, keeping resin canals open for longer. Safety: Sulfuric acid is corrosive. Wear chemical-resistant gloves, safety goggles, and long sleeves. Avoid skin contact. If acid contacts skin, flush immediately with large amounts of water. Keep a water container on hand at all times.

Materials for this step:

Sulfuric Acid Solution (50% concentration)Sulfuric Acid Solution (50% concentration)0.5 liter
Kaolin Clay PowderKaolin Clay Powder0.25 kilogram

Tools needed:

Acid Applicator (Squeeze Bottle with Nozzle)Acid Applicator (Squeeze Bottle with Nozzle)
Chemical-Resistant GlovesChemical-Resistant Gloves
Safety GogglesSafety Goggles
7

Monitoring Resin Flow in the First Days

After the initial cut and acid treatment, resin should begin flowing within minutes and continue for several days. Visit the tree after 24 to 48 hours to check that resin is flowing properly into the gutter and cup. Resin flow is highest in warm weather — daytime temperatures above 25 degrees Celsius produce the best flow, while cold nights below 10 degrees Celsius slow it significantly. The tapping season in the US Southeast runs from approximately March through November. Flow rates are highest in summer (June through August) when temperatures and tree metabolism peak. If the cup is filling faster than expected, replace it with a larger container. If resin is bypassing the gutter, adjust its position or add a small clay dam to redirect flow.

8

Refreshing the Streak — Subsequent Rounds

After 2 to 4 weeks, the exposed bark surface oxidizes and resin flow slows as wound tissue begins to seal the canals. A new streak must be chipped above the previous one to reopen flow. Using the bark hack, shave a fresh strip of bark approximately 1 to 2 centimeters high directly above the previous cut, extending the catface upward. Apply acid stimulant to the new streak. This process is called "streaking" or "chipping." Over one season, the catface gradually moves upward by 30 to 50 centimeters. A single face can be worked for 5 to 7 or more years, eventually reaching 2 to 3 meters high (at which point a raised hack or ladder is needed). Each new streak reopens resin canals and restarts the flow cycle.

Materials for this step:

Sulfuric Acid PasteSulfuric Acid Paste0.25 liter

Tools needed:

Bark Hack (Bark Chipper)Bark Hack (Bark Chipper)
Acid Applicator (Squeeze Bottle with Nozzle)Acid Applicator (Squeeze Bottle with Nozzle)
9

Collecting the Oleoresin — Dipping

When the collection cup is full or near full (typically every 2 to 4 weeks), the oleoresin is harvested — a process traditionally called "dipping." Using the flat-bottomed dipper (a spatula-like scraping tool), scoop the accumulated oleoresin from the cup into a collection bucket. Also scrape any hardened resin (called "scrape" or "gum" that has dried on the face of the tree above the gutter) into the bucket separately — scrape is lower quality than cup resin (called "virgin dip" or "gum") because it has lost some of its volatile turpentine to evaporation. A healthy longleaf pine produces approximately 200 to 400 grams of oleoresin per collection round, totaling 2 to 4 kilograms over the full season.

Materials for this step:

Metal Collection Bucket (10 liter)Metal Collection Bucket (10 liter)1 piece

Tools needed:

Resin Dipper (Flat Scraping Tool)Resin Dipper (Flat Scraping Tool)
10

Straining and Cleaning the Oleoresin

Raw oleoresin collected from the cups contains bark chips, insects, pine needles, and other forest debris. Strain the oleoresin through a coarse mesh screen (2 to 3 millimeter openings) or cheesecloth into a clean storage barrel or drum. For higher purity, strain a second time through finer cheesecloth. Work in a well-ventilated area — fresh oleoresin releases turpentine vapors that are flammable and can cause dizziness and respiratory irritation with prolonged exposure. Do not strain near open flames or sparks. Strained oleoresin can be stored in sealed metal drums or barrels. Keep barrels in shade to minimize turpentine evaporation through any gaps.

Materials for this step:

CheeseclothCheesecloth2 meter
Metal Storage Barrel (50 liter)Metal Storage Barrel (50 liter)1 piece

Tools needed:

Coarse Mesh ScreenCoarse Mesh Screen
11

Transferring Oleoresin to Storage

Once strained, transfer the oleoresin to sealed metal storage barrels. Historically, wooden barrels were used, but metal drums with locking lids are preferred today to prevent turpentine evaporation and contamination. Label each barrel with the date, tree face numbers, and whether the contents are cup resin or scrape. Store barrels upright in a shaded, cool location away from any heat sources or open flames. Turpentine vapor is heavier than air and can accumulate in low areas — ensure storage is well-ventilated. Oleoresin remains workable for several months in sealed containers before further processing (distillation to separate turpentine from rosin). Do not store in direct sunlight, which heats the barrel and accelerates turpentine loss.

Materials for this step:

Paper LabelsPaper Labels5 piece
12

Cleaning and Maintaining Tools

After each collection round, clean all tools immediately — dried oleoresin becomes extremely difficult to remove. Soak the bark hack blade, dipper, and gutters in turpentine or mineral spirits for 15 to 20 minutes, then wipe clean with a rag. Sharpen the bark hack blade with a file after every 2 to 3 rounds — a sharp blade produces clean cuts that maximize resin flow and minimize tree damage. Inspect ceramic or metal cups for cracks and replace any damaged ones. Rinse the acid applicator with water to prevent clogging. Store tools in a dry place to prevent corrosion. Well-maintained tools produce cleaner cuts and better resin yields throughout the season.

Materials for this step:

Mineral SpiritsMineral Spirits0.5 liter
Cotton RagsCotton Rags3 piece

Tools needed:

Sharpening FileSharpening File
13

Preparing for the Next Streak Round

Every 2 to 4 weeks throughout the tapping season, repeat the cycle: chip a new streak above the previous one, apply acid stimulant, and collect accumulated resin. Keep a log of each tree: date of each streak, resin yield per collection, and any signs of tree stress (excessive wound tissue, crown thinning, insect infestation). A well-managed tree receives 15 to 25 streak rounds per season. Adjust the chipping schedule based on weather — during hot, dry periods, resin flows faster and cups fill more quickly (chip every 2 weeks). During cooler or rainy spells, extend the interval to 3 to 4 weeks. Never chip more bark than necessary per round — overtapping exhausts the tree's resin production capacity.

Tools needed:

Field NotebookField Notebook
14

End-of-Season Tree Care and Closing

At the end of the tapping season (typically late October to November in the Southeast), make a final collection from all cups and scrape remaining hardened resin from the catfaces. Remove all cups, gutters, and nails from the trees to prevent damage over winter and allow wound tissue to form naturally. The exposed catface will gradually callus over during the dormant season. Do not seal or paint the wound — the tree's natural wound response is sufficient. Inspect each tree's crown and trunk condition. Trees showing severe decline (more than 30% crown dieback or heavy boring insect damage) should be rested for a full season before re-tapping. Healthy trees can be tapped on the same face the following spring by continuing upward from the previous year's highest streak, or a new face can be opened on the opposite side of the trunk.

Tools needed:

Resin Dipper (Flat Scraping Tool)Resin Dipper (Flat Scraping Tool)
Claw HammerClaw Hammer

Materials

14

Tools Required

10

CC0 Public Domain

This blueprint is released under CC0. You are free to copy, modify, distribute, and use this work for any purpose, without asking permission.

Support the Maker by purchasing products through their Blueprint where they earn a Maker Commission set by Vendors, or create a new iteration of this Blueprint and include it as a connection in your own Blueprint to share revenue.

Discussion

(0)

Log in to join the discussion

Loading comments...