ပူးပေါင်းဆောင်ရွက်ခြင်း
အနုပညာ
အလှအပနှင့် ကျန်းမာရေး
လက်မှုအနုပညာ
ယဉ်ကျေးမှုနှင့် သမိုင်း
ဖျော်ဖြေရေး
ပတ်ဝန်းကျင်
အစားအစာနှင့် အချိုရည်
ပြောင်းပြန်အင်ဂျင်နီယာပညာ
သိပ္ပံပညာများ
အားကစား
နည်းပညာ
ဝတ်ဆင်နိုင်သောပစ္စည်းများ
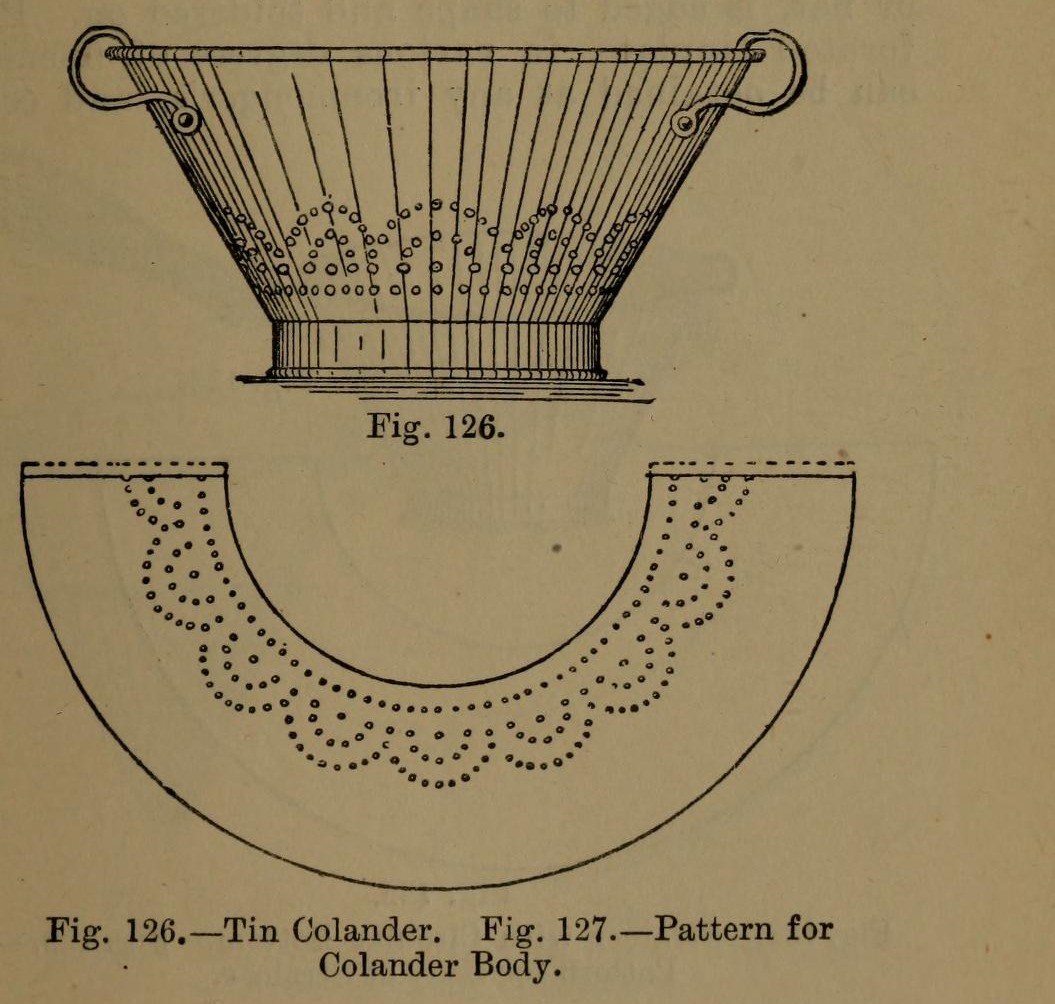


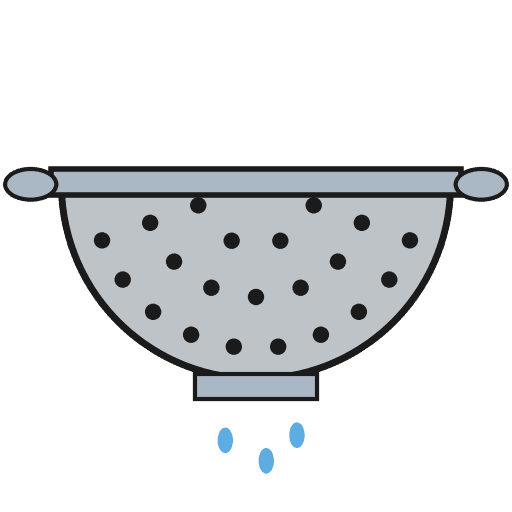
Colander: a Tinplate Colander with Perforated Body and Bottom (Hasluck, 1907)
A tinsmith's colander for straining: a tapered tinplate body and a hollowed bottom, both punched full of holes, standing on a wired hoop, with two bow handles.
The body pattern is a ring segment: outer radius = top diameter, inner radius = bottom diameter, which gives sides at 60 degrees.
Source: Paul N. Hasluck, Tinplate Work (1907), pp. 50-51. Unknown: sizes, solder. Picture: Figs. 126-127 of the book.
အလယ်အလတ်
Unknown
ညွှန်ကြားချက်များ
1
1
Set out the body pattern
Set out the body pattern
Choose the top and bottom diameters. On tinplate, strike an arc with radius equal to the top diameter and, from the same centre, one equal to the bottom diameter (Fig. 127); the sides then slope at 60 degrees. Mark the rows of holes, add edges for a grooved seam and the wire, and cut it out.
ဤအဆင့်အတွက် ကုန်ကြမ်းများ:
 သံဖြူပြား1 body
လိုအပ်သော ကိရိယာများ:
 အချွန်နှစ်ချောင်းပါ ကွန်ပါ
 မျဉ်းဆွဲတံ
 သံပြားညှပ်ကတ်ကြေး
2
2
Break, punch and planish the body
Break, punch and planish the body
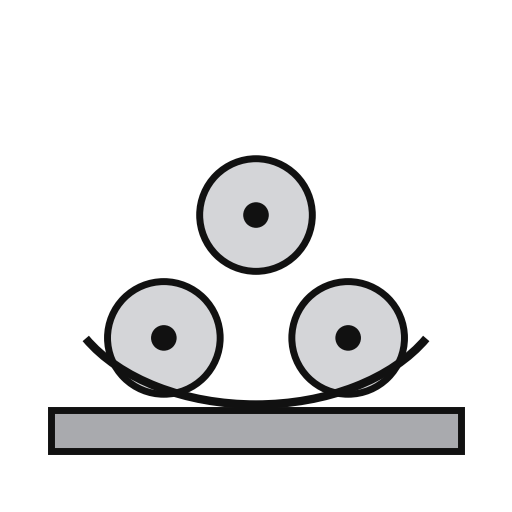
'Break' the pattern through the rollers, turning it the opposite way each pass, so it won't crease when bent. Punch the holes on a hardwood block, then flatten and planish the burrs.
လိုအပ်သော ကိရိယာများ:
 သံပြားကွေးလိပ်စက်
 သံပြားအပေါက်ဖောက်ကိရိယာ
 မာကျောသောသစ်သားတုံး
 ချောမွေ့စေသောတူ
3
3
Seam and wire the body
Seam and wire the body
Set off the edges for a grooved seam, bend the body to shape and seam it. Solder the seam inside. Set off an edge on the wide end and wire it with No. 10 B.W.G. wire. If you like, raise a swage about 1 1/2 in below the wired edge: it stiffens the colander and looks better.
ဤအဆင့်အတွက် ကုန်ကြမ်းများ:
 သံဝါယာ1 No. 10 B.W.G.
 သံဖြူ-ခဲဂဟေ1 seam
လိုအပ်သော ကိရိယာများ:
 သစ်သားတူ
 တံသင်
 လျှပ်စစ် ဂဟေဆော်တံ
 ဖလပ်စ်
4
4
Make and fit the bottom
Make and fit the bottom
Cut out the bottom, hollow it and edge it to fit the small end. Inside, mark circles from 1 in across at the centre, each 1 in wider than the last, out to the edge. Punch holes at short intervals round them and flatten the burrs on an upturned hollowing hammer. Solder the bottom on.
ဤအဆင့်အတွက် ကုန်ကြမ်းများ:
သံဖြူပြား1 bottomသံဖြူ-ခဲဂဟေ1 bottomလိုအပ်သော ကိရိယာများ:
အချွန်နှစ်ချောင်းပါ ကွန်ပါသံပြားညှပ်ကတ်ကြေးသံပြားအပေါက်ဖောက်ကိရိယာချောမွေ့စေသောတူလျှပ်စစ် ဂဟေဆော်တံဖလပ်စ်5
5
Add the hoop and handles
Add the hoop and handles
Cut a strip 1 1/2 in wide, as long as the circumference of the bottom. Wire it with No. 10 B.W.G., round it, seam it and solder it on as the foot. Rivet a pair of bow handles opposite each other at the top.
ဤအဆင့်အတွက် ကုန်ကြမ်းများ:
သံဖြူပြား1 hoopသံဝါယာ1 hoopသံဖြူ-ခဲဂဟေ1 hoop လက်ကိုင်2 bow handles
 သံရစ်ချည်များ1 number not given
လိုအပ်သော ကိရိယာများ:
သံပြားညှပ်ကတ်ကြေးလျှပ်စစ် ဂဟေဆော်တံဖလပ်စ် ရစ်ဗက်တူ
6
6
Clean and scald
Clean and scald
Clean with turpentine and whiting, then polish with dry whiting. Before first use, steep it a short time in boiling water, as for any metal article for the kitchen.
လိုအပ်သော ကိရိယာများ:
 တာပင်တိုင်ဆီ
 ကယ်လ်စီယမ်ကာဗွန်နိတ် (ထုံးဖြူမှုန့်)
 ရေ
ပစ္စည်းများ
5- 1 hoopနေရာယူပစ္စည်း
- 1 hoopနေရာယူပစ္စည်း
- 1 hoopနေရာယူပစ္စည်း
- 2 bow handlesနေရာယူပစ္စည်း
- 1 number not givenနေရာယူပစ္စည်း
လိုအပ်သော ကိရိယာများ
15- နေရာယူပစ္စည်း
- နေရာယူပစ္စည်း
- နေရာယူပစ္စည်း
- နေရာယူပစ္စည်း
- နေရာယူပစ္စည်း
- နေရာယူပစ္စည်း
- နေရာယူပစ္စည်း
- နေရာယူပစ္စည်း
- နေရာယူပစ္စည်း
- နေရာယူပစ္စည်း
- နေရာယူပစ္စည်း
- နေရာယူပစ္စည်း
- နေရာယူပစ္စည်း
- နေရာယူပစ္စည်း
- နေရာယူပစ္စည်း
ချိတ်ဆက်ထားသော ဘလူးပရင့် ကုန်ကြမ်းများ


ဤဘလူးပရင့်က ပြုလုပ်သည်
CC0 အများပိုင်
ဤအစီအစဉ်ကို CC0 အောက်တွင် ထုတ်ဝေထားသည်။ ခွင့်ပြုချက်မလိုဘဲ ကူးယူ၊ ပြင်ဆင်၊ ဖြန့်ဝေ နှင့် အသုံးပြုနိုင်သည်။
အစီအစဉ်မှတစ်ဆင့် ကုန်ပစ္စည်းများဝယ်ယူ၍ လက်မှုပညာရှင်ကို ပံ့ပိုးပါ လက်မှုပညာရှင် ကော်မရှင် ရောင်းချသူက သတ်မှတ်သည်၊ သို့မဟုတ် ဤအစီအစဉ်၏ ဗားရှင်းအသစ်ဖန်တီး၍ ဝင်ငွေခွဲဝေရန် သင့်အစီအစဉ်တွင် ချိတ်ဆက်မှုအဖြစ် ထည့်သွင်းပါ။