အနုပညာ
အလှအပနှင့် ကျန်းမာရေး
လက်မှုအနုပညာ
ယဉ်ကျေးမှုနှင့် သမိုင်း
ဖျော်ဖြေရေး
ပတ်ဝန်းကျင်
အစားအစာနှင့် အချိုရည်
စိမ်းလန်းသောအနာဂတ်
ပြောင်းပြန်အင်ဂျင်နီယာပညာ
သိပ္ပံပညာများ
အားကစား
နည်းပညာ
ဝတ်ဆင်နိုင်သောပစ္စည်းများ
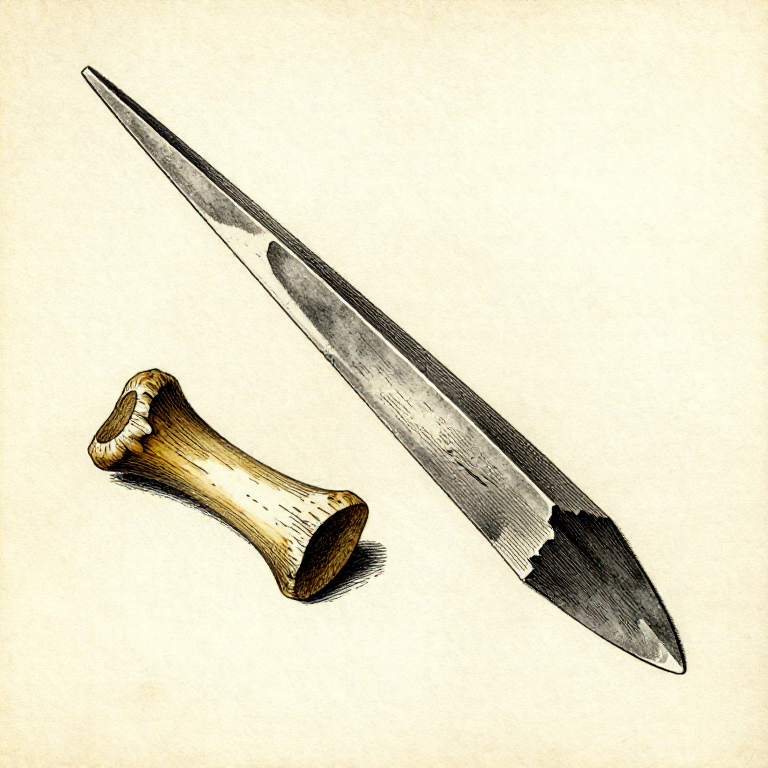
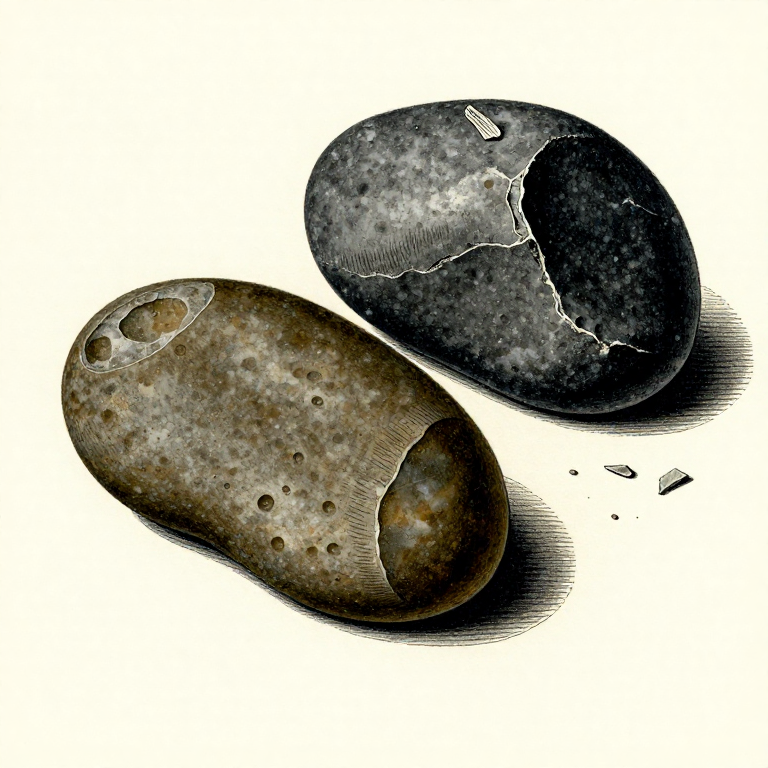
Making a Stone Burin — The Engraving Chisel That Enabled Bone and Antler Work
The burin is a specialized stone tool with a narrow, chisel-like cutting edge formed by striking thin slivers (burin spalls) off the end of a flint blade. Unlike a knife edge which is thin and fragile, a burin edge is supported by the full thickness of the blade behind it, making it strong enough to engrave, incise, and groove hard materials like bone, antler, ivory, and hardwood without snapping. Burins first appear in the archaeological record around 40,000 years ago in the Upper Palaeolithic and are one of the defining tool types of that era. They made possible the entire bone and antler tool industry: without burins, there would be no bone needles for sewing tailored clothing, no barbed antler harpoon points, no eyed needles, and no decorative engravings on bone and ivory. The burin technique is a secondary modification applied to an already-knapped blade — the maker starts with a finished blade and then removes one or more narrow spalls from the end to create the working edge. Different burin types serve different functions: an angle burin (spall struck from one corner) produces an asymmetric edge good for incising grooves, while a dihedral burin (spalls struck from both sides meeting at a ridge) produces a centred edge ideal for splitting bone lengthwise. This blueprint teaches both types.
အလယ်အလတ်
30-60 minutes
ညွှန်ကြားချက်များ
1
1
Select a Suitable Flint Blade
Select a Suitable Flint Blade
Begin with a well-struck flint blade at least 6 to 10 cm long, 2 to 3 cm wide, and 5 to 8 mm thick. The blade should have a relatively straight profile without significant curvature along its length. A blade with a clean, flat striking platform at the proximal end is ideal — the platform provides a surface to strike the burin blow against. Blades that are too thin (under 4 mm) will snap rather than producing a clean spall. Blades with a trapezoidal cross-section work best because the flat surfaces guide the spall removal predictably.
Materials for this step:
 Flint Nodule1 ခု
Tools needed:
 Hammerstone
2
2
Prepare the Blade End with a Truncation
Prepare the Blade End with a Truncation
To control where the burin spall initiates, first create a truncation — a small, straight break across the end of the blade at an angle to the long axis. Do this by placing the blade edge on the edge of an anvil stone and striking downward with a small hammerstone to snap off a small flake, leaving a flat, angled surface at the distal end. This truncation surface acts as the platform from which the burin spall will be struck. The angle of the truncation determines the angle of the resulting burin edge.
Tools needed:
Hammerstone3
3
Position for the Burin Blow (Angle Burin)
Position for the Burin Blow (Angle Burin)
Hold the blade firmly in your non-dominant hand with the truncated end pointing upward. Rest the base of the blade against a solid surface — your thigh padded with leather works well, or a flat stone. Position a small hammerstone or antler baton so that it will strike the truncation surface at a precise point: the corner where the truncation meets one of the blade's lateral edges. The blow must travel parallel to the long axis of the blade, not across it.
Tools needed:
Hammerstone4
4
Strike the Burin Spall
Strike the Burin Spall
Deliver a sharp, controlled blow to the truncation platform. The force must be directed precisely downward along the blade's length. If executed correctly, a thin, narrow flake (the burin spall) peels away from the edge of the blade, running the full length of the blade parallel to one lateral edge. The spall is typically 1 to 3 mm wide and as long as the blade itself. Where the spall detached, a narrow, flat facet is exposed — this facet, meeting the opposite face of the blade at a near-right angle, forms the burin's working edge.
Tools needed:
Hammerstone5
5
Examine the Burin Edge
Examine the Burin Edge
Inspect the resulting edge closely. A successful angle burin has a narrow, straight edge at the distal end where the spall facet intersects the original blade surface. The edge should be sharp but robust — it is the junction of two flat surfaces meeting at approximately 80 to 90 degrees, forming a miniature chisel. If the spall terminated prematurely (stepped or hinged short of the full blade length), the edge may still be usable but will be weaker. If the blow shattered the end of the blade, start over with a new blade — the most common cause of failure is striking too hard or at the wrong angle.
6
6
Create a Dihedral Burin (Alternative Type)
Create a Dihedral Burin (Alternative Type)
To make a dihedral burin — which has a centred, symmetrical edge — strike a burin spall from one side of the blade end as described above, then rotate the blade 180 degrees and strike a second spall from the opposite side. The two spall facets meet at a ridge line running along the centre of the blade's end, forming a strong, symmetrical chisel edge. Dihedral burins are stronger than angle burins because the edge is centred and supported equally from both sides, making them ideal for heavy-duty tasks like splitting long bones lengthwise.
Tools needed:
Hammerstone7
7
Test the Burin on Bone or Antler
Test the Burin on Bone or Antler
Hold the burin like a thick pencil with the chisel edge angled against the surface of a piece of bone or antler. Push firmly while drawing the burin toward you in a scoring motion. The edge should cut a clean, V-shaped groove into the hard material. Repeat the stroke in the same groove to deepen it progressively. A working burin can incise a groove 2 to 3 mm deep in dense bone with 10 to 15 passes. If the edge skips or slides rather than cutting, the burin angle is too obtuse and needs re-spalling.
8
8
Resharpening by Striking Additional Spalls
Resharpening by Striking Additional Spalls
When the burin edge dulls from use — which happens relatively quickly on very hard materials like antler — it can be resharpened by striking another burin spall from the same facet. This removes a thin sliver of the dulled edge and exposes a fresh, sharp surface beneath. A single blade can be resharpened this way multiple times, each spall removal shortening the blade slightly. Archaeological sites often contain clusters of burin spalls alongside the burins themselves, evidence of repeated resharpening during extended work sessions.
Tools needed:
Hammerstone9
9
Applications of the Burin
Applications of the Burin
The burin's chisel edge enables a range of critical tasks that no other stone tool can perform effectively. Incising parallel grooves along a long bone and then prying the strip between them free produces bone blanks for needles — the only way to extract a thin, straight bone rod without shattering the material. Scoring and splitting antler tines produces blanks for harpoon points and pressure flakers. Engraving decorative lines and figures on bone and ivory plaques is only possible with the burin's precise, narrow edge. The burin is the bridge between the stone tool and the bone tool industries.
ပစ္စည်းများ
1- 1 ခုPlaceholder
Connected Blueprint Materials
ဆက်စပ် အစီအစဉ်များ
ဤအစီအစဉ်များသည် အသိပညာမျှဝေသည် — နည်းပညာ၊ ပစ္စည်း သို့မဟုတ် မူများ
Related blueprints
Other builds that share materials, tools, or techniques with this one.
Making a Stone Scraper for Hide Working — Conchoidal Flake Toolstoneworking
Making a Bone Awl — Piercing Tool for Sewing and Basketrystoneworking
Making a Stone Hoe — The First Agricultural Toolstoneworking

Making a Stone Chisel — Splitting and Grooving Toolstoneworking
Making a Hammerstone — The First Tool in Human Historystoneworking
Making a Pump Drill — Flywheel-Powered Rotary Drillstoneworking
CC0 အများပိုင်
ဤအစီအစဉ်ကို CC0 အောက်တွင် ထုတ်ဝေထားသည်။ ခွင့်ပြုချက်မလိုဘဲ ကူးယူ၊ ပြင်ဆင်၊ ဖြန့်ဝေ နှင့် အသုံးပြုနိုင်သည်။
အစီအစဉ်မှတစ်ဆင့် ကုန်ပစ္စည်းများဝယ်ယူ၍ ဖန်တီးသူကို ပံ့ပိုးပါ ဖန်တီးသူ ကော်မရှင် ရောင်းချသူက သတ်မှတ်သည်၊ သို့မဟုတ် ဤအစီအစဉ်၏ ဗားရှင်းအသစ်ဖန်တီး၍ ဝင်ငွေခွဲဝေရန် သင့်အစီအစဉ်တွင် ချိတ်ဆက်မှုအဖြစ် ထည့်သွင်းပါ။