

Using Relays — SIK Circuit 13
ညွှန်ကြားချက်များ
Parts & Introduction
Parts & Introduction
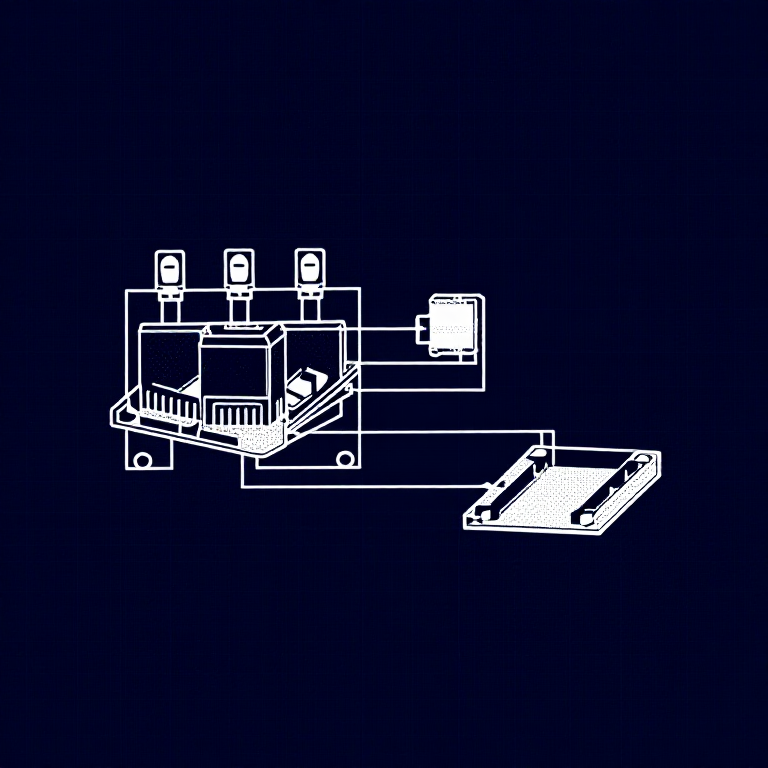
A relay is an electrically-operated mechanical switch. A small current energizes a coil that physically moves a contact arm, switching a separate circuit. Relays can control high-power devices (motors, lights, appliances) from low-power Arduino signals. This experiment uses an SPDT (Single Pole Double Throw) relay to alternate between two LEDs.
Parts Needed
- 1x Arduino Uno + USB cable
- 1x Breadboard
- 1x SPDT Relay
- 1x NPN Transistor (P2N2222A)
- 1x Diode (1N4148)
- 2x LEDs (different colors)
- 2x 330Ω Resistors
- 14x Jumper Wires
ဤအဆင့်အတွက် ကုန်ကြမ်းများ:
 SparkFun Inventor's Kit - V3.21 အစုံ
လိုအပ်သော ကိရိယာများ:
 Arduino IDE ပါ ကွန်ပျူတာ
Hardware Hookup
Hardware Hookup
Wiring Instructions
Transistor + Relay Coil
- Connect transistor Base through 330Ω resistor to Arduino Digital Pin 2.
- Connect transistor Emitter to GND.
- Connect one side of the relay coil to transistor Collector.
- Connect other side of relay coil to 5V.
- Flyback Diode: Band (cathode) to 5V, anode to Collector.
Relay Contacts + LEDs
- Connect relay COMMON through a 330Ω resistor to 5V.
- Connect relay NC (Normally Closed) to LED 1 positive leg.
- Connect relay NO (Normally Open) to LED 2 positive leg.
- Connect both LED negative legs to GND.
ဤအဆင့်အတွက် ကုန်ကြမ်းများ:
 SPDT ရီလေး1 ခု
 ဘရက်ဘုတ်1 ခု
 ဆက်သွယ်ဝါယာ8 ခု
Arduino Code
Arduino Code
Open the Arduino IDE and upload the following sketch to your Arduino board.
ဤအဆင့်အတွက် ကုန်ကြမ်းများ:
 Arduino Uno R31 ခု
လိုအပ်သော ကိရိယာများ:
Arduino IDE ပါ ကွန်ပျူတာTest & Experiment
Test & Experiment
What You Should See
You should hear the relay clicking, and see the two LEDs alternating — one on, one off — switching every second.
Troubleshooting
- LEDs not lighting: Check LED polarity — longer leg is positive.
- No clicking sound: The transistor or coil circuit isn't working. Verify transistor orientation and coil connections.
- Relay not making good contact: The SIK relay is designed for soldering, not breadboarding. Press it firmly to ensure all pins contact.
- Confusion: Don't mix up the TMP36 temperature sensor with the transistor!
Experiments to Try
- Replace the LEDs with a motor on the NO contact — use the relay as a motor on/off switch.
- Use a button to control when the relay toggles.
- Add variable delay to create morse code patterns.
ပစ္စည်းများ
9- SparkFun Inventor's Kit - V3.210% ကော်မရှင်1 အစုံ$106.79
- နေရာယူပစ္စည်း
- နေရာယူပစ္စည်း
- နေရာယူပစ္စည်း
- 1 ခုနေရာယူပစ္စည်း
- 1 ခုနေရာယူပစ္စည်း
- 1 ခုနေရာယူပစ္စည်း
- နေရာယူပစ္စည်း
- နေရာယူပစ္စည်း
လိုအပ်သော ကိရိယာများ
1- နေရာယူပစ္စည်း
CC0 အများပိုင်
ဤအစီအစဉ်ကို CC0 အောက်တွင် ထုတ်ဝေထားသည်။ ခွင့်ပြုချက်မလိုဘဲ ကူးယူ၊ ပြင်ဆင်၊ ဖြန့်ဝေ နှင့် အသုံးပြုနိုင်သည်။
အစီအစဉ်မှတစ်ဆင့် ကုန်ပစ္စည်းများဝယ်ယူ၍ လက်မှုပညာရှင်ကို ပံ့ပိုးပါ လက်မှုပညာရှင် ကော်မရှင် ရောင်းချသူက သတ်မှတ်သည်၊ သို့မဟုတ် ဤအစီအစဉ်၏ ဗားရှင်းအသစ်ဖန်တီး၍ ဝင်ငွေခွဲဝေရန် သင့်အစီအစဉ်တွင် ချိတ်ဆက်မှုအဖြစ် ထည့်သွင်းပါ။