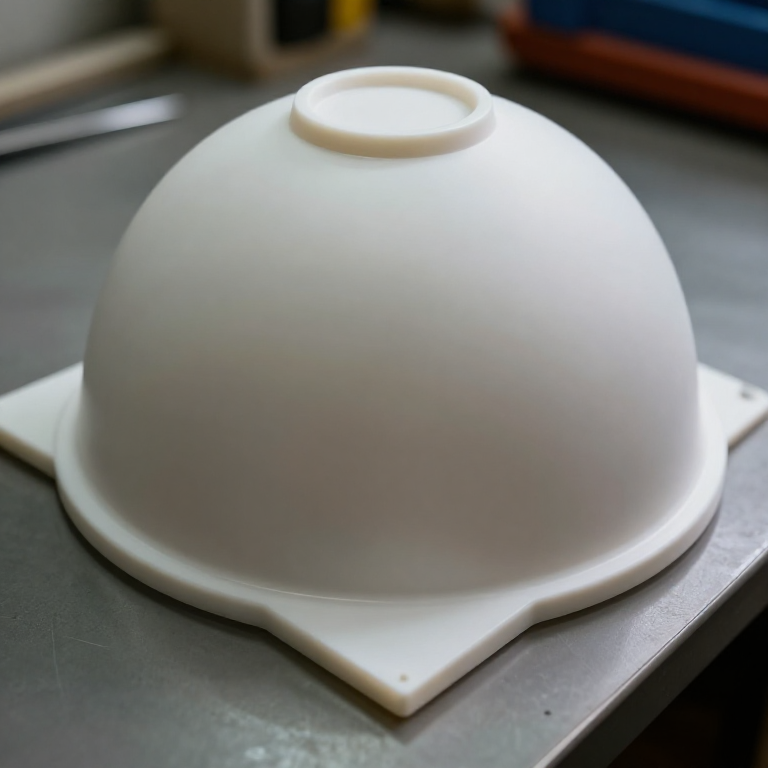


Vacuum Forming
Injection moulding gives you a perfect plastic part and costs thousands for the tool. Vacuum forming gives you a good-enough plastic shell from a mould you can cut out of MDF in an afternoon. For one-offs and short runs — trays, casings, masks, packaging, cosplay armour — it is the only plastics process that makes economic sense at the bench.
The principle is a sheet of thermoplastic heated until it goes limp, dropped over a shape, and sucked down onto it by removing the air underneath. The plastic does not flow and it is not cast; it stretches. Everything that goes right or wrong follows from that one fact — thinning at the corners, the need for draft, the impossibility of undercuts.
This blueprint covers the buck, the temperature window and the pull.
ညွှန်ကြားချက်များ
Ventilate and glove up before any heat
Ventilate and glove up before any heat
Work with forced ventilation or outdoors. Hot thermoplastic sticks to skin and keeps burning; wear heat-resistant gloves and eye protection. Never let the sheet scorch or smoke — overheated polystyrene gives off styrene, and burnt plastic fumes are the real hazard in this process, not the heat itself.
လိုအပ်သော ကိရိယာများ:
 အခိုးမတက်သော ဘေးကင်းရေးမျက်မှန်
Design the buck with 3-5° of draft on every wall
Design the buck with 3-5° of draft on every wall
Taper all vertical faces outward by 3-5° from the top. A vertical wall grips the shrinking plastic as it cools and the part will not come off in one piece.
Remove every undercut
Remove every undercut
Any feature narrower at the top than below traps the part permanently. If the shape genuinely needs an undercut, split the buck into pieces that come apart after forming.
Make or source the buck
Make or source the buck
MDF, hardwood, tooling board, plaster or a 3D print all work. If you print it, use PETG or ABS rather than PLA — PLA softens around 60 °C and deforms against a hot sheet.
ဤအဆင့်အတွက် ကုန်ကြမ်းများ:
 လေဟာနယ်ပုံသွင်းရန် ပုံစံခွက်1 ခု
Seal and smooth the buck surface
Seal and smooth the buck surface
Fill, sand and seal porous materials such as MDF or plaster. Hot plastic records everything — a sanding scratch or a grain line reproduces perfectly on the finished part.
Drill vent holes at deep corners
Drill vent holes at deep corners
Drill 0.5-1 mm holes through the buck at the bottom of every recess and internal corner, into the vacuum chamber. Trapped air is the commonest cause of soft, unformed corners, and vents are the only cure.
Raise the buck off the platen
Raise the buck off the platen
Stand it on a few small spacers so air can be drawn from underneath as well as through the vents. Sitting flat on the platen it can seal itself down and starve the vacuum.
Cut the sheet oversized and clamp it flat
Cut the sheet oversized and clamp it flat
Cut plastic sheet at least 50 mm larger than the frame on all sides and clamp it evenly. 1-2 mm HIPS is the easiest material to start on. Any slack in the clamping shows up as a wrinkle in the part.
ဤအဆင့်အတွက် ကုန်ကြမ်းများ:
 HIPS ပြား1 ရွက်
Heat the sheet evenly, not quickly
Heat the sheet evenly, not quickly
Bring the whole sheet up together with an oven or a heater bank, keeping it moving if you are using a heat gun. HIPS forms at roughly 150-180 °C. Hot in one spot and cool in another gives you a part that is thin in one place and unformed in another.
လိုအပ်သော ကိရိယာများ:
 လေပူသေနတ်
Watch for the sag and the second sag
Watch for the sag and the second sag
The sheet first bellies downward, then tightens slightly and sags again more slowly. That second sag is the forming window. Judge readiness by this behaviour rather than by a timer — sheet thickness and room temperature move the timing every session.
Bring the sheet down over the buck in one movement
Bring the sheet down over the buck in one movement
Lower the frame smoothly and fully in a single motion. Hesitating lets the edges chill against the frame while the centre is still hot, and the part forms unevenly.
Apply vacuum immediately
Apply vacuum immediately
Switch the vacuum on the instant the sheet seats. A shop vacuum is enough for small work. You have a couple of seconds before the plastic stiffens past forming.
လိုအပ်သော ကိရိယာများ:
 လေဟာနယ်ပုံသွင်းစက်
Hold the vacuum while it cools
Hold the vacuum while it cools
Keep it running for 30-60 seconds, longer for thick sheet. Releasing early lets the part spring back and lose detail. A fan across the surface shortens the wait.
Release and trim
Release and trim
Lift the part off the buck, then cut the flange away with a knife, bandsaw or rotary tool. Score-and-snap works cleanly on HIPS.
Check the wall thickness at the corners
Check the wall thickness at the corners
Measure the part at the top face and at the deepest corner. The corner will be markedly thinner. This tells you whether the shape is too deep for the sheet you used, and it is the number to change next time.
လိုအပ်သော ကိရိယာများ:
 ပေတံ
ပေတံCompendium — stretching, not moulding
Compendium — stretching, not moulding
Why the corners are always thinnest. A vacuum-formed part is made from a fixed quantity of plastic: whatever was in the sheet. Nothing is added during forming, so every square millimetre of extra surface area comes from thinning somewhere. The plastic that reaches the deepest point has travelled furthest and stretched most. This is quantified as the draw ratio — depth against width — and above roughly 1:1 on a simple box shape you should expect real thinning problems. It is also why a tall narrow part is much harder than a wide shallow one, regardless of how good your vacuum is.
Thermoplastic versus thermoset. This process only exists because HIPS, PETG and ABS are thermoplastics: heating them breaks no chemical bonds, so they soften, take a new shape and can in principle be reheated and reshaped again. Bakelite and the other thermosets cannot do this — their polymer chains are cross-linked during curing, and reheating degrades rather than softens them. That single distinction determines which plastics can be formed this way and which must be cast or machined.
Male and female tooling. Forming over a raised buck is drape forming, and it gives good detail on the inside surface and best thickness on the top face. Forming down into a cavity gives good outside detail but thins the base more severely. Neither is correct in general — choose by which surface has to look right and which dimension has to be accurate.
Where it came from. Thermoplastic sheet forming grew out of wartime work on acrylic aircraft canopies, and vacuum forming became a mainstream industrial process during the 1950s alongside the arrival of cheap sheet polystyrene. It is now the backbone of disposable packaging — the blister pack, the yoghurt pot, the interior door card of a car. It stayed in the workshop for the same reason it succeeded in industry: the tooling is nearly free.
ဤဘလူးပရင့်က ပြုလုပ်သည်
ဆက်စပ် အစီအစဉ်များ
ဤအစီအစဉ်များသည် အသိပညာမျှဝေသည် — နည်းပညာ၊ ပစ္စည်း သို့မဟုတ် မူများ

CC0 အများပိုင်
ဤအစီအစဉ်ကို CC0 အောက်တွင် ထုတ်ဝေထားသည်။ ခွင့်ပြုချက်မလိုဘဲ ကူးယူ၊ ပြင်ဆင်၊ ဖြန့်ဝေ နှင့် အသုံးပြုနိုင်သည်။
အစီအစဉ်မှတစ်ဆင့် ကုန်ပစ္စည်းများဝယ်ယူ၍ လက်မှုပညာရှင်ကို ပံ့ပိုးပါ လက်မှုပညာရှင် ကော်မရှင် ရောင်းချသူက သတ်မှတ်သည်၊ သို့မဟုတ် ဤအစီအစဉ်၏ ဗားရှင်းအသစ်ဖန်တီး၍ ဝင်ငွေခွဲဝေရန် သင့်အစီအစဉ်တွင် ချိတ်ဆက်မှုအဖြစ် ထည့်သွင်းပါ။