

Vinyl Cutting
A vinyl cutter has no motor on its blade. The little knife hangs freely in its holder and is dragged sideways through the material, swivelling to face whatever direction the carriage is moving — a drag knife, the same principle as a castor wheel on a trolley.
That free swivel is the source of every quirk in the machine. The blade tip sits a fraction of a millimetre off the centre of rotation, so it always lags behind the point the software is aiming at. The software compensates by lying about the path — offsetting it by exactly that distance. Set the offset wrong and corners come out rounded or overcut, and no amount of pressure adjustment will fix it.
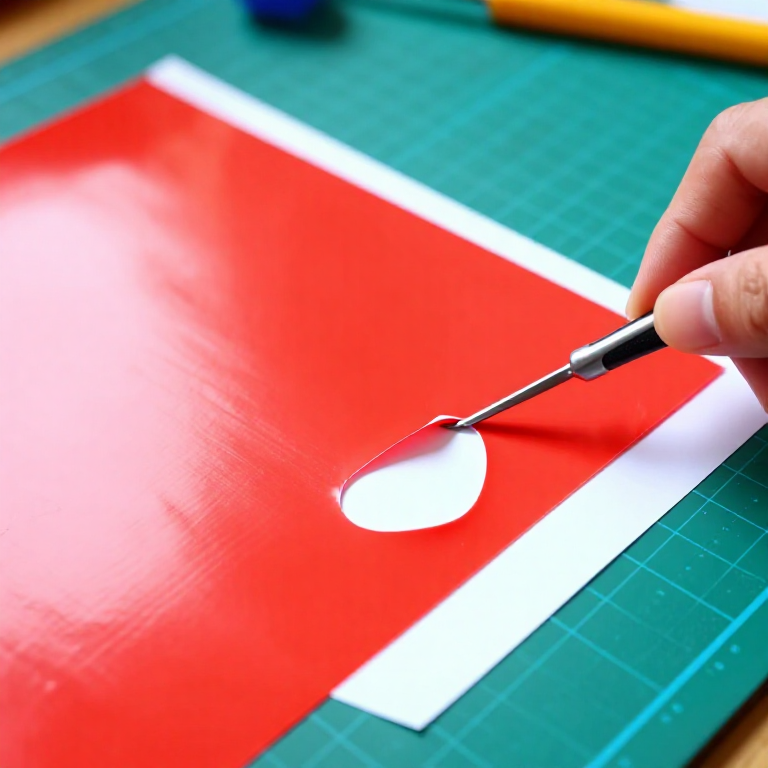
Then there is the cut depth. You are cutting the vinyl and deliberately not cutting the paper backing underneath it. A kiss cut. Get it right and the design lifts away cleanly; get it wrong and you have either a sheet of confetti or a design that will not release.
ညွှန်ကြားချက်များ
The blade is small, exposed and extremely sharp
The blade is small, exposed and extremely sharp
Carbide cutter blades are a few millimetres long and easy to lose track of. Cap the holder when it is out of the machine and never run a finger along the mat to check a cut.
Decide which vinyl you are actually using
Decide which vinyl you are actually using
Adhesive vinyl sticks to hard surfaces and has a paper backing. Heat transfer vinyl bonds to fabric under an iron and has a clear carrier on the front. They cut differently and are not interchangeable.
ဤအဆင့်အတွက် ကုန်ကြမ်းများ:
 ကပ်ခွာ ဗီနိုင်းပြား2 ရွက်
Build the design as closed vector paths
Build the design as closed vector paths
The cutter follows outlines only. There is no fill, no gradient and no stroke width — an open path cuts a slit rather than a shape.
Check the smallest detail against the blade
Check the smallest detail against the blade
Anything thinner than about 2 mm will tear out during weeding. Simplify the design now rather than losing an hour to it later.
Mirror the design if you are cutting heat transfer vinyl
Mirror the design if you are cutting heat transfer vinyl
HTV is cut face down through the carrier, so the design must be flipped. Forgetting to mirror is the single most common mistake with this machine and it is only discovered after the press.
Load the vinyl squarely onto the mat or the rollers
Load the vinyl squarely onto the mat or the rollers
Align the leading edge parallel to the rollers. A sheet loaded a degree out of true drifts progressively and a long cut ends up off the material.
လိုအပ်သော ကိရိယာများ:
 ဗိုင်နိုင်းဖြတ်စက်
Set the blade to protrude about the thickness of the vinyl
Set the blade to protrude about the thickness of the vinyl
Expose a sliver — roughly the depth of the vinyl film alone. Drag the holder across a scrap by hand and you should barely mark the backing.
Enter the blade offset for your blade
Enter the blade offset for your blade
Typically 0.25 mm for a 45° blade and 0.5 mm for a 60°. This tells the software how far the tip trails behind the carriage — wrong offset gives rounded or overshot corners.
Run a small test cut before the real job
Run a small test cut before the real job
Cut a 10 mm square in the corner. Every machine wants a slightly different pressure and this costs ten seconds against a wasted sheet.
Peel the test square to judge the depth
Peel the test square to judge the depth
The square should lift away leaving a faint score on the backing paper. Cut clean through and pressure is too high; a ragged edge means too low.
Cut the job and leave it on the mat
Cut the job and leave it on the mat
Run the full design and do not unload it yet. If anything went wrong you can re-cut in perfect registration only while it is still held down.
Weed away the waste
Weed away the waste
Lift a corner with a fine hook and pull back the material you do not want, including the counters inside letters like A and O. Pull at a shallow angle, not straight up.
လိုအပ်သော ကိရိယာများ:
 ဗိုင်နိုင်းအပိုအစခွာကိရိယာ
Lay transfer tape over the finished design
Lay transfer tape over the finished design
Squeegee application tape across the whole design and burnish it down firmly. The tape holds every separate piece in position while you move it.
ဤအဆင့်အတွက် ကုန်ကြမ်းများ:
 ကူးပြောင်းတိပ်1 လိပ်
Peel the backing at a sharp angle and apply
Peel the backing at a sharp angle and apply
Pull the paper backing away almost flat against itself so the vinyl stays on the tape. Position on a clean, dry surface, burnish, then peel the tape off just as flatly.
Compendium — a knife that steers itself
Compendium — a knife that steers itself
The drag knife and why offset exists. The blade is mounted in a bearing and is free to spin. Its cutting tip is deliberately mounted off the axis of rotation, so as the carriage moves the tip trails behind like a castor and aligns itself with the direction of travel. That trailing distance is the blade offset — around 0.25 mm for a 45° blade, 0.5 mm for a 60°. The software must therefore drive the carriage along a path displaced from the true outline, and must overshoot slightly at corners so the tip completes the turn before the next stroke begins. Enter a value too small and corners come out rounded; too large and the machine cuts past every corner. It is the same geometry that makes a shopping trolley wheel swing round when you change direction.
Kiss cutting. Vinyl sheet arrives as a film of plasticised PVC, roughly 60-90 µm thick, on a silicone-coated release liner. The whole workflow depends on severing the film while leaving the liner intact, so the design stays registered on its backing while the waste is peeled away. Two settings control it: how far the blade physically protrudes from the holder, and how hard the machine presses. Depth is the coarse control and pressure the fine one — the common error is leaving the blade far too exposed and then reducing pressure to compensate, which cuts inconsistently across the sheet.
The blade angles are not interchangeable. A 45° blade suits standard adhesive vinyl and heat transfer film. A 60° blade has a steeper, longer tip that reaches through thicker or denser material such as flock, magnetic sheet and sandblast resist, but it is more fragile and it tracks small radii less well. A 30° blade is for very thin films and detailed work. Using a 45° blade on thick material simply drags rather than cuts, no matter how hard the machine presses.
What it replaced, and what it did not. Before the plotter, signwriting meant hand lettering or a hand-cut stencil, and cutting the counters out of an O by knife was a craft skill in its own right. Computer-driven cutters arrived commercially in the early 1980s — Roland and Graphtec built the trade machines, and the desktop generation that followed put the same drag-knife mechanism on kitchen tables. The interesting part is that nothing about the geometry changed. Weeding, transfer tape and the problem of holding a floating counter in position are exactly the problems a hand cutter had, and the machine solved none of them; it only made the cut itself repeatable.
ပစ္စည်းများ
2- 2 ရွက်နေရာယူပစ္စည်း
- 1 လိပ်နေရာယူပစ္စည်း
လိုအပ်သော ကိရိယာများ
2- နေရာယူပစ္စည်း
- နေရာယူပစ္စည်း
ချိတ်ဆက်ထားသော ဘလူးပရင့် ကုန်ကြမ်းများ
ဤဘလူးပရင့်က ပြုလုပ်သည်
ဆက်စပ် အစီအစဉ်များ
ဤအစီအစဉ်များသည် အသိပညာမျှဝေသည် — နည်းပညာ၊ ပစ္စည်း သို့မဟုတ် မူများ

CC0 အများပိုင်
ဤအစီအစဉ်ကို CC0 အောက်တွင် ထုတ်ဝေထားသည်။ ခွင့်ပြုချက်မလိုဘဲ ကူးယူ၊ ပြင်ဆင်၊ ဖြန့်ဝေ နှင့် အသုံးပြုနိုင်သည်။
အစီအစဉ်မှတစ်ဆင့် ကုန်ပစ္စည်းများဝယ်ယူ၍ လက်မှုပညာရှင်ကို ပံ့ပိုးပါ လက်မှုပညာရှင် ကော်မရှင် ရောင်းချသူက သတ်မှတ်သည်၊ သို့မဟုတ် ဤအစီအစဉ်၏ ဗားရှင်းအသစ်ဖန်တီး၍ ဝင်ငွေခွဲဝေရန် သင့်အစီအစဉ်တွင် ချိတ်ဆက်မှုအဖြစ် ထည့်သွင်းပါ။