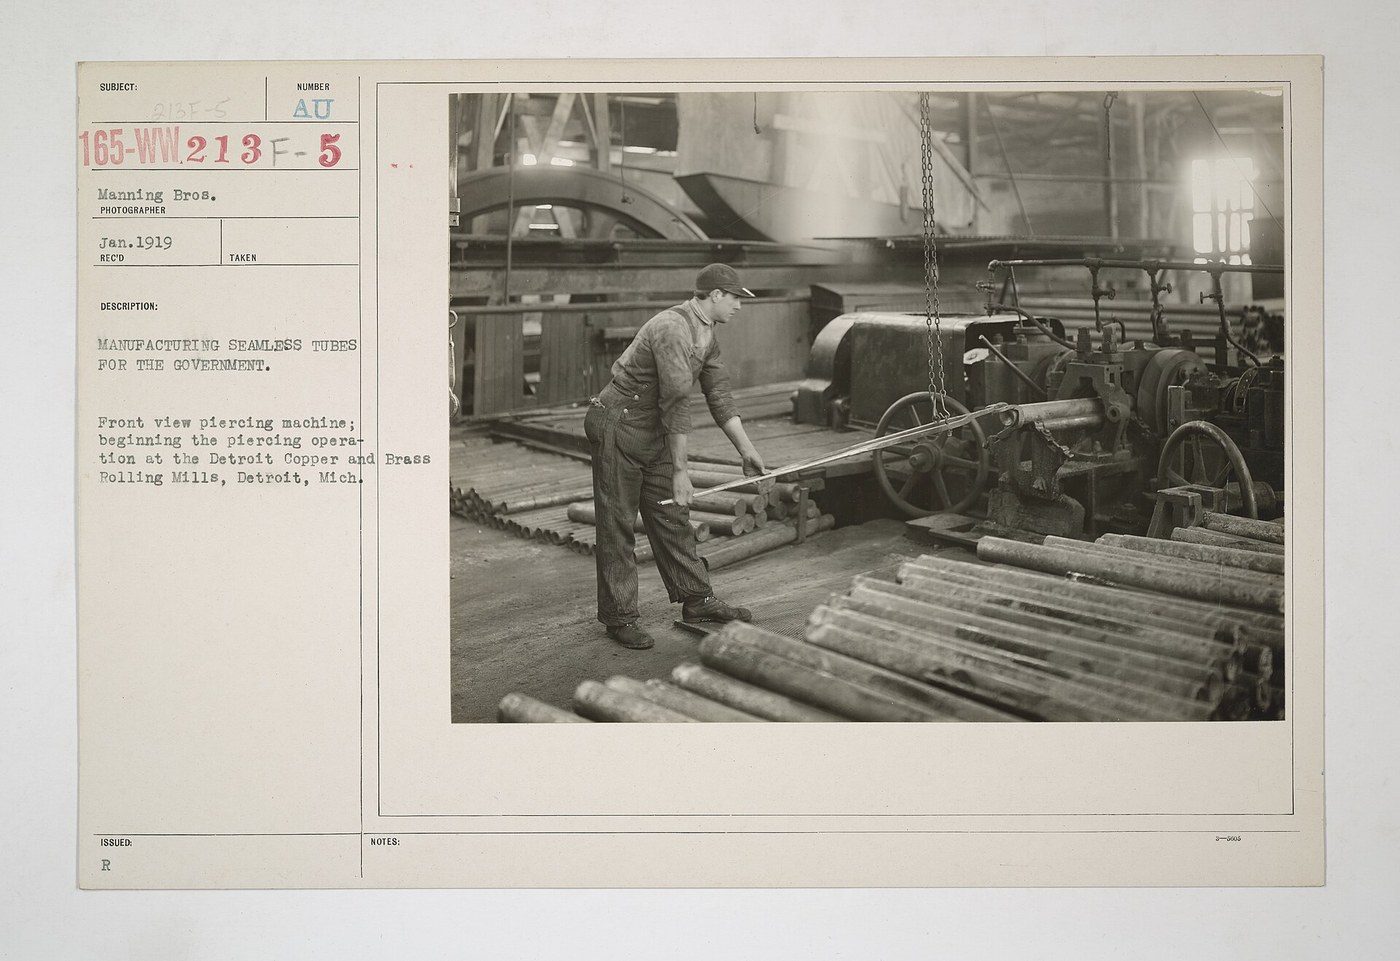


Mannesmann Seamless Tube
Зааварчилгаа
See the cavity form before building the machine
See the cavity form before building the machine
The effect is counter-intuitive enough that it is worth demonstrating first.
- Take a cylinder of modelling clay or soft wax as an analogue billet.
- Roll it firmly between two flat boards, pressing hard while rolling it along.
- Cut it across the middle after a hundred rotations.
- Look for the disturbed, opened structure along the axis.
Why the centre fails first. As the billet rotates under compression, every point on its axis is squeezed from a different direction in turn, so the material at the centre is cyclically loaded in alternating tension and compression. Metal fatigues under that far faster than under steady load, and the axis is where the alternating stress is highest — so a cavity opens exactly where you want a bore.
The Mannesmann effect was originally a NUISANCE — a defect that appeared in rolled bar and ruined it. The brothers' insight was to stop fighting it and use it, which is a recurring pattern in manufacturing history.Энэ алхмын материал:
 Зузаан цаас1 баглаа
Шаардлагатай багаж:
 Дижитал штангенциркуль 6 инч
 Муруй хөрөө
Build two barrel rolls set at a skew angle
Build two barrel rolls set at a skew angle
The skew is the whole mechanism: it converts rotation into rotation PLUS advance.
- Turn two barrel-shaped rolls, 100 mm at the waist swelling to 120 mm, from aluminium round bar.
- Mount each in 608 bearings in a housing that can be swivelled about a vertical axis.
- Set both rolls skewed by 6 to 12 degrees, in OPPOSITE senses, so their surfaces drive the billet forward as they spin it.
- Fix the housings with M6 × 50 hex bolts × 6, M6 flat washers × 12 and M6 hex nuts × 6.
Skew angle sets the feed rate. With zero skew the billet spins in place and never advances; increase the angle and it screws itself forward faster. Too much and the rolls lose grip and simply polish the surface. This is the same helix logic as a screw thread, applied to a friction drive rather than a mesh.
Barrel-shaped rolls rather than cylindrical ones, because the billet must be gripped hardest at the waist where the piercing point sits. The swelling shape concentrates the squeeze exactly where the cavity needs to open.Энэ алхмын материал:
 Хөнгөн цагаан дугуй баганз2 ширхэг
 Бөмбөлөгт холхивч4 ширхэг
 Фанер хуудас1 хуудас
 Хавтгай угаагуур12 ширхэг
 Зургаан талт эрэг6 ширхэг
Шаардлагатай багаж:
 Төмөр хөрөөний хүрээ ба ир
 Утасгүй өрөм
 Өрмийн үзүүрийн иж бүрдэл
 Гилбэрийн иж бүрдэл
 Хосолсон өнцөг хэмжигчДижитал штангенциркуль 6 инч
 Зургаан талт түлхүүрийн иж бүрдэл
Mount the piercing point
Mount the piercing point
The point does not cut the hole. It shapes a hole that is already opening.
- Turn a bullet-shaped point from hard steel, 20 mm diameter with a long ogive nose.
- Mount it on a stiff bar held from downstream, on the roll axis, at the waist of the rolls.
- Set its tip just past the point where the rolls grip hardest.
- Ensure it is exactly on the billet's axis, checked from two directions.
Position along the axis is the critical setting. Too far forward and the point tries to pierce solid metal, which needs enormous force and tears the bore. Too far back and the cavity has already opened raggedly before the point reaches it, leaving a rough, uneven bore. The point should meet the cavity just as it forms.
Off-centre and the tube comes out with one wall thick and the other thin — the same eccentricity failure as the extrusion mandrel, arrived at by a completely different route.Энэ алхмын материал:
Хөнгөн цагаан дугуй баганз1 ширхэг Хонхор үзүүртэй тогтоох шураг2 ширхэг
Шаардлагатай багаж:
Гилбэрийн иж бүрдэл Ширээний хавчаарУтасгүй өрөмӨрмийн үзүүрийн иж бүрдэлХосолсон өнцөг хэмжигчДижитал штангенциркуль 6 инч
Pierce a billet and measure wall eccentricity
Pierce a billet and measure wall eccentricity
The test of any tube-making process is whether the wall is even.
- Warm a soft aluminium or lead billet and feed it into the rolls.
- Let it screw itself forward over the point and emerge as a hollow shell.
- Cut a ring from each end and one from the middle.
- Measure wall thickness at eight points around each ring.
- Compute eccentricity as the difference between maximum and minimum wall.
Энэ алхмын материал:
Хөнгөн цагаан дугуй баганз1 ширхэгШаардлагатай багаж:
Төмөр хөрөөний хүрээ ба ирДижитал штангенциркуль 6 инчШирээний хавчаарГилбэрийн иж бүрдэлTurning a defect into a process, and history
Turning a defect into a process, and history
Reinhard and Max Mannesmann patented rotary piercing in 1885, working in their father's file factory in Remscheid. The effect they exploited was known as a defect — bars rolled between skewed rolls developed axial cavities and were scrapped. Recognising that a reliable defect is a reliable process is the whole invention, and it turned a scrap problem into the dominant method of making seamless tube.
Why seamless mattered so much. Welded and brazed tube fails at the seam, and in the 1880s the demand for tube that would not fail was rising fast: boilers, hydraulic lines, gun barrels, bicycle frames and later oil wells. A tube with no seam has no preferential failure line, which is worth a great deal when the contents are steam at pressure.
Three routes to a tube, all in this catalogue now. Roll a strip and weld the seam — cheapest, and the seam is the weakness. Extrude around a mandrel — seamless in principle, but the spider legs leave weld lines to knit. Pierce a solid billet — no die, no seam, no weld line at all, but only round sections and only in metals ductile enough to survive the rotation. Each answers the same need under different constraints, which is exactly the comparison this catalogue exists to make possible.
Its honest limits: round cross-sections only; a strong dependence on billet quality, since any inclusion at the centre becomes a defect in the bore; and considerable energy expended rotating and deforming the whole billet rather than just its surface. Tube produced this way is usually sized afterwards by further rolling or drawing.
Материал
7- 1 баглааТүр орлуулагч
- 4 ширхэгТүр орлуулагч
- Түр орлуулагч
- 1 хуудасТүр орлуулагч
- 12 ширхэгТүр орлуулагч
- 6 ширхэгТүр орлуулагч
- 2 ширхэгТүр орлуулагч
Шаардлагатай багаж
9- Түр орлуулагч
- Түр орлуулагч
- Түр орлуулагч
- 1 vendor sell this, none ship to you yetТүр орлуулагч
- Түр орлуулагч
- Түр орлуулагч
- Түр орлуулагч
- Түр орлуулагч
- Түр орлуулагч
Холбоотой загварууд
Эдгээр загварууд мэдлэг хуваалцдаг — арга техник, материал эсвэл зарчим

CC0 Нийтийн домэйн
Энэ загвар CC0 дор гаргагдсан. Та зөвшөөрөл авахгүйгээр хуулах, өөрчлөх, түгээх, ашиглах боломжтой.
Загвараар дамжуулан бүтээгдэхүүн худалдаж авч Бүтээгчийг дэмжээрэй Бүтээгчийн шимтгэл Борлуулагчаар тогтоосон, эсвэл энэ загварын шинэ хувилбар үүсгэж орлогоо хуваахын тулд өөрийн загварт холбоос болгон оруулна уу.