Хамтын ажиллагаа
УРЛАГ
ГОО САЙХАН БА ЭРҮҮЛ МЭНД
ГАРААР ХИЙСЭН
СОЁЛ БА ТҮҮХ
ҮЗВЭР НААДАМ
БАЙГАЛЬ ОРЧИН
ХООЛ БА УНДАА
УРВУУ ИНЖЕНЕРЧЛЭЛ
ШИНЖЛЭХ УХААН
СПОРТ
ТЕХНОЛОГИ
ӨМСДӨГ ХЭРЭГСЭЛ
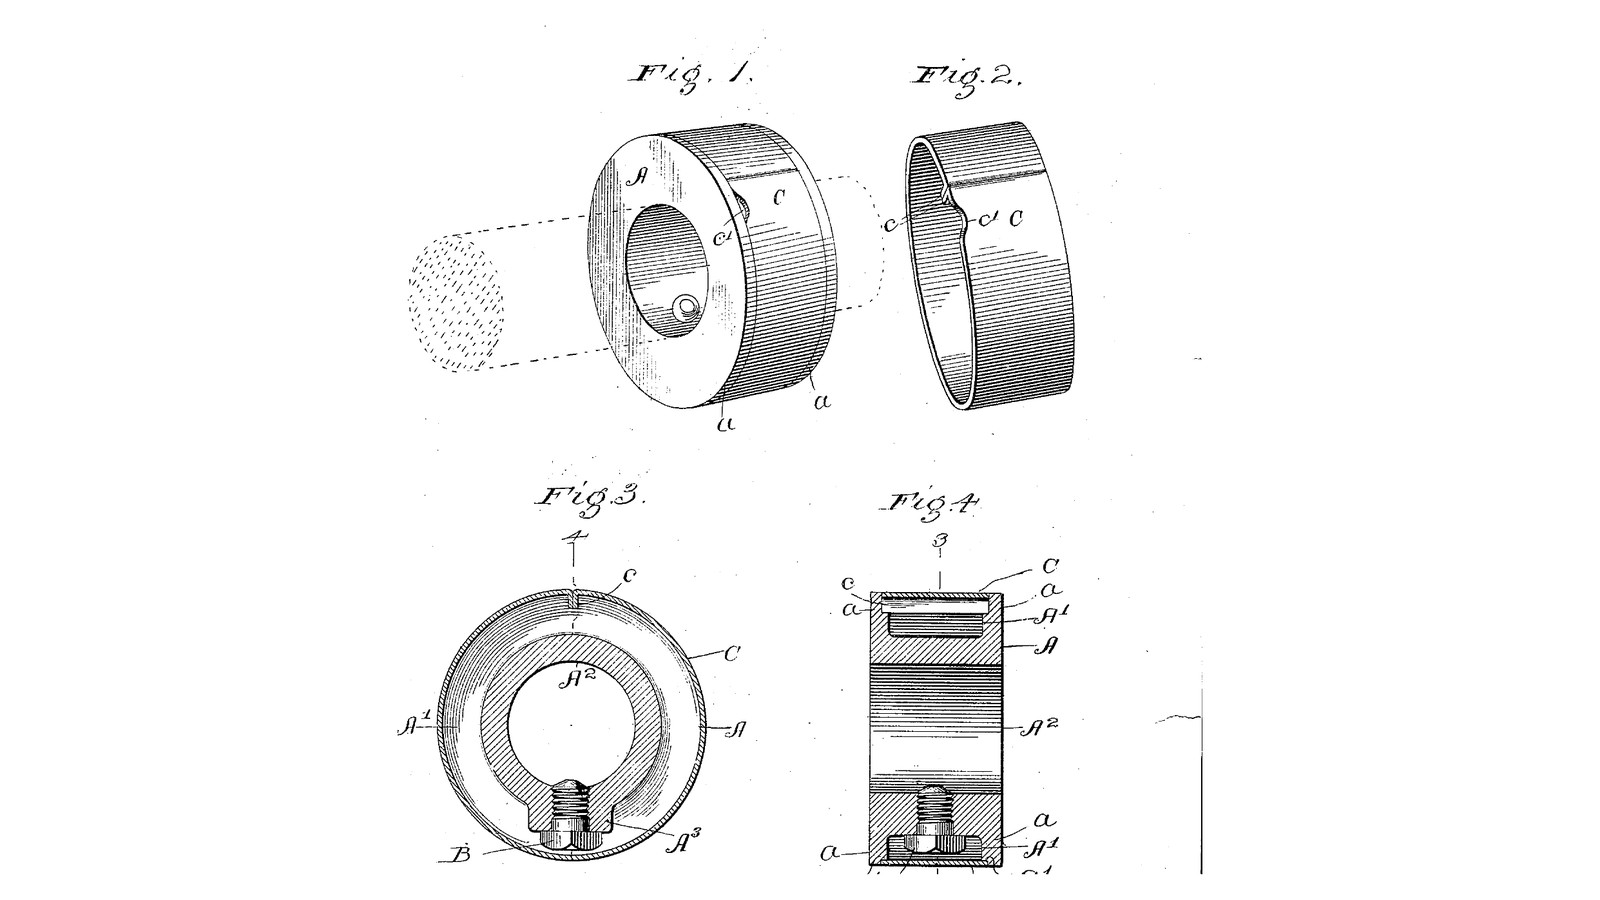


Shielded Set-Screw Shaft Collar: The Screw Head Sunk in a Groove, a Sprung Brass Band Snapped Over It (Rich, 1904)
George H. and Robert C. Rich of Chicago received US 774,199, dated 8 November 1904, for making the ordinary set-screw collar safe. A groove round the collar leaves a hub between two flanges. The set screw goes through the hub and its head sits low in the groove. A band of springy sheet metal snaps over the groove into seats on the flanges, so the outside is smooth and "it is impossible for the clothing of a workman to be caught". Its turned-in ends sit in a notch, and a screwdriver in a nick at the edge springs it off.
The patent gives no sizes; every size here is ours.
Дунд шат
About 4 hours
Зааварчилгаа
1
1
Will the shield clear the screw?
Will the shield clear the screw?
Jupyter дэвтэр ачаалж байна…
2
2
Read US 774,199
Read US 774,199
"The collar is used in the ordinary way on the shaft, and when locked in place the spring-shield is snapped over it, as illustrated, and covers the projecting set-screw and furnishes a smooth outer surface, upon which it is impossible for the clothing of a workman to be caught."
3
3
Turn the body A
Turn the body A
Grip 55 mm round bar in the 3-jaw chuck. Face it, turn it to 52 mm for 30 mm, centre-drill, drill through 15 mm and ream 16 mm. With the parting tool, cut the groove A1 18 mm wide between two 4 mm flanges, down to a 30 mm hub A2. Turn a seat 2 mm wide and 0.6 mm deep on the inner rim of each flange, at the outside, for the shield. Chamfer the bore and part off 26 mm long; face the parted side.
Энэ алхмын материал:
 Зөөлөн ган дугуй саваа1 ширхэг
 Зүсэлтийн тос1 ширхэг
Шаардлагатай багаж:
 Металл эрэг
 Гурван эрүүт токарийн патрон
 Эргүүлэх машины хэрчих хэрэгсэл
 Таслах иртэй хутга (эргүүлэх суурь машин)
 Төвлөх өрөмний багц
 Өрмийн үзүүрийн иж бүрдэл
 Нүх өргөсгөгч
 Дижитал штангенциркуль 6 инч
 Хамгаалалтын нүдний шил
4
4
Tap the hole for the set screw B
Tap the hole for the set screw B
Centre-punch the hub in the middle of the groove. In the machine vice on the drill press, drill through the hub into the bore with 6.8 mm and tap M8 with cutting oil. Opposite the hole, file a notch 3 mm wide through the seat and 4 mm deep in each flange, in line, for the shield's ends. Deburr the bore where the drill came through.
Энэ алхмын материал:
Зүсэлтийн тос1 ширхэгШаардлагатай багаж:
 Төвлүүлэх цүүц
 Суурин өрөм
 Машины хавчаарӨрмийн үзүүрийн иж бүрдэл
 Эрчлээ огтлох иж бүрдэл
 Дотор эрчлээний бариул
 Ширээний хавчаар
 Хавчаарын зөөлөн эрүү
 Зүү гилбэрийн иж бүрдэл
 Ирмэг цэвэрлэх багаж
5
5
Make the spring shield C
Make the spring shield C
Cut a strip of 0.5 mm brass 22 mm wide and 169 mm long with the snips. Bend 4 mm at each end square to the strip with the pliers, the same way. Roll it by hand round the collar itself until the ends meet, the bent ends pointing in. File a small nick in one edge of the band beside the ends, for a screwdriver. Spring it open over the collar: it must snap into the seats with the ends down the notch and stay put.
Энэ алхмын материал:
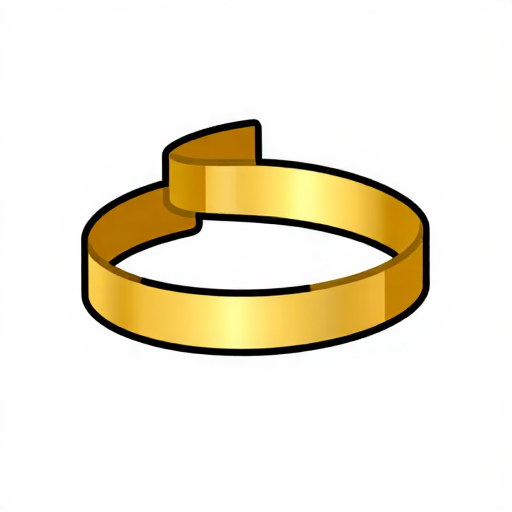 Гуулин тууз1 ширхэг
Шаардлагатай багаж:
 Тугалган цаас огтлох хайч
 Хавтгай хошуут хямсааШирээний хавчаар
 Гилбэрийн иж бүрдэлДижитал штангенциркуль 6 инч
6
6
The collar in 3D
The collar in 3D
FreeCAD model, our sizes: the grooved body on a 16 mm shaft, the M8 hex set screw with its head in the groove, and the 0.5 mm shield in its seats with both ends turned in down the notch.
7
7
Fit it on the shaft
Fit it on the shaft
Run an M8 x 10 hex screw into the hub until it just shows in the bore. Slide the collar along the shaft to its place, turn it so the screw is easy to reach, and tighten the screw onto the shaft with the spanner. Spring the shield over the groove with its ends into the notch. To move the collar, put a screwdriver in the nick, spring the shield off and slacken the screw.
Энэ алхмын материал:
 Зургаан талт болтны цуглуулга1 ширхэг
Шаардлагатай багаж:
 Тохируулгатай түлхүүр
 Хавтгай хошуут халив
8
8
Troubleshooting
Troubleshooting
Shielded collar troubleshooting.
Flow
Loading...
9
9
History and honest limits
History and honest limits
**George H. Rich and Robert C. Rich** of Chicago, Illinois, US 774,199, dated 8 November 1904, filed 14 March 1904. They claimed a collar with a peripheral depression, a set screw whose head lies in it, and a cylindrical shield outside the screw in continuous contact with the collar; the flanges countersunk for it; and a single strip of spring sheet metal with its ends turned in and abutting, in notches in the flanges. Their hub has a boss A3 for the screw; a lathe cannot leave a boss in a turned groove, so our hub is thick all round. They say spring steel or brass; ours is brass. The patent gives no sizes; every size here is ours.
Материал
4- 1 ширхэгТүр орлуулагч
- 1 ширхэгТүр орлуулагч
- 1 ширхэгТүр орлуулагч
- 1 ширхэгТүр орлуулагч
Шаардлагатай багаж
23- Түр орлуулагч
- Түр орлуулагч
- Түр орлуулагч
- Түр орлуулагч
- Түр орлуулагч
- Түр орлуулагч
- Түр орлуулагч
- Түр орлуулагч
- Түр орлуулагч
- Түр орлуулагч
- Түр орлуулагч
- Түр орлуулагч
- Түр орлуулагч
- Түр орлуулагч
- Түр орлуулагч
- Түр орлуулагч
- Түр орлуулагч
- Түр орлуулагч
- Түр орлуулагч
- Түр орлуулагч
- Түр орлуулагч
- Түр орлуулагч
- Түр орлуулагч
Загварын файлууд
1Энэ загвараар хийдэг
Холбоотой загварууд
Эдгээр загварууд мэдлэг хуваалцдаг — арга техник, материал эсвэл зарчим
CC0 Нийтийн домэйн
Энэ загвар CC0 дор гаргагдсан. Та зөвшөөрөл авахгүйгээр хуулах, өөрчлөх, түгээх, ашиглах боломжтой.
Загвараар дамжуулан бүтээгдэхүүн худалдаж авч Бүтээгчийг дэмжээрэй Бүтээгчийн шимтгэл Борлуулагчаар тогтоосон, эсвэл энэ загварын шинэ хувилбар үүсгэж орлогоо хуваахын тулд өөрийн загварт холбоос болгон оруулна уу.