
Carving an Elder Branch Flute — A Whistle from a Hollow Stem
Instrucciones
Select and Cut the Elder Branch
Select and Cut the Elder Branch
Find a straight section of elder (Sambucus nigra) branch, 20-30cm long and 1.5-2.5cm in diameter. Elder is unique among European trees — its branches have a thick, soft pith core surrounded by a thin but hard outer wood wall, creating a natural tube when the pith is removed.
Cut cleanly at both ends with a saw or sharp knife. Choose a section between two nodes (the bumpy growth points where side branches emerge) for the straightest bore. Fresh green wood is easiest to work, but elder also works well when slightly dried.
Elder was considered a sacred tree across Northern Europe — the Elder Mother (Hylde Moer in Danish) was believed to inhabit the tree, and you should ask permission before cutting.
Remove the Pith
Remove the Pith
Push the soft white pith out of the branch using a thin stick or dowel slightly narrower than the bore. Work from one end, pushing steadily. The pith should come out in sections, leaving a clean hollow tube.
For stubborn pith, let the branch dry for a few days — the pith shrinks and separates from the outer wood. You can also soak the branch and push the softened pith out with water pressure.
Clean the bore thoroughly with a cloth wrapped around your pushing stick. The inside wall should be smooth. Bore diameter will be roughly 8-15mm depending on the branch thickness.
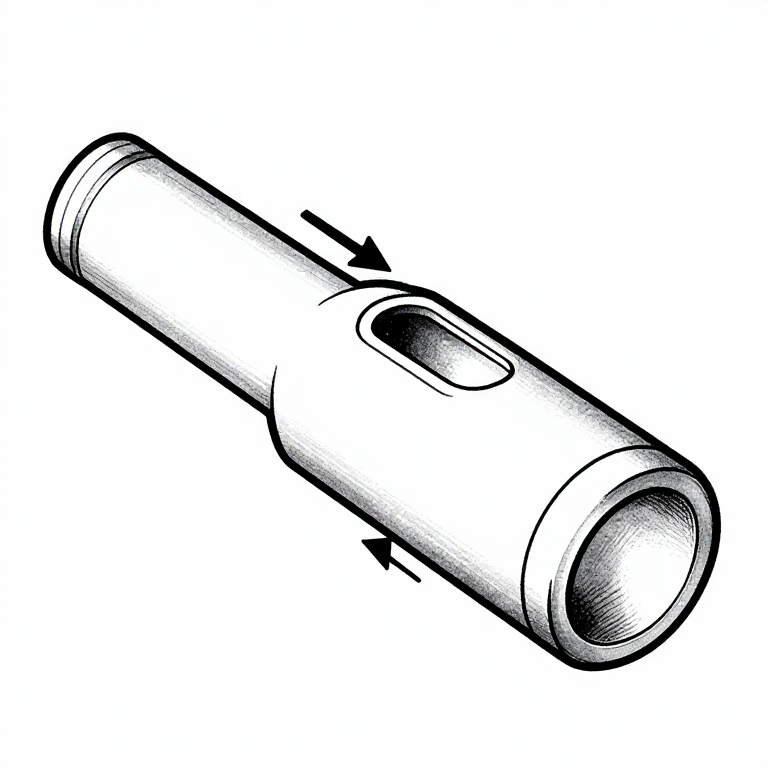
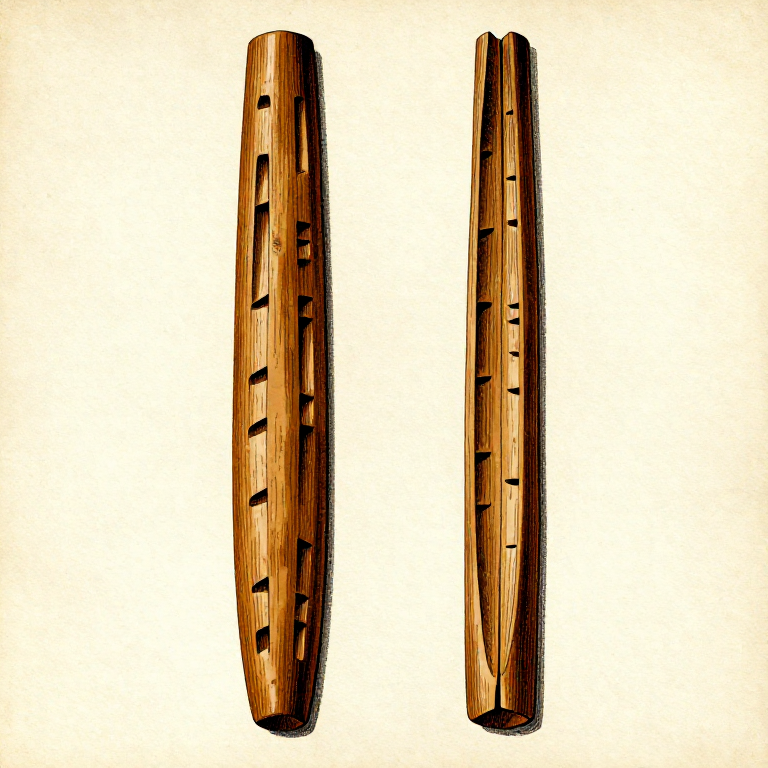
Cut the Mouthpiece and Windway
Cut the Mouthpiece and Windway
This is the critical step that determines whether your flute plays. At one end of the tube, carve a notch (the "window") about 2cm from the end. Cut a rectangular opening roughly 8mm wide and 5mm deep into the top of the tube — this is where the air stream will split and create sound.
Create the windway: carve or whittle a small wooden plug (the "fipple") that fits snugly inside the mouthpiece end. The plug should fill most of the bore but leave a narrow channel (about 2mm high) along the top for air to flow through. This channel directs a thin stream of air across the sharp edge of the window.
The air stream splitting on the window edge is what produces sound — the same principle as a recorder or tin whistle.
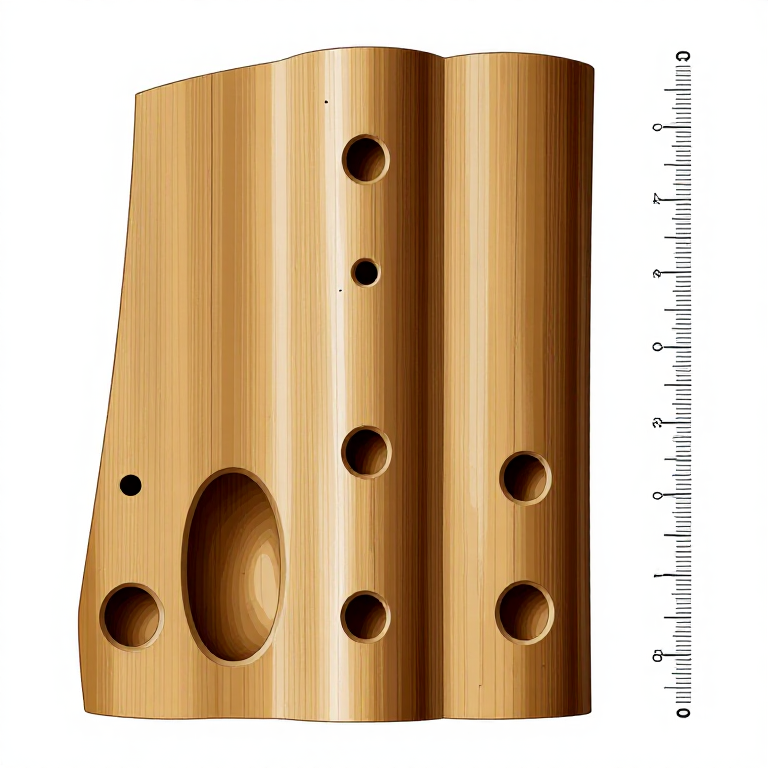
Drill Finger Holes
Drill Finger Holes
Test-blow your flute before adding holes. You should get a clear, steady tone. If the sound is weak or breathy, adjust the fipple plug position and windway height.
Once you have a good base tone, add finger holes. For a simple 4-hole flute: space holes evenly along the top of the tube, starting about 4cm from the window. Drill or carve holes approximately 6-8mm in diameter.
Hole placement determines pitch. Larger holes = sharper pitch. Closer to the window = higher note. Start with small holes and enlarge carefully while testing — you can always make a hole bigger, never smaller.
A pentatonic scale (5 notes) is the most natural and forgiving tuning for a first instrument. Four holes plus the open end gives you five notes.
Tune and Finish
Tune and Finish
Play each note and compare to a reference pitch (another instrument or a tuning app). Enlarge holes gradually with your knife to sharpen flat notes. If a note is too sharp, you can slightly close the hole with a ring of beeswax.
Sand the outside smooth if desired. A light coat of linseed oil protects the wood and gives it a warm appearance. Do not oil the inside of the bore — moisture from playing is sufficient.
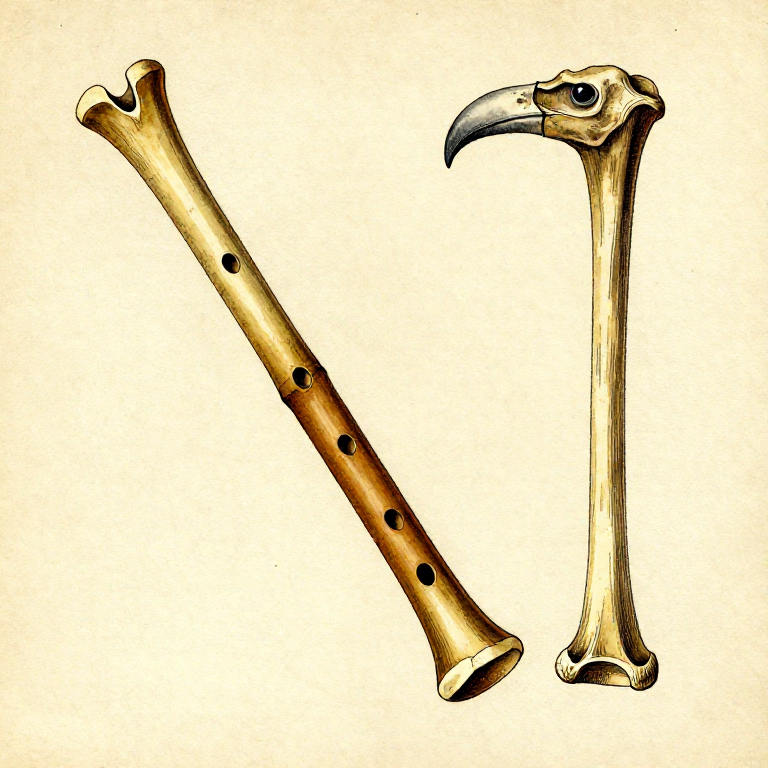
Archaeological finds of elder-wood flutes date back thousands of years. The Divje Babe flute (a Neanderthal cave bear bone flute from 60,000 years ago) uses the same acoustic principle. Viking-era bone and wood flutes have been found across Scandinavia and the British Isles.
Related blueprints
Other builds that share materials, tools, or techniques with this one.

CC0 Dominio público
Este Blueprint se publica bajo CC0. Eres libre de copiar, modificar, distribuir y usar este trabajo para cualquier propósito, sin pedir permiso.
Apoya al Maker comprando productos a través de su Blueprint, donde gana una Comisión del Maker establecida por los vendedores, o crea una nueva iteración de este Blueprint e inclúyela como conexión en tu propio Blueprint para compartir ingresos.