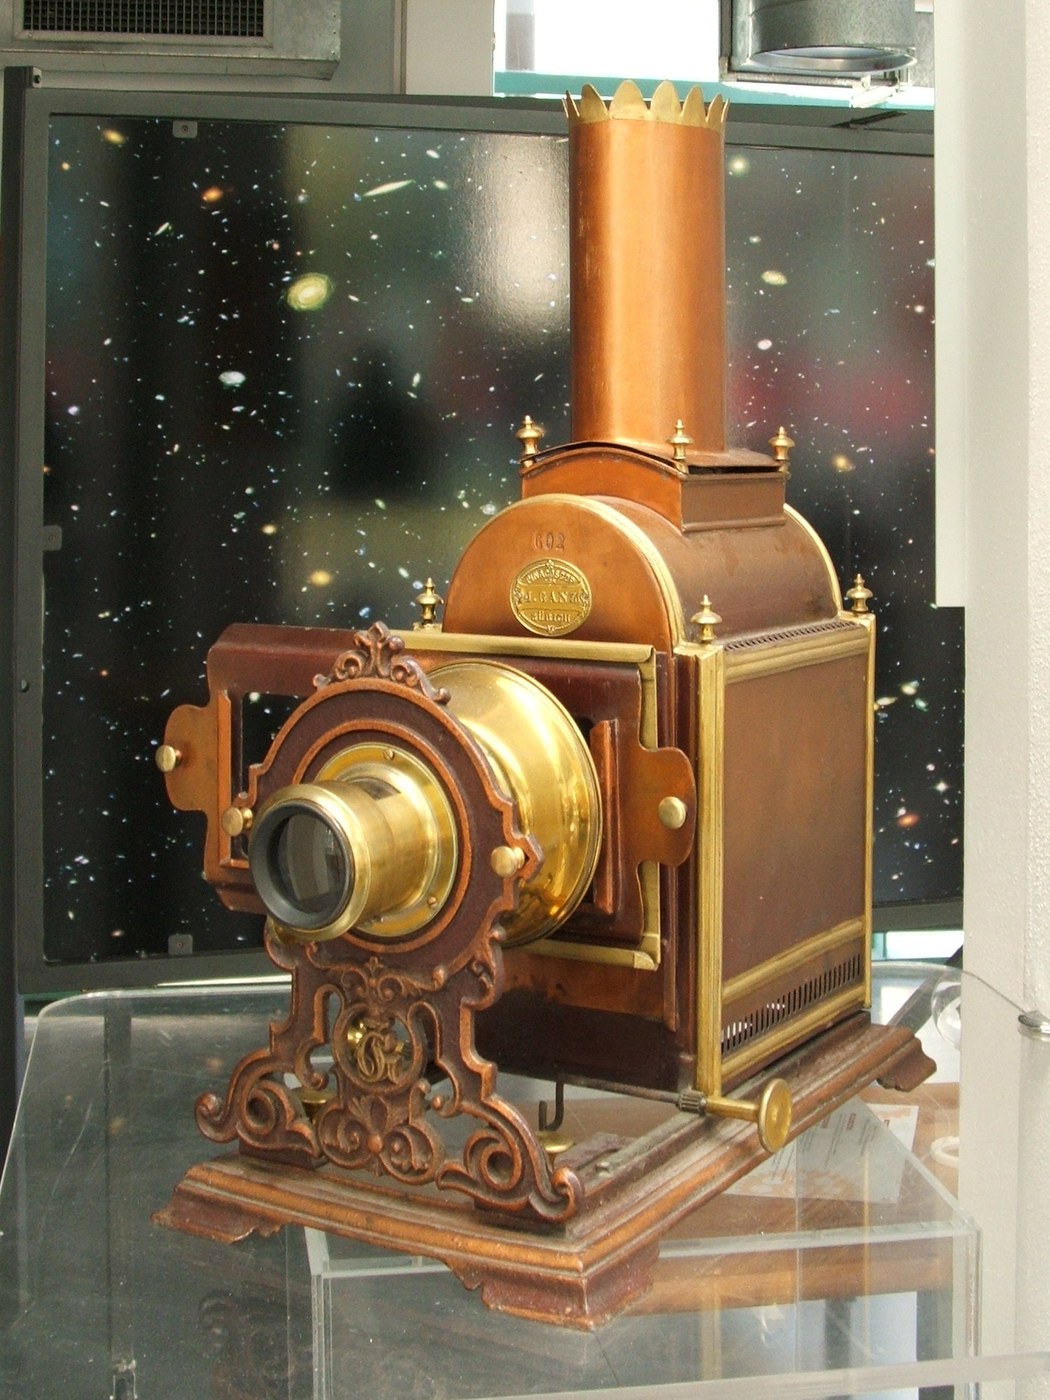


Magic Lantern
A magic lantern is a box with a lamp in it, a mirror behind the lamp, a condenser lens in front, a painted glass slide, and a projection lens. That is the entire machine, and it is the direct ancestor of every projector and every cinema.
Christiaan Huygens described and drew the working principles in 1659 and had a usable lantern that November. Within a generation travelling showmen were carrying them across Europe, projecting biblical scenes, ghosts and scientific demonstrations onto walls and sheets — and, crucially, Huygens had already demonstrated the illusion of movement using glass slides.
The physics worth chasing here is the division of labour between the two lenses. The condenser does not form the image; it gathers light. The projection lens does not gather light; it forms the image. Build it and remove one at a time, and you will see exactly what each is for — which is faster than reading about it.
Instrucciones
Build the light-tight box
Build the light-tight box
Take a box roughly 250 mm long and line the inside matt black. Cut a 60 mm round port in one end for the lens and a chimney hole in the top.
Materiales para este paso:
 Caja de cartón ondulado1 pieza
 Pintura negra100 ml
Cut the chimney
Cut the chimney
Cut a 50 mm vent in the top above the lamp position, with a baffle over it so no light escapes upward. A sealed box with a flame in it is a fire, not a lantern.
Mount the lamp
Mount the lamp
Stand a spirit lamp on a non-combustible tile at the rear third of the box. Keep the flame at least 60 mm from any cardboard surface.
Herramientas necesarias:
 Mechero de alcohol (lámpara de espíritu)
Set the concave mirror behind the lamp
Set the concave mirror behind the lamp
Mount a concave mirror behind the flame, facing forward. Light heading backwards is otherwise wasted — the mirror turns it round and roughly doubles the usable output.
Herramientas necesarias:
 Espejo cóncavo
Place the condenser lens
Place the condenser lens
Fit a large convex lens between lamp and slide slot, close to the lamp. This is the condenser: its job is to collect the diverging light and push it evenly through the slide, not to make a picture.
Herramientas necesarias:
 Lente convexa
Cut the slide slot
Cut the slide slot
Cut a vertical slot just in front of the condenser, sized for your glass slides. It should hold a slide upright with a little friction so it stays where you put it.
Fit the projection lens
Fit the projection lens
Mount a second convex lens in a sliding tube at the front port. This one forms the image, and sliding it in and out is the focus control.
Herramientas necesarias:
Lente convexaPaint a slide
Paint a slide
Paint a simple bold design on a glass slide with translucent colour. Fine detail disappears at projection scale — strong shapes and clear colour read best.
Materiales para este paso:
 Portaobjetos de vidrio4 piezas
 Juego de pigmentos minerales en polvo1 juego
Load the slide upside down
Load the slide upside down
Put the slide in inverted. A single projection lens flips the image, exactly as in the camera obscura — so the slide goes in upside down to land the right way up.
Focus in a dark room
Focus in a dark room
Darken the room, light the lamp, and slide the projection lens until the image sharpens on the wall. Moving the lantern further back gives a bigger but dimmer picture.
Remove the condenser and observe
Remove the condenser and observe
Take the condenser out and look. The image survives but goes dim and unevenly lit — bright centre, dark corners. That is proof the condenser's job is light distribution, not image formation.
Measure magnification against distance
Measure magnification against distance
Measure image height at 1 m, 2 m and 3 m from the wall, refocusing each time. Plot height against distance — the relationship is linear, and the slope is set by your projection lens.
Herramientas necesarias:
 Regla
ReglaHistory & Context
History & Context
Huygens, 1659. The magic lantern was first described by the Dutch physicist Christiaan Huygens in 1659, and he had a working lantern by that November. He drew the working principles and — notably — already demonstrated the illusion of movement using glass slides. Athanasius Kircher had described a projection system close to a magic lantern in 1646, and credit is genuinely debated, but Huygens is generally regarded as the most probable creator of the device as such.
Two lenses, two jobs. This is the idea the build teaches. The condenser sits near the lamp and gathers widely-diverging light into a beam that passes evenly through the slide — it improves brightness and uniformity and contributes nothing to sharpness. The projection lens takes the illuminated slide and forms a real, magnified, inverted image on the wall. Every projector since, including the one in a cinema, keeps this division.
Why it inverts. Same reason as the camera obscura: rays cross as they pass through the lens, so top maps to bottom. Loading the slide upside down is the fix, and every lantern operator did it automatically.
What it was used for. From the start the lantern served entertainment, education, research and children's play. Travelling showmen carried them across Europe projecting biblical scenes, ghost stories and scientific demonstrations. The eighteenth-century phantasmagoria shows used hidden lanterns on rails, moving toward the screen to make projected ghosts appear to rush at the audience — the first special effect built on the fact that image size scales with distance, which is the thing you measure in step 12.
The line to cinema. Add a light source bright enough, a mechanism to change slides fast, and film in place of glass, and you have a film projector. The optical layout — lamp, reflector, condenser, image plane, projection lens — did not need to change. When a modern projector is described as having a "lamp house" and a "lens", those are magic lantern words.
Materiales
4- 1 piezaMarcador de posición
- 100 mlMarcador de posición
- 4 piezasMarcador de posición
- Marcador de posición
Herramientas requeridas
4- Marcador de posición
- Marcador de posición
- Marcador de posición
- Marcador de posición
Este plano hace
CC0 Dominio público
Este Blueprint se publica bajo CC0. Eres libre de copiar, modificar, distribuir y usar este trabajo para cualquier propósito, sin pedir permiso.
Apoya al Maker comprando productos a través de su Blueprint, donde gana una Comisión del Maker establecida por los vendedores, o crea una nueva iteración de este Blueprint e inclúyela como conexión en tu propio Blueprint para compartir ingresos.