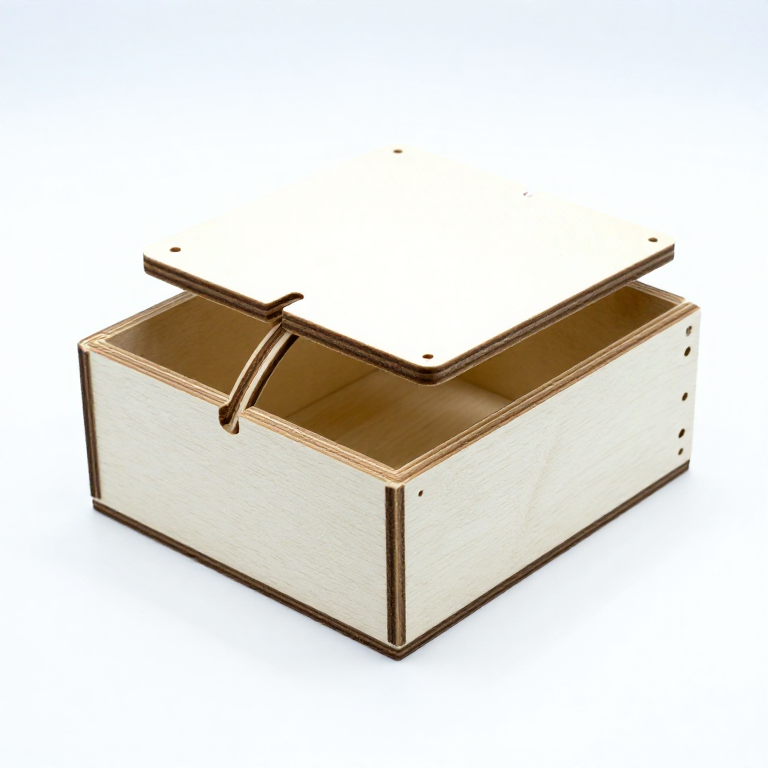


Laser-Cutting a Living-Hinge Wooden Box — Flexible Kerf Pattern
Instrucciones
Design the Box Layout in Vector Software
Design the Box Layout in Vector Software
Design the box as a flat pattern that unfolds from the 3D shape. The layout consists of: a rectangular base, four side walls connected to the base with finger joints (interlocking tab-and-slot edges), and a lid panel connected to one wall via the living hinge section. Finger joints are rectangular tabs cut into one edge that mate with corresponding slots in the adjacent edge, creating a strong mechanical interlock when glued. Size the tabs to be the same width as the material thickness (3mm for 3mm plywood). The critical element is the living hinge: a rectangular area between the lid and wall filled with a pattern of closely spaced parallel cuts. Set all cut lines as vector paths in red (the standard colour code for cutting on most laser systems) and any engraving as a separate colour.
Design the Living Hinge Pattern
Design the Living Hinge Pattern
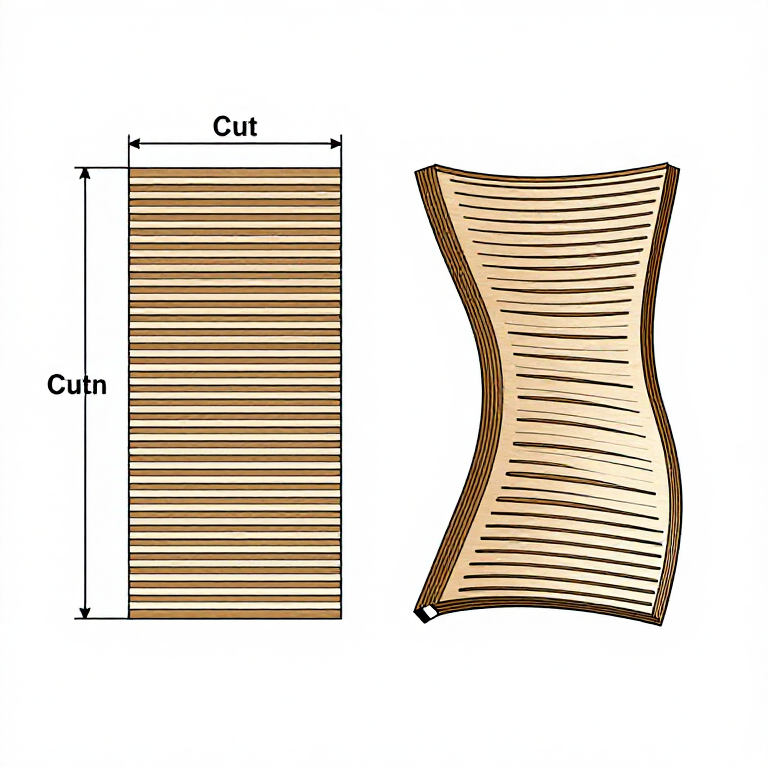
The living hinge is a grid of alternating parallel cuts (kerfs) that create a series of thin wood bridges that flex individually, allowing the rigid panel to bend. The most common pattern uses straight parallel cuts offset in alternating rows — each cut in row A sits between two cuts in row B, like a brick wall pattern. Cut length, spacing between cuts, and row spacing determine flexibility: longer cuts with smaller gaps produce a more flexible hinge. For 3mm birch plywood, cuts of 15-20mm length with 1mm gaps between cut ends and 3-4mm row spacing produce a hinge that bends smoothly to 90 degrees without breaking. Test with a small sample piece first — over-dense patterns snap the wood, while sparse patterns are too stiff to bend.
Laser-Cut the Parts
Laser-Cut the Parts
Place the plywood sheet on the laser bed, focus the laser to the material surface, and send the cut file. Set power and speed for a clean cut through 3mm plywood — this varies by laser wattage (a 40W CO2 laser typically cuts at 10-15mm/s at full power). Run any engraving operations first (they are surface-only and do not move the material), then the interior cuts (finger joint slots and living hinge), and finally the perimeter outline cuts last (once the perimeter is cut, the piece is free and could shift, misaligning subsequent cuts). The living hinge area generates significant kerf debris — ensure adequate exhaust ventilation to prevent fire. After cutting, remove the sheet and pop out all parts and waste pieces.
Materiales para este paso:
 Tablero contrachapado1 sheet, approximately 30x60cm pieza
 Cola de carpinterosmall amount pieza
Herramientas necesarias:
 Cortadora láser
 Paquete de complementos de FreeCAD
Flex the Hinge and Assemble the Box
Flex the Hinge and Assemble the Box
Before assembling, carefully flex the living hinge section by bending it slowly and repeatedly. The first few bends break any remaining wood fibres that bridge the kerf cuts and relax the material. Bend gradually — forcing a stiff hinge to full flex on the first try can crack it. After 5-10 gentle flexing cycles, the hinge should move smoothly. Assemble the box by interlocking the finger joints: apply a small amount of wood glue to each tab and press the walls onto the base. Use tape or clamps to hold the joints tight while the glue dries. The living hinge section should now allow the lid to open and close smoothly on its integral wooden hinge.
Materiales para este paso:
Tablero contrachapado1 sheet, approximately 30x60cm piezaCola de carpinterosmall amount piezaFinish and Refine
Finish and Refine
Lightly sand all edges to remove char marks from laser cutting — the laser carbonizes the cut edges, leaving a dark brown to black edge that some makers prefer as a design feature and others prefer to sand away. Apply a finish if desired: mineral oil brings out the birch grain, or a light coat of polyurethane provides more durable protection. The living hinge is a mechanical element — it fatigues with repeated use. Birch plywood hinges typically survive several thousand cycles before the bridges begin to crack. For a longer-lasting hinge, apply a thin coat of flexible wood finish or mineral oil to the hinge area, which lubricates the fibres and delays fatigue. The completed box demonstrates a core principle of digital fabrication: complex three-dimensional objects can be produced from flat sheet material using precise two-dimensional cutting patterns.
Materiales
2- 1 sheet, approximately 30x60cm piezaMarcador de posición
- small amount piezaMarcador de posición
Herramientas requeridas
3- Marcador de posición
- Marcador de posición
- Marcador de posición
Este plano hace
CC0 Dominio público
Este Blueprint se publica bajo CC0. Eres libre de copiar, modificar, distribuir y usar este trabajo para cualquier propósito, sin pedir permiso.
Apoya al Maker comprando productos a través de su Blueprint, donde gana una Comisión del Maker establecida por los vendedores, o crea una nueva iteración de este Blueprint e inclúyela como conexión en tu propio Blueprint para compartir ingresos.