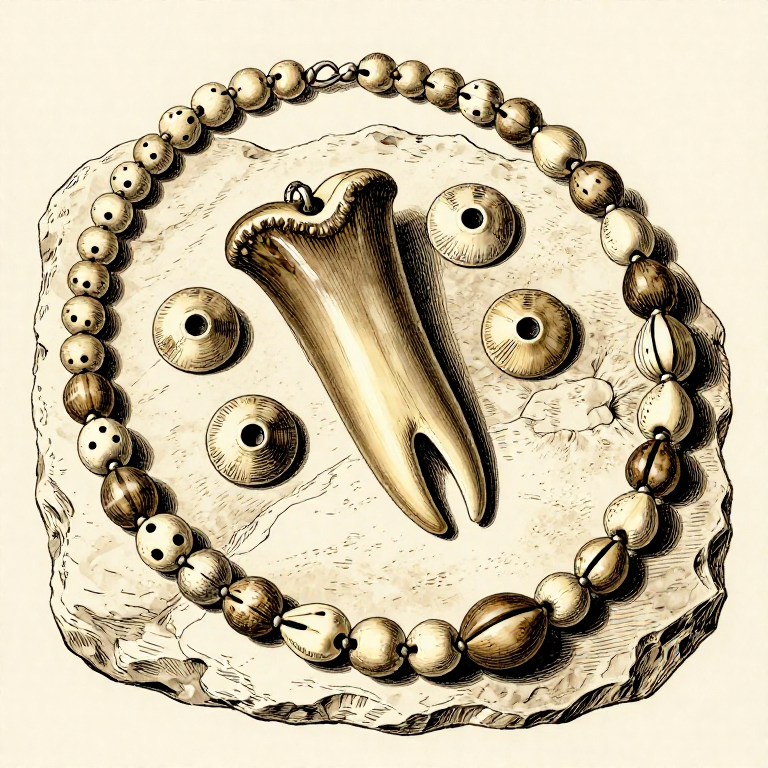
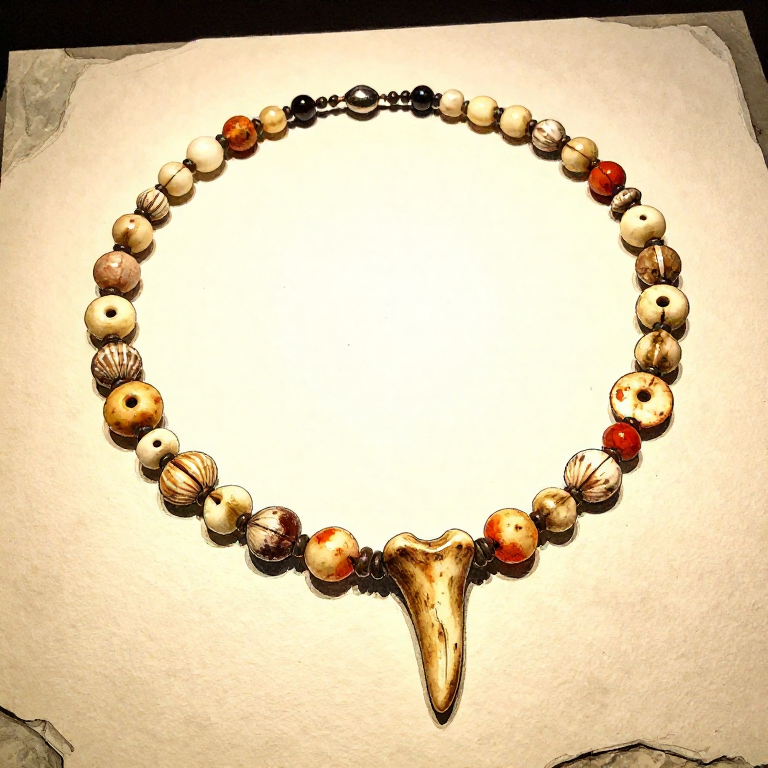
Crafting Shell and Bone Jewelry — Beads, Pendants, and Necklaces
Instrucciones
Select and Clean the Materials
Select and Clean the Materials
Collect small shells from beaches, riverbeds, or middens — Nassarius shells (small sea snails about 1 cm long) were among the most widely used bead materials in prehistory. Also collect small, dense bone fragments and animal teeth (canine teeth from foxes, deer, or bears make striking pendants). Clean all materials by soaking in water and scrubbing off any organic residue. Select shells and bones that are intact, without cracks — cracked pieces will shatter during drilling. Sort by size for a uniform-looking necklace, or deliberately mix sizes for a varied, naturalistic aesthetic.
Materiales para este paso:
 Cordage50-80 cm cm
Herramientas necesarias:
 Sandstone (Abrasive)
 Flat Stone (Trowel / Shaping Tool)
Drill Suspension Holes
Drill Suspension Holes
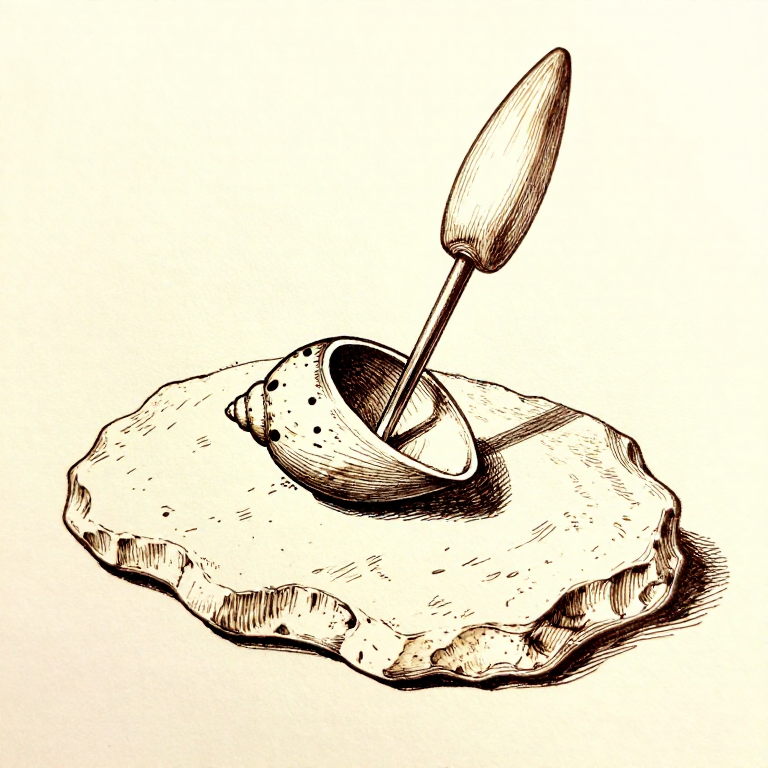
Each bead or pendant needs a hole for threading onto cordage. Place the shell or bone piece on a flat stone as a drilling platform. Using a flint burin or a small, sharp flint point, rotate the drill between your palms while pressing down on the shell. Drill slowly — too much pressure cracks delicate shells. For thin shells like Nassarius, drilling from one side is sufficient. For thicker bone beads or teeth, drill from both sides to meet in the middle, preventing blow-out chips. The hole needs to be just large enough for your cordage to pass through — about 1-2 mm diameter.
Make Bone Disc Beads
Make Bone Disc Beads
For disc-shaped bone beads, cut thin cross-sections (2-3 mm thick) from a dense bone shaft using a flint saw. Grind each disc smooth on sandstone, rounding the edges and flattening both faces. Drill a centre hole through each disc. Bone disc beads were mass-produced at many prehistoric sites — at Sunghir in Russia, a burial from around 30,000 years ago contained over 3,000 ivory disc beads sewn onto clothing. For a contrasting effect, some beads can be coloured by rubbing with red ochre pigment, which embeds in the porous bone surface.
String the Necklace
String the Necklace
Thread the beads and pendants onto a length of thin cordage — sinew or fine plant fiber twisted cord both work well. Sinew is particularly good because individual fibers can be split very fine. Arrange the beads in a deliberate pattern — prehistoric necklaces often alternate materials (shell, bone, shell, bone) or graduate from small beads at the back to larger pendants at the front. To keep beads spaced evenly, tie a small overhand knot between each bead. For the closure, either tie the ends together with a simple knot or create a loop-and-toggle clasp using a small bone toggle.
Finishing and Significance
Finishing and Significance
Polish the finished necklace by rubbing each bead gently with a soft piece of leather. Bone beads develop a warm lustre from the oils in leather and from skin contact over time. For added colour, rub ochre pigment into the bead surfaces — red ochre was extensively used on prehistoric ornaments, and its presence on beads is one of the key indicators of symbolic behaviour in the archaeological record. Shell beads found far from the sea indicate trade networks — Nassarius shells have been found hundreds of kilometres inland, demonstrating that even in deep prehistory, ornamental objects were valued enough to trade over great distances.
Materiales
4Herramientas requeridas
3- Marcador de posición
- Marcador de posición
- Marcador de posición
Related blueprints
Other builds that share materials, tools, or techniques with this one.
CC0 Dominio público
Este Blueprint se publica bajo CC0. Eres libre de copiar, modificar, distribuir y usar este trabajo para cualquier propósito, sin pedir permiso.
Apoya al Maker comprando productos a través de su Blueprint, donde gana una Comisión del Maker establecida por los vendedores, o crea una nueva iteración de este Blueprint e inclúyela como conexión en tu propio Blueprint para compartir ingresos.