Pouring a Wax Writing Tablet (Pugillaris) — Roman Erasable Notebook
Instrucciones
Carve the Recessed Writing Area
Carve the Recessed Writing Area
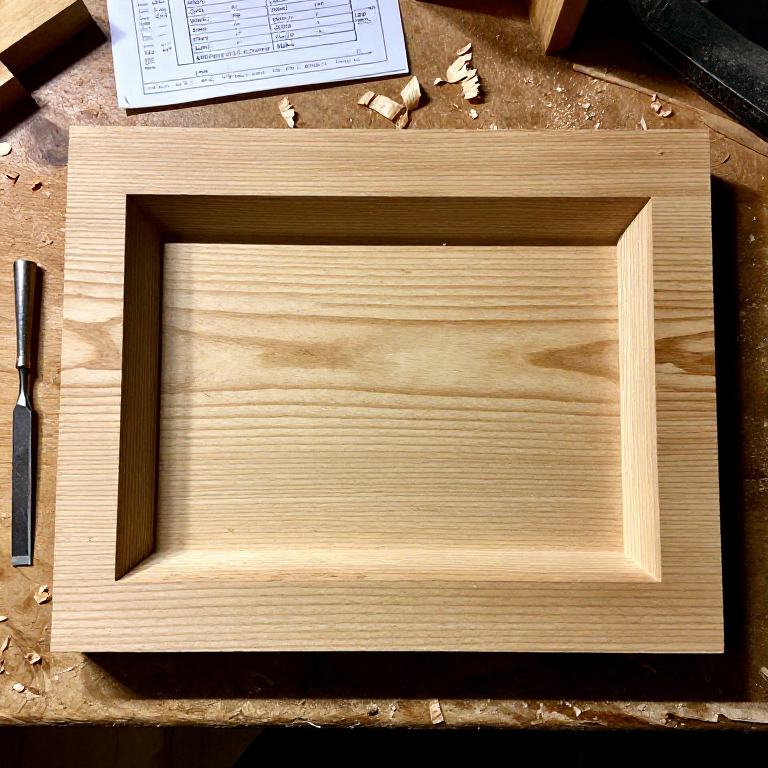
Mark a border approximately 10 to 15 mm wide around the perimeter of the wooden board — this raised frame protects the wax surface when tablets are stacked or bound together. Using a chisel and mallet, carefully excavate the interior area to a depth of approximately 3 to 4 mm, creating a shallow, flat-bottomed tray. Work systematically across the surface, keeping the depth uniform. A router plane is ideal for achieving a consistent depth, but a flat chisel worked carefully will also produce good results. Smooth the bottom of the recess with sandpaper or a cabinet scraper so the wax will adhere evenly. Round over the inner edges of the frame slightly to prevent the wax from cracking away at sharp corners. Sand the exterior surfaces smooth and round the board edges for comfortable handling.
Materiales para este paso:
 Beeswax (Optional)100-150 grams pieza
Herramientas necesarias:
 Iron Chisel
 Gouge
Gouge Sandpaper
Prepare the Wax Mixture
Prepare the Wax Mixture
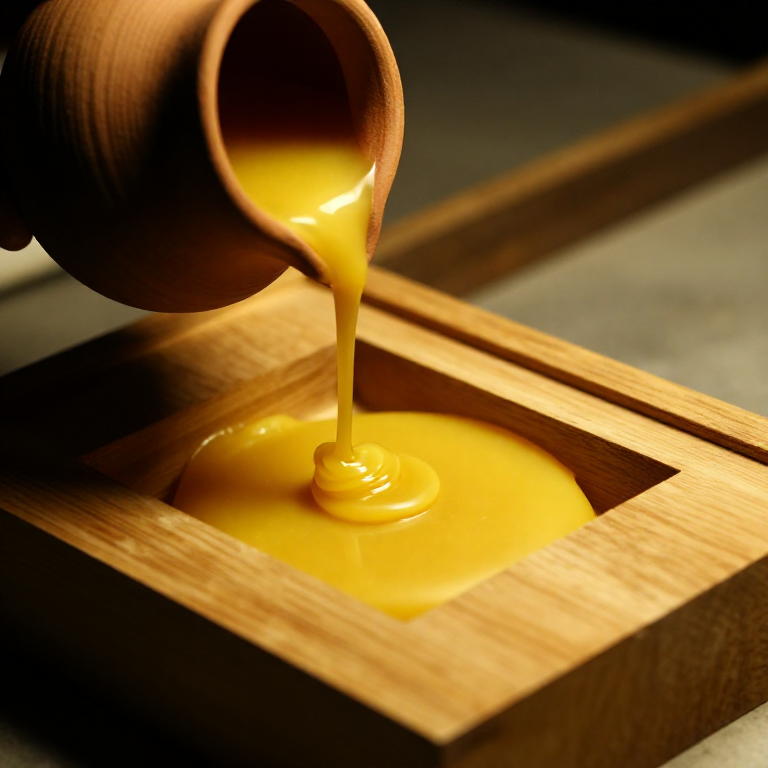
Melt beeswax in a small pot using a double-boiler method (a pot of wax set inside a larger pot of simmering water) to prevent overheating — beeswax melts at approximately 62-65 degrees Celsius and should not be heated above 85 degrees Celsius, as it will discolour and become brittle. Once melted, stir in a small amount of carbon black pigment or lamp soot to darken the wax — this provides contrast that makes the incised writing easier to read, as the stylus cuts through the dark surface to reveal the pale wood or lighter wax beneath. Add a small quantity of pine resin or tallow (approximately 10 percent by weight) to harden the mixture slightly, making it more resistant to accidental smudging in warm weather while remaining soft enough to write on with a stylus at room temperature.
Pour the Wax into the Recess
Pour the Wax into the Recess
Warm the wooden board slightly (place it near a fire or in a warm oven at about 40 degrees Celsius) so the wax bonds well to the wood surface. Pour the melted, pigmented wax slowly into the carved recess until it fills the cavity to just below the level of the surrounding frame — leave approximately 0.5 to 1 mm below the frame edge so the frame still protects the wax surface. Tilt the board gently to ensure the wax flows into all corners. If air bubbles form, pop them with a pin while the wax is still liquid. Allow the wax to cool and solidify completely at room temperature — do not refrigerate, as rapid cooling can cause the wax to crack or pull away from the wood edges. The surface should set perfectly flat and smooth.
Smooth the Wax Surface
Smooth the Wax Surface
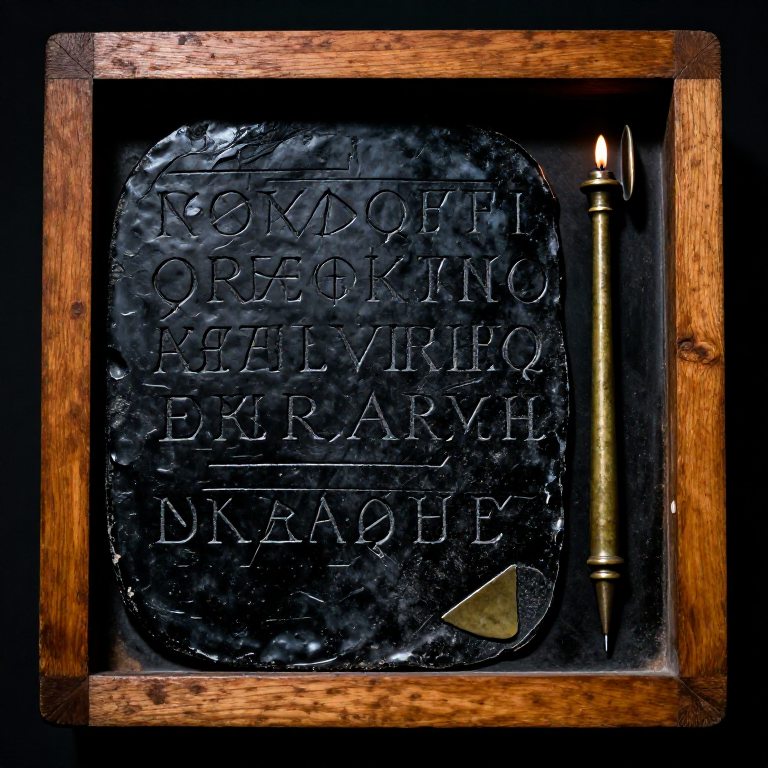
Once the wax has fully solidified (after at least one hour), inspect the surface for any unevenness, bubbles, or shrinkage depressions. If the surface is not perfectly flat, warm a flat metal tool (the flat end of a stylus or a wide knife blade) gently over a candle flame and draw it across the wax surface to remelt and level the top layer. This technique was used by Roman scribes to erase and refresh the writing surface. The wax should present a smooth, dark, uniform surface ready for writing. If you are making a diptych (two tablets that fold together), drill small holes through the frame edges of both boards on one long side and thread them together with cord or leather thongs to create a hinged pair that closes wax-face to wax-face, protecting both writing surfaces.
Make a Stylus and Test the Tablet
Make a Stylus and Test the Tablet
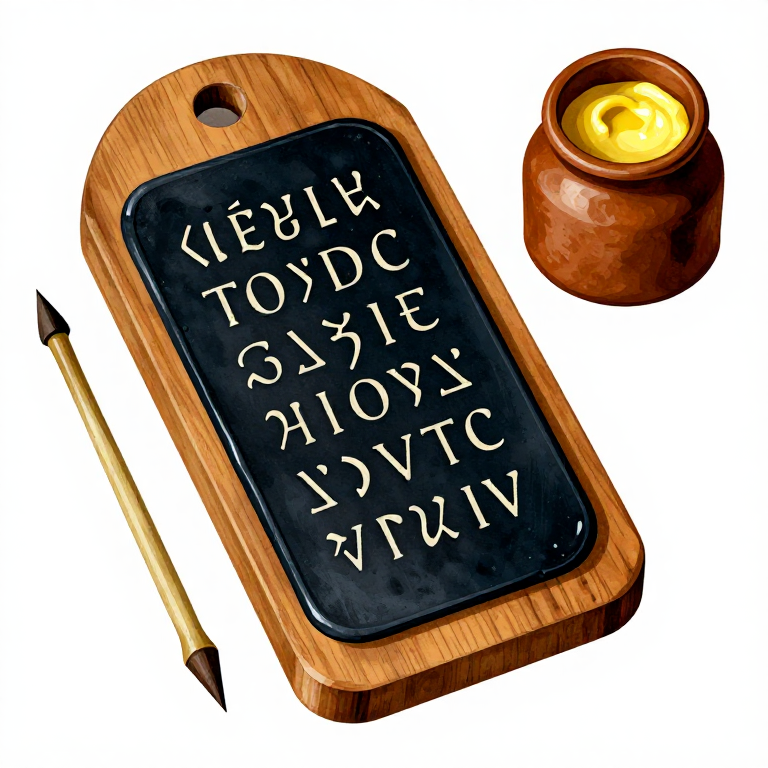
A Roman stylus (stilus) can be fashioned from bronze wire, iron rod, or bone. One end should be sharpened to a fine point for writing, and the other end should be flattened into a paddle or spatula shape for erasing by smoothing the wax. A bronze wire approximately 3 mm in diameter and 12 to 15 cm long works well — file one end to a point and hammer the other flat. Test the tablet by incising letters into the wax — the point should cut cleanly through the dark surface layer without gouging the wood beneath. Writing should be clearly legible as pale lines against the dark wax. To erase, press the flat end of the stylus against the inscribed area and draw it across the surface, smoothing the wax back to a flat state. Thousands of Roman wax tablets survive, including the Vindolanda tablets from Hadrian's Wall and legal documents from Herculaneum, attesting to the ubiquity of this writing technology.
Materiales
4- 1 piece piezaMarcador de posición
- small amount piezaMarcador de posición
Related blueprints
Other builds that share materials, tools, or techniques with this one.

CC0 Dominio público
Este Blueprint se publica bajo CC0. Eres libre de copiar, modificar, distribuir y usar este trabajo para cualquier propósito, sin pedir permiso.
Apoya al Maker comprando productos a través de su Blueprint, donde gana una Comisión del Maker establecida por los vendedores, o crea una nueva iteración de este Blueprint e inclúyela como conexión en tu propio Blueprint para compartir ingresos.