ARTE
BELLEZA Y BIENESTAR
ARTESANÍA
CULTURA E HISTORIA
ENTRETENIMIENTO
MEDIO AMBIENTE
COMIDA Y BEBIDAS
INGENIERÍA INVERSA
CIENCIAS
DEPORTES
TECNOLOGÍA
TECNOLOGÍA VESTIBLE
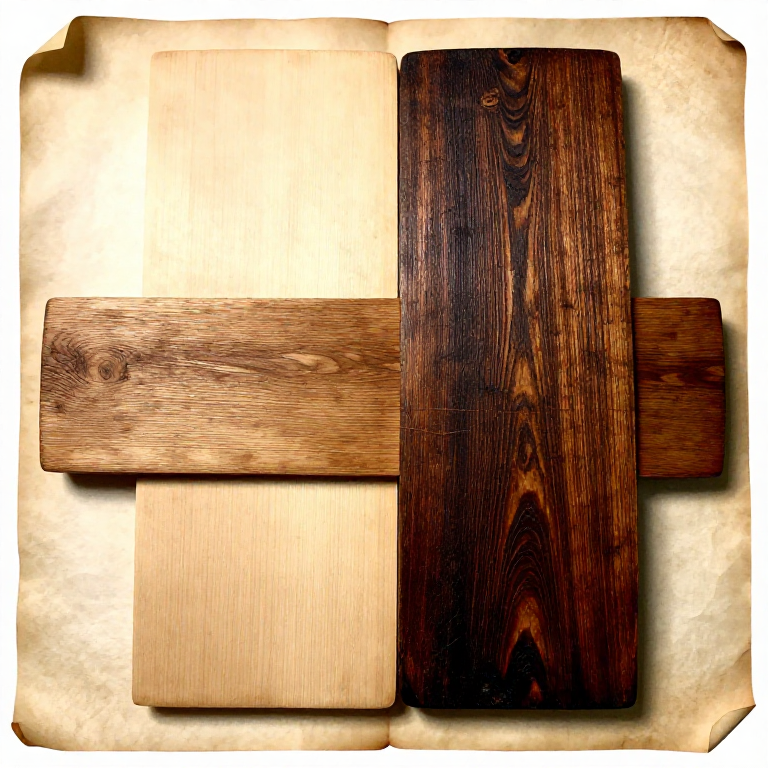


Why Finish Wood At All: Three Jobs, and They Pull Against Each Other
A finish does three things: it slows moisture moving in and out of the wood, it protects the surface from wear and dirt, and it changes how the wood looks.
No finish does all three well. A hard film protects against wear and is difficult to repair; an oil is trivially repairable and offers almost no wear resistance; wax looks and feels wonderful and protects against very little. Choosing is a matter of deciding which of the three the piece actually needs.
160 published blueprints on Youblob use a finish and every published technique is a specific historical one. This batch is the general practice underneath them.
Principiante
2 hours
Instrucciones
1
1
Moisture: a finish slows it, nothing stops it
Moisture: a finish slows it, nothing stops it
Wood takes up and gives off water vapour with the seasons, and it swells and shrinks across the grain as it does. A finish slows that exchange; it does not prevent it, and no finish ever has.
Which means a finish reduces how FAST wood moves, not how far it moves eventually. A tabletop finished on one side only will cup, because one face responds to a humidity change faster than the other. Finish both faces of anything wide, including the underside nobody sees.
The design has to allow for movement regardless — that is what a breadboard end and a slotted fixing are for. A finish buys time and evens out short-term swings; it is not a substitute for building in room to move.
Materiales para este paso:
 Tabla de madera dura1 pieza
Herramientas necesarias:
 Lupa de relojero
2
2
Protection: in the film, or in the wood
Protection: in the film, or in the wood
FILM finishes — varnish, polyurethane, lacquer, shellac — build a layer that sits on the surface. The layer takes the wear, so protection is good, but damage shows as a scratch in the film and repair usually means recoating an entire surface.
PENETRATING finishes — oils — soak into the fibres and harden there. There is almost no film, so there is very little wear resistance, but there is also nothing to scratch through: damage is repaired by wiping on more oil, blending invisibly.
That is the real trade, and it is about repairability as much as toughness. A kitchen table in daily use is better served by a finish that can be touched up in five minutes than by a tougher one that must be stripped.
Herramientas necesarias:
 Tela de algodón
 Brocha de espuma
 Poliuretano - al aceite
 Aceite danés - natural
3
3
Appearance: what a finish does to the colour
Appearance: what a finish does to the colour
Almost every finish darkens wood and deepens its figure — the 'wet look' you see when you wipe a board with solvent. Wiping the bare surface with mineral spirits shows you very closely what an oil or oil-based varnish will look like, and it evaporates away with no commitment.
Do that BEFORE deciding. Some timbers change dramatically, and a finish chosen from a photograph on a tin is a guess.
Water-based finishes stay much clearer and leave pale timbers pale, which is sometimes exactly what is wanted and sometimes makes a warm timber look lifeless. Oil-based ones also continue to yellow for years, which matters on light woods and not at all on walnut.
Materiales para este paso:
Tabla de madera dura2 piezasHerramientas necesarias:
Tela de algodón Guantes de nitrilo
 Aguarrás mineral
4
4
Always test on an offcut of the same board
Always test on an offcut of the same board
Keep an offcut from the actual timber, prepare it exactly as you prepared the work — same grit, same sequence — and try the whole finishing schedule on it.
The same board matters. Sapwood and heartwood take finish differently, one board of oak differs from another, and the timber the tin's photograph was shot on was none of them.
Label the sample with the products and the number of coats and keep it. A drawer of labelled samples is the most useful reference in finishing, because it answers in one second the question every project starts with — and it is a physical answer rather than a remembered one.
Materiales para este paso:
Tabla de madera dura2 piezasHerramientas necesarias:
Tela de algodón Surtido de papel de lijaPoliuretano - al aceiteAceite danés - natural
Herramientas requeridas
8- Marcador de posición
- Marcador de posición
- Marcador de posición
- Marcador de posición
- Marcador de posición
- Marcador de posición
- Marcador de posición
- Marcador de posición
Blueprints relacionados
Estos blueprints comparten conocimiento — técnicas, materiales o principios
CC0 Dominio público
Este Blueprint se publica bajo CC0. Eres libre de copiar, modificar, distribuir y usar este trabajo para cualquier propósito, sin pedir permiso.
Apoya al Maker comprando productos a través de su Blueprint, donde gana una Comisión del Maker establecida por los vendedores, o crea una nueva iteración de este Blueprint e inclúyela como conexión en tu propio Blueprint para compartir ingresos.