

Drop Forging
Arahan
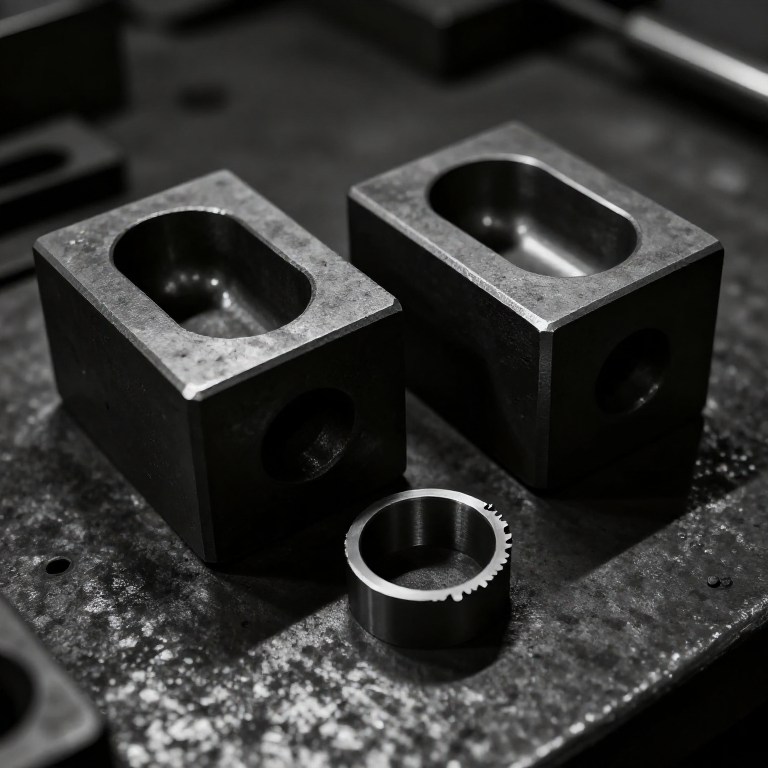
Sink a die cavity in two halves
Sink a die cavity in two halves
The die is the product, inverted, split along a chosen line.
- Choose a simple part — a lever or a hook — and decide the parting line where the two halves meet.
- Cut matching cavities in two blocks of thick aluminium, each half the part's depth.
- Add generous draft: taper every wall by 5 to 7 degrees so the forging can be lifted out.
- Round every internal corner; sharp corners will not fill and will crack the die.
- Fit two dowel pins so the halves always align identically.
Draft and radii are not refinements, they are requirements. A vertical wall grips the forging and it will not release. A sharp internal corner is where metal must flow furthest and fastest, so it fills last, and it is where die cracks start. Every drop forging you have ever handled has rounded corners and tapered sides for these two reasons.
Choose the parting line where the part is widest. Put it anywhere else and the metal has to flow uphill to fill the deeper half, which needs more blows and fills less reliably.Bahan untuk langkah ini:
 Plat Aluminium2 keping
 Pin pasak keluli1 bungkus
Alatan diperlukan:
 Gerudi Tanpa Wayar
 Set Mata Gerudi
 Set Kikir
 Ragum Bangku
 Angkup Digital 6 Inci
 Sesiku Gabungan
 Penebuk Pusat
Cut the flash gutter
Cut the flash gutter
A shallow land around the cavity, and a wider gutter beyond it.
- Machine a flat land 3 mm wide all around the cavity's edge, only 0.5 mm deep.
- Beyond it, cut a gutter 8 mm wide and 3 mm deep to receive surplus metal.
- Blend the land smoothly into the cavity.
The thin land is doing something counter-intuitive: it RESISTS escape. Metal trying to squeeze out through a 0.5 mm gap meets high resistance, so pressure builds inside the cavity and forces the metal into every corner. Make the land too deep and the metal escapes easily, pressure never rises, and the cavity fills incompletely. Flash is not waste to be minimised; it is the pressure-control device that makes the process work.
The gutter beyond the land exists so the escaped flash has somewhere to go without holding the dies apart. Dies that cannot close fully produce a part that is too thick across the parting line.Alatan diperlukan:
Set KikirAngkup Digital 6 InciRagum BangkuSesiku GabunganBuild a guided drop hammer
Build a guided drop hammer
The blow must land in the same place every time, or the dies mismatch.
- Build a frame with two vertical guide rails from aluminium angle.
- Make a tup — a weighted sliding block — that runs between them and carries the top die.
- Mount the bottom die on a heavy anvil block, bolted with M10 hardware.
- Fit a rope and pulley to raise the tup to a measured height.
- Add a positive catch so the tup can be held up safely.
Guides are what separate drop forging from hammering. A hand hammer lands wherever the smith's aim puts it; a guided tup lands in exactly the same place every blow, so the two die halves meet in register. Die mismatch — one half offset from the other — is the classic drop-forging defect and it comes straight from worn or sloppy guides.
The catch is a safety requirement, not a convenience. A raised tup held only by a rope in someone's hand is an accident with a countdown.Bahan untuk langkah ini:
 Besi siku aluminium2 keping
 Kepingan papan lapis1 helaian
 Sesendal Rata12 keping
 Nat Heksagon6 keping
Alatan diperlukan:
 Gergaji JigsawGerudi Tanpa WayarSet Mata Gerudi
 Set Kunci HeksSesiku Gabungan
 Bingkai Gergaji Besi dengan Mata
Forge, trim, and compare grain flow
Forge, trim, and compare grain flow
The strength argument is visible if you etch a section.
- Heat a billet of aluminium or brass to its working temperature and place it in the die.
- Drop the tup, reheat if needed, and repeat until the cavity fills and flash appears all round.
- Trim the flash with a chisel or a trimming die.
- Section a forged part and an identical part machined from bar, polish both faces and etch them.
- Compare the grain lines.
Bahan untuk langkah ini:
 Bar Bulat Aluminium1 keping
 Bar Bulat Loyang1 keping
Alatan diperlukan:
 Penyepit Mangkuk PijarBingkai Gergaji Besi dengan MataSet KikirAngkup Digital 6 InciRagum Bangku
Shape versus grain, and history
Shape versus grain, and history
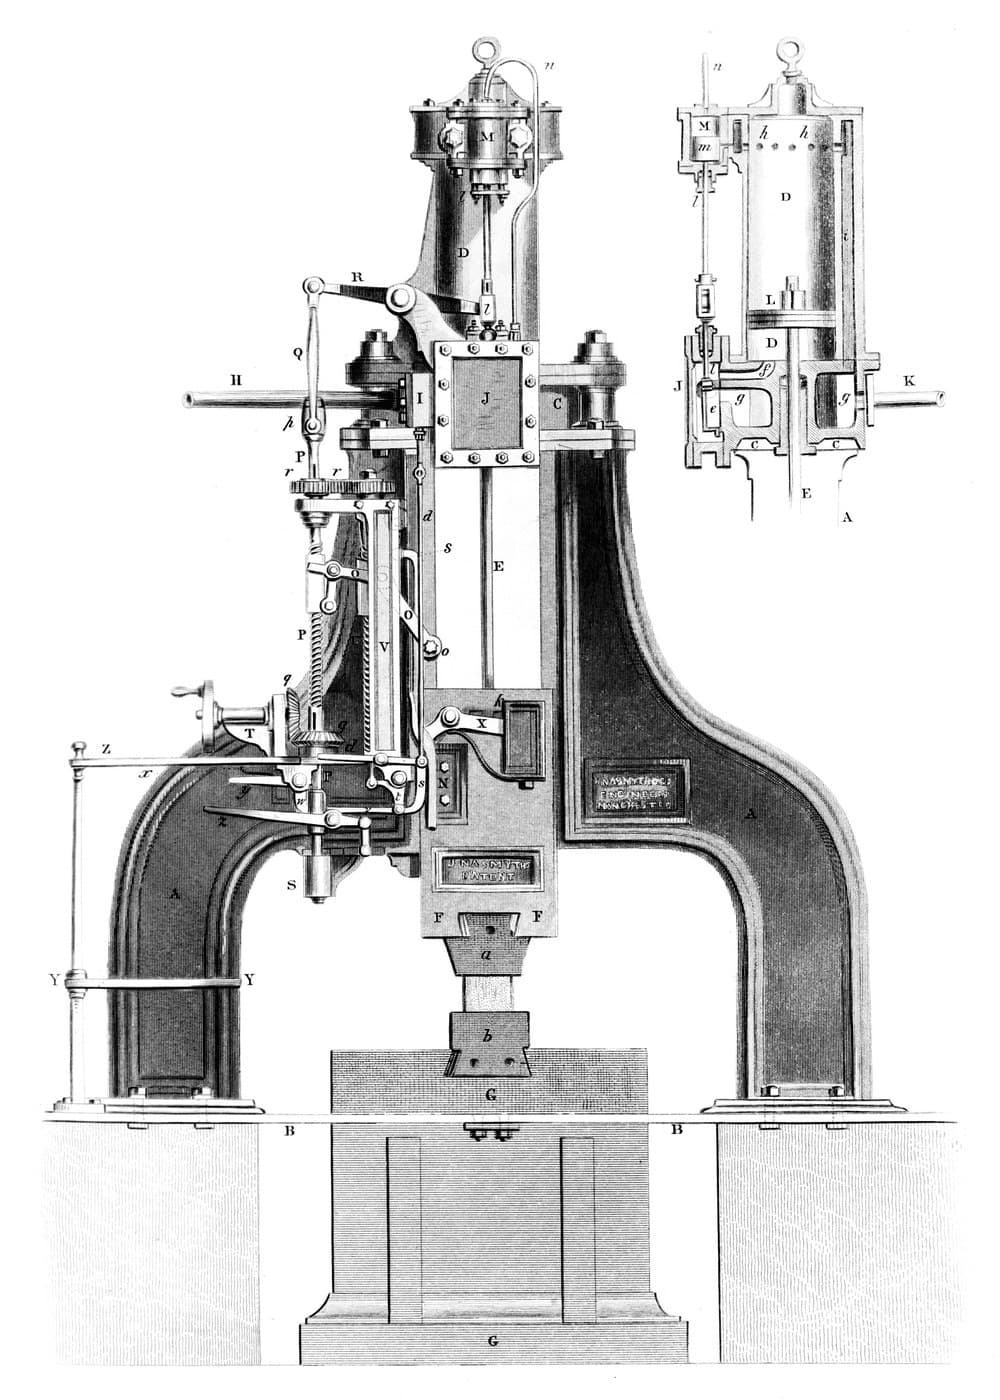
Drop forging with closed dies developed through the middle of the nineteenth century, and the American arms and tool industries drove it hard — the same interchangeability pressure that produced the turret lathe. Nasmyth's steam hammer of 1839, already in this catalogue, is the enabling machine: it delivers a blow of controllable force, repeatedly, in the same place, which is precisely what die forging needs and what a falling weight alone cannot give.
The tooling economics are the same story as the turret lathe and the broach. A pair of dies is expensive and makes exactly one shape. The first forging costs a fortune; the ten-thousandth costs almost nothing and is identical to the first. Every process in this batch and the last sits somewhere on that curve, and choosing between them is mostly a question of quantity.
Where it sits among the forming processes here: rolling makes long constant sections, extrusion makes constant hollow sections, casting makes complex shapes with poor grain structure, and drop forging makes complex shapes with the BEST grain structure of any of them. That last property is why it survives for safety-critical parts even where casting or machining would be cheaper.
Its honest limits: die cost, a shape that must be liftable from the die so no undercuts, flash that must be trimmed and recycled, and a size limit set by the hammer. And dies wear — a die that has made a hundred thousand parts is producing a measurably different part from the one it started with, which is why die maintenance is a scheduled operation rather than a repair.
Bahan
8- 2 kepingPemegang Tempat
- 1 bungkusPemegang Tempat
- 2 kepingPemegang Tempat
- 1 helaianPemegang Tempat
- 12 kepingPemegang Tempat
- 6 kepingPemegang Tempat
- 1 kepingPemegang Tempat
- 1 kepingPemegang Tempat
Alatan Diperlukan
11- 1 vendor sell this, none ship to you yetPemegang Tempat
- Pemegang Tempat
- Pemegang Tempat
- Pemegang Tempat
- Pemegang Tempat
- Pemegang Tempat
- Pemegang Tempat
- 1 vendor sell this, none ship to you yetPemegang Tempat
- Pemegang Tempat
- Pemegang Tempat
- Pemegang Tempat
Blueprint berkaitan
Blueprint ini berkongsi pengetahuan — teknik, bahan atau prinsip
CC0 Domain Awam
Blueprint ini dikeluarkan di bawah CC0. Anda bebas menyalin, mengubah, mengedar, dan menggunakan karya ini untuk sebarang tujuan, tanpa meminta kebenaran.
Sokong Pembuat dengan membeli produk melalui Blueprint mereka di mana mereka memperoleh Komisen Pembuat ditetapkan oleh Penjual, atau cipta iterasi baru Blueprint ini dan sertakan ia sebagai sambungan dalam Blueprint anda sendiri untuk berkongsi hasil.