Kerjasama
SENI
KECANTIKAN & KESEJAHTERAAN
KRAFTANGAN
BUDAYA & SEJARAH
HIBURAN
ALAM SEKITAR
MAKANAN & MINUMAN
KEJURUTERAAN TERBALIK
SAINS
SUKAN
TEKNOLOGI
BOLEH PAKAI
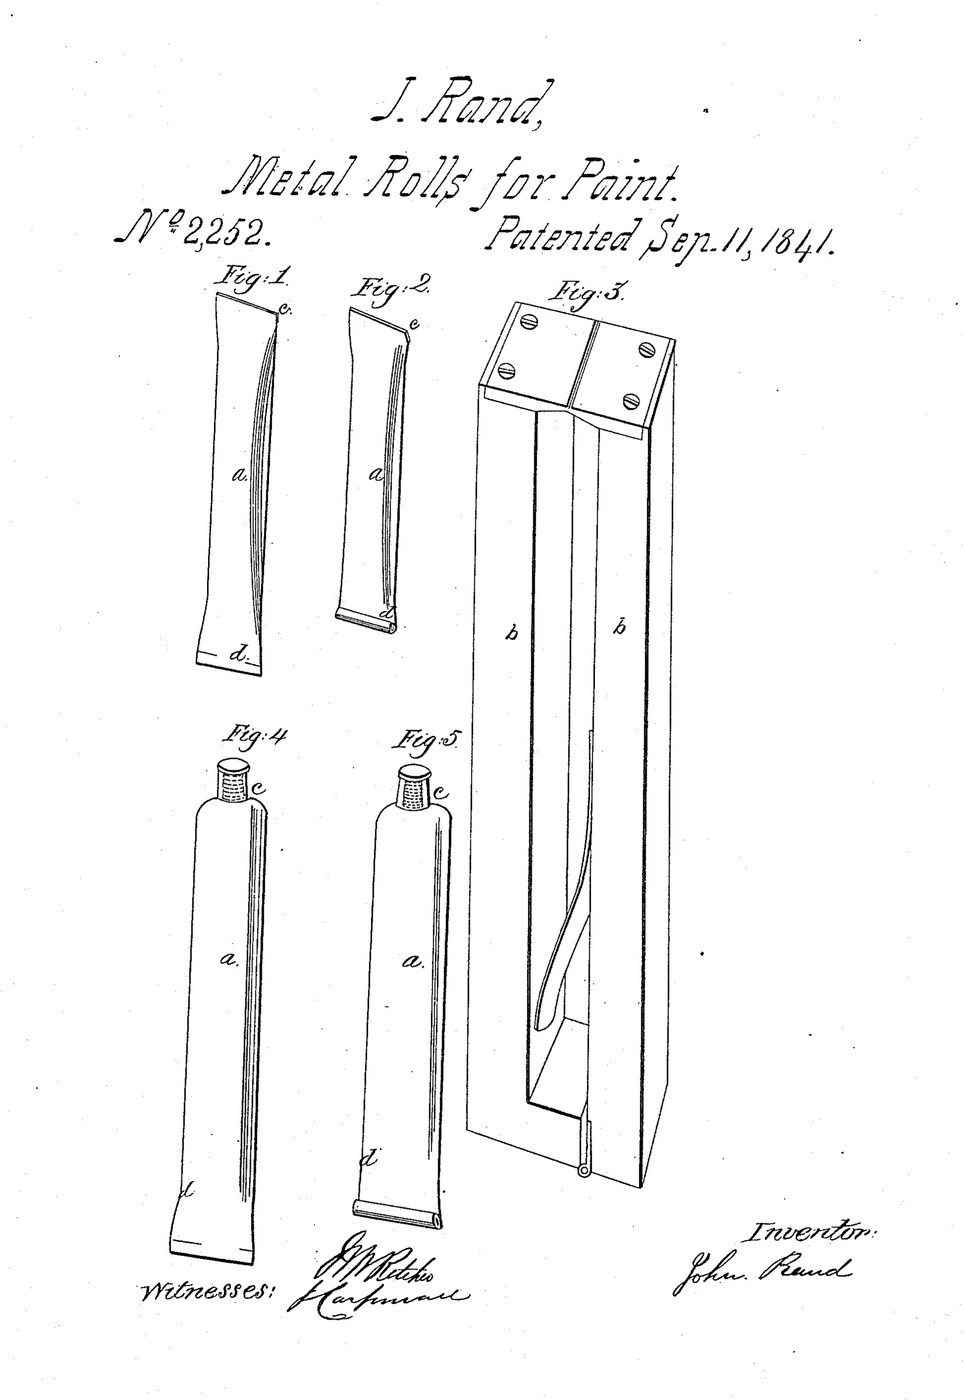


Empty Paint Tube: Soldered Sheet Lead, Rand 1841
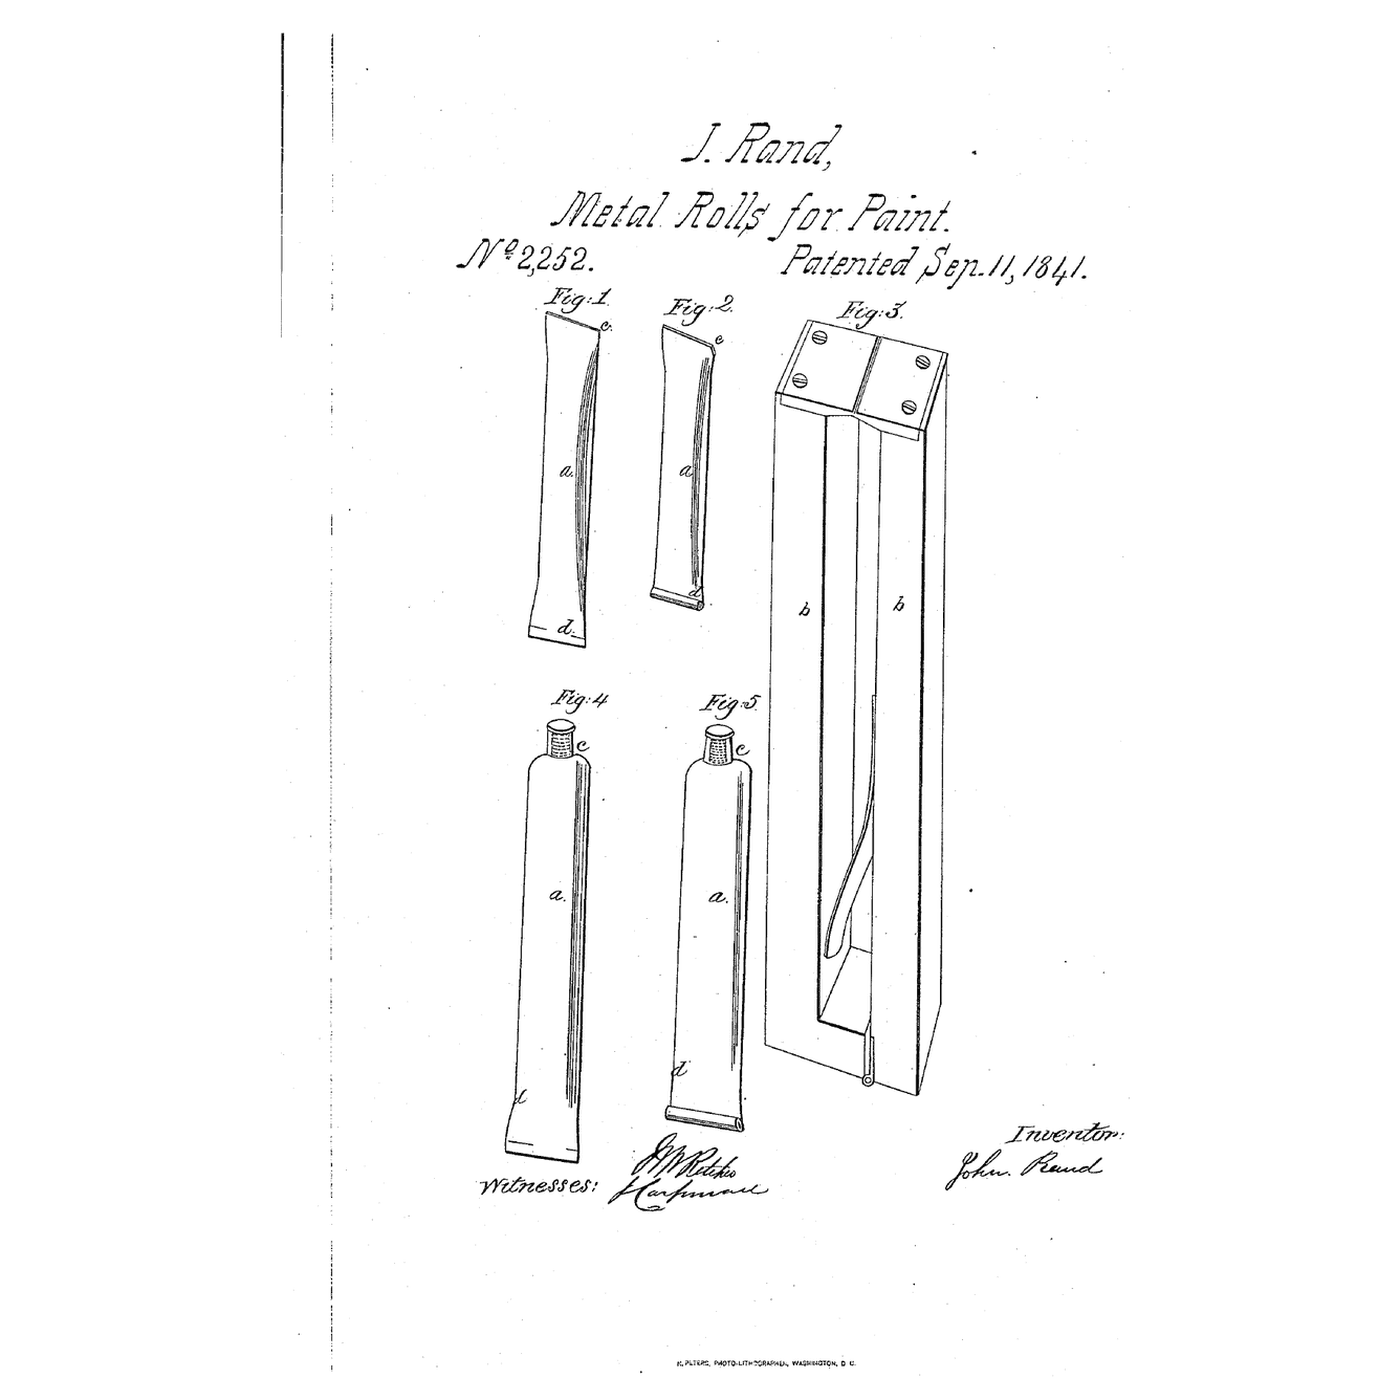
John Rand's 1841 patent names grain-tin, lead and pewter for paint tubes. The metal only has to be thin enough to yield to pressure and stay collapsed. His own tube was drawn tin about 1/75 inch thick, but he writes that a tube of sheet metal with a soldered seam works as well. This is that route in lead: roll a strip round a former, solder the seam, close one end, and leave the other open for filling.
Source: J. Rand, US 2,252 (1841). The sheet thickness, former, flux, size and tools are ours. The picture is the patent's drawing sheet.
Pertengahan
1 hour
Arahan
1
1
Cut the strip
Cut the strip
Cut a strip of thin lead sheet as long as the tube and wide enough to go once round the former with a narrow overlap. Rand asks only for metal thin enough to yield to pressure and stay collapsed; ours is Ure's thinner cast sheet, 1/48 in (0.5 mm). Longer tubes need somewhat thicker metal.
Bahan untuk langkah ini:
 Kepingan plumbum1 as required
Alatan diperlukan:
 Gunting kepingan logam
 Pembaris
2
2
Roll it round a former
Roll it round a former
Roll the strip round a round wooden dowel so the edges overlap, and press the seam flat. The dowel and the overlap are ours.
Alatan diperlukan:
 Pasak kayu
3
3
Solder the seam
Solder the seam
Join the edges by soldering, one of the two ways Rand gives (the other is melting the edges together). Ours: a little rosin flux and tin-lead solder run along the seam with a hot iron, on the dowel. Slide the tube off.
Bahan untuk langkah ini:
 Pateri timah-plumbum1 as required
 Pes fluks pematerian (berasaskan damar)1 as required
Alatan diperlukan:
 Alat pematerianPasak kayu
4
4
Close one end
Close one end
Press the edges of one end together with flat pliers (Rand used forceps that leave a groove along the end). Close it by adding a little solder with a hot iron. Leave the other end open: the tube is filled from there and then closed the same way.
Bahan untuk langkah ini:
Pateri timah-plumbum1 as requiredAlatan diperlukan:
 Playar Muncung RataAlat pematerian
Bahan
3- 1 as requiredPemegang Tempat
- 2 as requiredPemegang Tempat
- 1 as requiredPemegang Tempat
Alatan Diperlukan
5- Pemegang Tempat
- Pemegang Tempat
- Pemegang Tempat
- 2 vendors sell this, none ship to you yetPemegang Tempat
- Pemegang Tempat
Blueprint ini membuat

Blueprint berkaitan
Blueprint ini berkongsi pengetahuan — teknik, bahan atau prinsip

CC0 Domain Awam
Blueprint ini dikeluarkan di bawah CC0. Anda bebas menyalin, mengubah, mengedar, dan menggunakan karya ini untuk sebarang tujuan, tanpa meminta kebenaran.
Sokong Pembuat dengan membeli produk melalui Blueprint mereka di mana mereka memperoleh Komisen Pembuat ditetapkan oleh Penjual, atau cipta iterasi baru Blueprint ini dan sertakan ia sebagai sambungan dalam Blueprint anda sendiri untuk berkongsi hasil.