SENI
KECANTIKAN & KESEJAHTERAAN
KRAFTANGAN
BUDAYA & SEJARAH
HIBURAN
ALAM SEKITAR
MAKANAN & MINUMAN
KEJURUTERAAN TERBALIK
SAINS
SUKAN
TEKNOLOGI
BOLEH PAKAI



Fillet and Butt: Sizing the Weld the Joint Actually Needs
Welds come in two structural families. A **butt** weld replaces the parent section, so a full-penetration butt weld in sound metal is as strong as the plate and needs no sizing at all — it is either full penetration or it is not.
A **fillet** weld adds a triangle of metal in a corner, and it does need sizing, because its strength depends on how big that triangle is.
Almost every beginner sizes fillets by eye and almost every beginner makes them too big. That is worth a number, because a fillet's strength goes with its leg while the metal, the arc time and the distortion go with the leg squared.
Pertengahan
3 hours
Arahan
1
1
Leg, throat, and which one carries the load
Leg, throat, and which one carries the load
A fillet weld is quoted by its **leg length** — the distance it runs up each of the two members from the root. That is what you can measure with a gauge on a finished weld, which is why the trade quotes it.
What carries the load is the **throat**: the shortest distance from the root of the joint through the weld to its face. For a normal mitre fillet with equal legs and a flat or slightly concave face, the throat is the leg divided by the square root of two — about 0.707 of it.
A **convex** fillet, piled up proud, has the same throat as a flat one of the same legs. The extra metal on the face adds nothing to the strength and does add a sharp angle at the toes where fatigue cracks start.
A **concave** fillet, hollowed out, has a smaller throat than its legs suggest — so it is weaker than it is measured to be.
Bahan untuk langkah ini:
 Plat keluli lembut1 keping
 Besi sudut keluli lembut1 keping
Alatan diperlukan:
 Pembaris
 Kanta Pembesar Tukang Emas
2
2
Sizing it
Sizing it
Memuatkan buku nota Jupyter…
Alatan diperlukan:
 Komputer Meja
3
3
Multi-pass: root, fill, cap
Multi-pass: root, fill, cap
A joint too big for one pass is built up in runs, and the runs have different jobs.
**The root run** has one job: fuse the bottom of the joint. It is run with a smaller electrode at a lower current than the rest, because the root is the hardest place to reach and the easiest to blow through.
**The fill runs** put in volume. Bigger rod, more current, and each run must be chipped and wire-brushed before the next goes on top of it — every scrap of slag left behind becomes an inclusion buried in the finished weld.
**The cap** is the last run and the visible one. It should sit slightly proud and blend into the plate at both toes without a step.
Let each run cool to below about 250 C before the next. Piling runs on while the joint is still glowing puts far more total heat into the work than the same welds laid with a pause, and that is distortion you never have to take out.
Bahan untuk langkah ini:
Plat keluli lembut2 keping Elektrod kimpalan2 bungkus
Alatan diperlukan:
 Mesin kimpalan arka
 Topi keledar kimpalan gelap automatik
 Sarung tangan kimpalan
 Tukul
 Set berus dawai
 Batang penyodok sanga
4
4
Intermittent welding, and when it is not allowed
Intermittent welding, and when it is not allowed
A long fillet often does not need to be continuous. Short lengths of weld with gaps between them carry the same load if the total welded length is right, and they put in far less heat, so a long light frame stays much straighter.
The gaps are not free, though, and there are three cases where intermittent welding is wrong:
**Anything that must be sealed.** Tanks, pressure parts, anything holding liquid or gas. A gap is a leak.
**Anything outdoors or wet.** The unwelded crevice between the parts holds water by capillary action and rusts from the inside out. This is why intermittent welds on exposed steelwork are often specifically banned.
**Anything cycling under load.** Every weld end is a stress raiser, and intermittent welding multiplies the number of ends. In fatigue, a continuous fillet outlasts an intermittent one of the same total length.
Bahan untuk langkah ini:
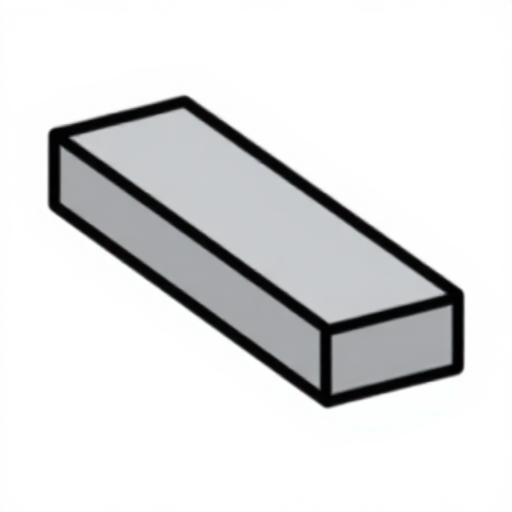 Bar Rata Keluli Lembut2 kepingBesi sudut keluli lembut1 kepingElektrod kimpalan1 bungkus
Alatan diperlukan:
Mesin kimpalan arkaTopi keledar kimpalan gelap automatikSarung tangan kimpalanPembaris Blok batu sabun
Bahan
4- 2 kepingPemegang Tempat
- 1 kepingPemegang Tempat
- 2 bungkusPemegang Tempat
- 2 kepingPemegang Tempat
Alatan Diperlukan
10- Pemegang Tempat
- Pemegang Tempat
- Pemegang Tempat
- Pemegang Tempat
- Pemegang Tempat
- Pemegang Tempat
- Pemegang Tempat
- Pemegang Tempat
- Pemegang Tempat
- Pemegang Tempat
Blueprint berkaitan
Blueprint ini berkongsi pengetahuan — teknik, bahan atau prinsip
CC0 Domain Awam
Blueprint ini dikeluarkan di bawah CC0. Anda bebas menyalin, mengubah, mengedar, dan menggunakan karya ini untuk sebarang tujuan, tanpa meminta kebenaran.
Sokong Pembuat dengan membeli produk melalui Blueprint mereka di mana mereka memperoleh Komisen Pembuat ditetapkan oleh Penjual, atau cipta iterasi baru Blueprint ini dan sertakan ia sebagai sambungan dalam Blueprint anda sendiri untuk berkongsi hasil.