SENI
KECANTIKAN & KESEJAHTERAAN
KRAFTANGAN
BUDAYA & SEJARAH
HIBURAN
ALAM SEKITAR
MAKANAN & MINUMAN
KEJURUTERAAN TERBALIK
SAINS
SUKAN
TEKNOLOGI
BOLEH PAKAI

Gel Electrophoresis: Separating by Charge and Size
Every rung so far has moved the sample with a flowing solvent. This one holds the liquid still and pulls the molecules through it with an electric field instead.
Charged molecules migrate toward the opposite electrode, and if they must squeeze through a gel to get there, the small ones thread the mesh easily while the large ones are held back. So the gel sorts by size, and the field sorts by charge, both at once. Oliver Smithies got there in 1955 with a starch gel he made in his own kitchen, looking for protein variants nobody else could see.
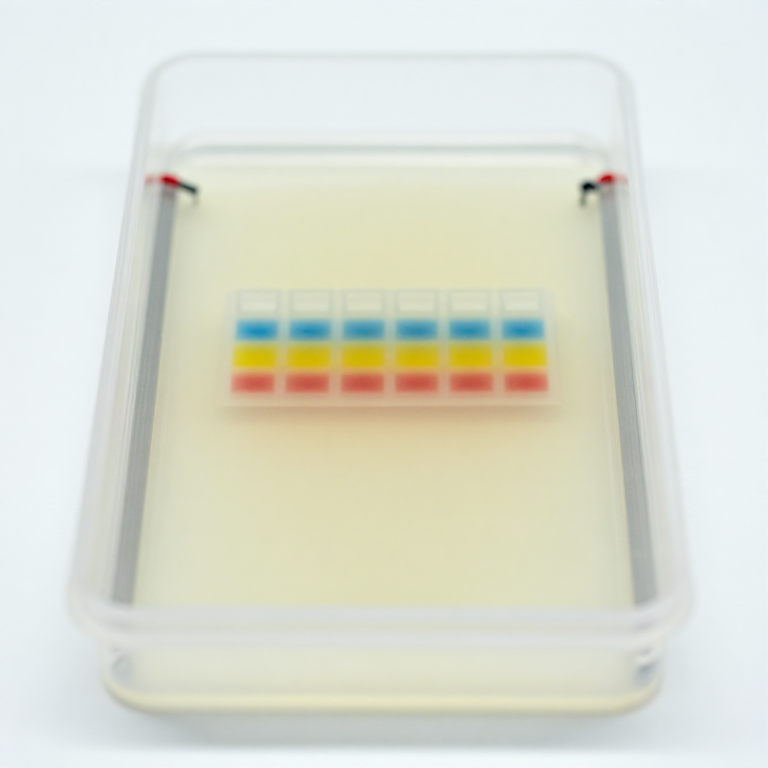
The version here needs a power supply, a plastic box and some agarose, and it separates the dyes in ordinary food colouring into their components — a real separation you can watch happen over half an hour, with no biological material and nothing to stain.
Pertengahan
1 day
Arahan
1
1
Build the tank
Build the tank
Take a shallow plastic box a little longer than your gel will be. Run a platinum or stainless wire across each end, just clear of the bottom, and bring a lead out through the wall of the box above the liquid line.
The electrodes must be at opposite ENDS and parallel, so the field runs straight down the gel; angled electrodes bend the lanes. Bring the leads out above the liquid, never through a hole below it. Platinum is worth it because it does not corrode; stainless will work for a few runs and then start dissolving into your buffer.
Bahan untuk langkah ini:
 Bekas simpanan plastik (kedap udara)1 keping
 Dawai platinum30 cm
Alatan diperlukan:
 Wayar Ujian Berpenyepit Buaya
2
2
Mix a buffer that carries current without cooking the gel
Mix a buffer that carries current without cooking the gel
Dissolve about 5 grams of baking soda in a litre of water. That is your running buffer, in the tank and in the gel both.
The buffer has two jobs: it conducts, and it holds the pH steady so your molecules keep the charge they started with. Plain water barely conducts and the run never finishes. Strong salt conducts too well, draws a large current and turns the tank into a heater — a gel that gets hot goes cloudy, the lanes smear and in the worst case it melts. Sodium bicarbonate is the forgiving middle, and it is in every kitchen.
Bahan untuk langkah ini:
 Soda bikarbonat5 g
Alatan diperlukan:
 Penimbang Digital
 Bikar Borosilikat
3
3
Cast the gel, and get the wells right
Cast the gel, and get the wells right
Heat 1 gram of agarose in 100 ml of buffer until it is completely clear, let it cool until the flask is merely hot, pour it into a level tray to about 5 mm deep, and set a comb in one end to form the wells.
Pour it too hot and the tray warps; pour it too cool and it sets lumpy with a visible seam. It must be CLEAR before pouring — undissolved specks become obstacles that deflect a lane. Leave the comb until the gel is fully set and firm to a fingertip, then lift it straight up and slowly; pulling it at an angle tears the well walls and your sample leaks sideways into its neighbour.
Bahan untuk langkah ini:
 Serbuk agarosa1 g
Alatan diperlukan:
 Plat PemanasBikar BorosilikatPenimbang Digital
4
4
Load the samples under the buffer
Load the samples under the buffer
Cover the set gel with buffer to a few millimetres, mix each sample with an equal volume of glycerol, and deliver it into the well with a fine tip held just inside the mouth.
The glycerol is why the sample stays put: it makes the drop denser than the buffer so it sinks and fills the well instead of drifting away in a coloured cloud. This is the same trick as the loading dye in a molecular biology laboratory. Do not push the tip through the bottom of the well — a punctured well leaks the sample under the gel where it runs as a useless smear.
Bahan untuk langkah ini:
 Gliserol20 ml
 Pewarna makanan1 botol
Alatan diperlukan:
 Tiub kapilari kaca
5
5
Run it — and get the polarity right the first time
Run it — and get the polarity right the first time
Connect the electrode NEAREST the wells to the negative terminal and the far one to positive, and apply about 5 volts per centimetre of gel length. Watch for fine bubbles at both wires: that is the water electrolysing, and it tells you current is flowing.
Most dyes and all nucleic acids carry a net negative charge, so they run TOWARD the positive electrode — away from the wells. Reverse the leads and your samples march straight off the near end of the gel in the first two minutes and are gone. Check the polarity before you walk away, not after.
Alatan diperlukan:
 Unit kuasa arus terus
 MultimeterWayar Ujian Berpenyepit Buaya
6
6
Watch the food colouring come apart
Watch the food colouring come apart
Over twenty to forty minutes the loaded spots stretch into bands and move down their lanes at visibly different speeds. A green food colouring separates into a blue band and a yellow one, because it was never a green dye — it was a mixture sold as one.
That is the whole lesson of this batch in one visible result, and it needs no stain and no ultraviolet. Stop the run before the fastest band reaches the far end; anything that runs off the gel is lost and you cannot tell afterwards how many bands left.
Alatan diperlukan:
 Jam Randik
 Pembaris
7
7
Mobility, sieving and the heat you must not make
Mobility, sieving and the heat you must not make
Memuatkan buku nota Jupyter…
Alatan diperlukan:
Multimeter8
8
Photograph it wet, and measure from the well
Photograph it wet, and measure from the well
Lift the gel onto a light background and photograph it straight away with a ruler beside it, then measure each band's distance from the FRONT EDGE OF ITS WELL, not from the edge of the gel.
Agarose dries into a brittle film within hours and the bands diffuse and fade long before that, so a wet photograph is the only permanent record. Measuring from the well is what makes two lanes comparable when the comb was not perfectly square — and comparing lanes is the entire reason for running more than one.
Alatan diperlukan:
PembarisBahan
6- Pemegang Tempat
- 30 cmPemegang Tempat
- Pemegang Tempat
- Pemegang Tempat
- 20 mlPemegang Tempat
- 1 botolPemegang Tempat
Alatan Diperlukan
9- Pemegang Tempat
- Pemegang Tempat
- Pemegang Tempat
- Pemegang Tempat
- Pemegang Tempat
- Pemegang Tempat
- Pemegang Tempat
- Pemegang Tempat
- Pemegang Tempat
Blueprint ini membuat
Blueprint berkaitan
Blueprint ini berkongsi pengetahuan — teknik, bahan atau prinsip


CC0 Domain Awam
Blueprint ini dikeluarkan di bawah CC0. Anda bebas menyalin, mengubah, mengedar, dan menggunakan karya ini untuk sebarang tujuan, tanpa meminta kebenaran.
Sokong Pembuat dengan membeli produk melalui Blueprint mereka di mana mereka memperoleh Komisen Pembuat ditetapkan oleh Penjual, atau cipta iterasi baru Blueprint ini dan sertakan ia sebagai sambungan dalam Blueprint anda sendiri untuk berkongsi hasil.