Kerjasama
SENI
KECANTIKAN & KESEJAHTERAAN
KRAFTANGAN
BUDAYA & SEJARAH
HIBURAN
ALAM SEKITAR
MAKANAN & MINUMAN
KEJURUTERAAN TERBALIK
SAINS
SUKAN
TEKNOLOGI
BOLEH PAKAI
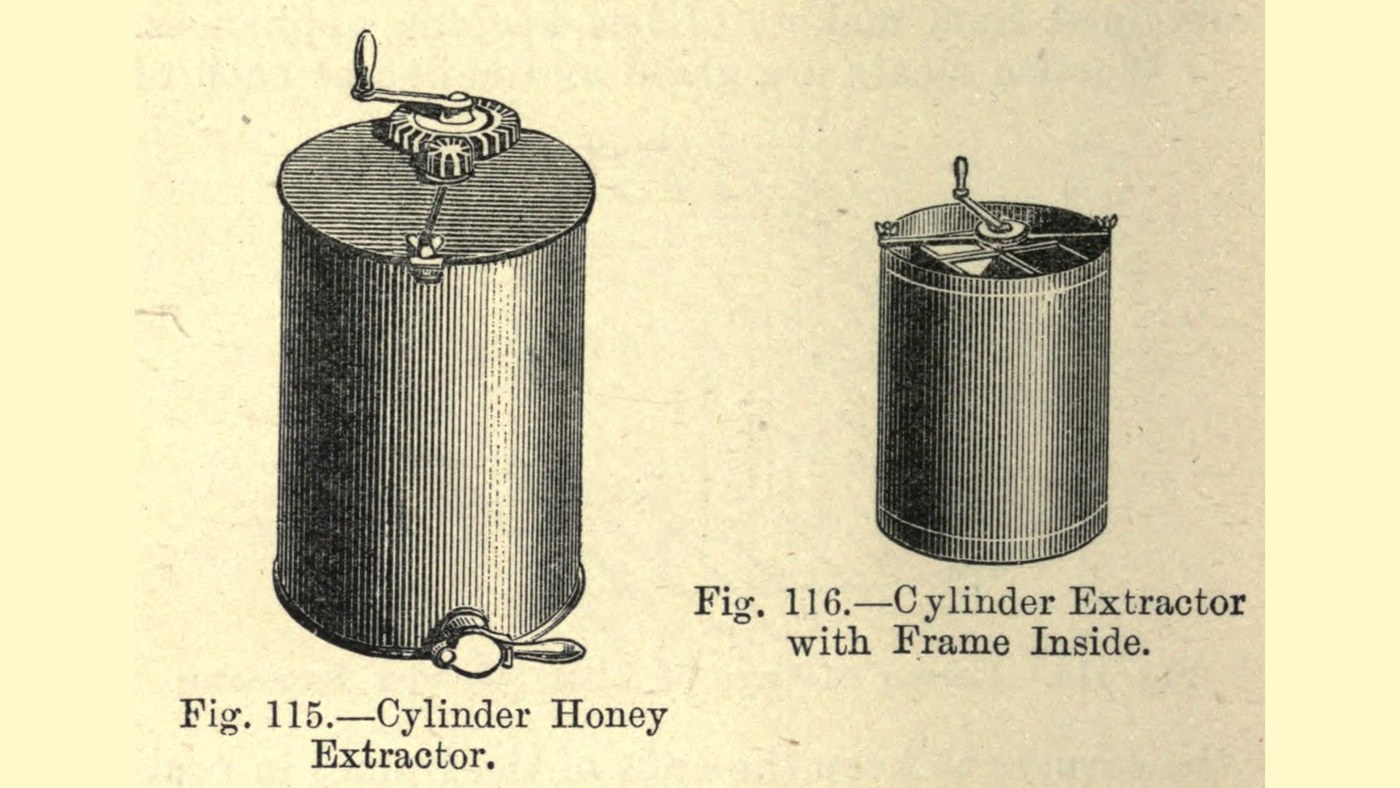


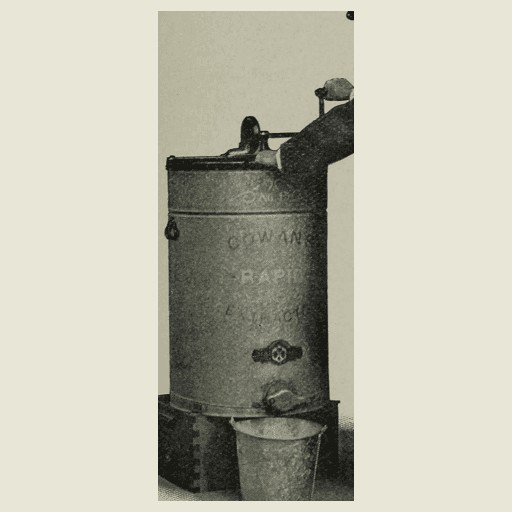
Honey Extractor: a Tinplate Cylinder Extractor (Hasluck, 1905)
A two-comb honey extractor built by a tinsmith: a soldered tinplate frame carrying two wire-netting comb baskets on a 1/2 in spindle, spun by bought gearing inside a tinplate cylinder with a sloping bottom that drains through a treacle valve.
Only the frame and combs revolve, not the can and the honey already thrown out, so it starts and stops easily; a comb that turns lighter tells you its side is empty.
Source: P. N. Hasluck, Beehives and Bee Keepers' Appliances (1905), pp. 122-132. Picture: the book's Figs. 115-116.
Lanjutan
Unknown
Arahan
1
1
Make the two bands
Make the two bands
Take three sheets of tinplate 17 in by 12 1/2 in and cut one into six strips 2 in wide; pare the edges straight. Join three strips end to end by turning 1/4 in over at the ends, hooking them together, hammering flat and touching with solder; do the same with the other three. Cut each to 45 in and wire both edges with wire about 1/8 in diameter (about No. 10 gauge), 44 in long: turn the edge over nearly 1/2 in with mallet and stake, lay the wire in, and hammer the tin down round it. Use fine solder with a large proportion of tin throughout. Bend each strip in a wooden vice into a rectangular band 12 in by 10 in, square at the corners and not in winding, wired edge outwards; solder the overlapping inch.
Bahan untuk langkah ini:
 Kepingan besi putih3 17 x 12 1/2 in sheets
 Dawai besi1 about 1/8 in, No. 10
 Pateri timah-plumbum1 keping
Alatan diperlukan:
 Gunting kepingan logam
 Tukul Kayu
 Pancang
 Alat pematerian
 Ragum Bangku
2
2
Fit the bridges
Fit the bridges
From another sheet cut two pieces 12 in by 3 1/2 in. Wire both edges with wires only 10 in long placed in the middle, leaving 1 in free at each end, and hammer the turned edges flat at the ends. Turn the unwired ends up sharp to make a tin stool 10 in long with legs 1 in high. Fasten one across each band the narrow way, equidistant from the short sides, with solder and small rivets. The bridges carry the spindle.
Bahan untuk langkah ini:
Kepingan besi putih1 kepingDawai besi1 keping Rivet besi1 kepingPateri timah-plumbum1 keping
Alatan diperlukan:
Gunting kepingan logamTukul KayuPancangAlat pematerian Tukul
3
3
Make the four slides
Make the four slides
Cut four pieces of tinplate 16 1/2 in by 3 1/8 in and cut small rectangles out of the corners. Turn over and hammer down 1/4 in at each long edge and 1/2 in at one short end. Turn the long edges up at right angles and the short end too, making a trough open at one end with the other end twice as high as the sides. Touch the corners with solder, nip off the sharp corners of the projecting end and round them with a file.
Bahan untuk langkah ini:
Kepingan besi putih1 kepingPateri timah-plumbum1 kepingAlatan diperlukan:
Gunting kepingan logamTukul KayuPancangAlat pematerian Kikir Logam
4
4
Assemble the frame
Assemble the frame
Lay one band on the bench, bridge up. Stand a slide, stopped end down, in a corner with its back against a long side of the band, hold the two with a small cramp and two pieces of wood, check with the square, and run solder between them; do the other three. Put the upper band over the tops of the slides; if a slide is out of true, unsolder and reset it. Both bridges must face upwards so they do not hold honey.
Bahan untuk langkah ini:
Pateri timah-plumbum1 kepingAlatan diperlukan:
 Pengapit C
 Sesiku tetapAlat pematerian
5
5
Make the comb baskets
Make the comb baskets
Cut four pieces of wire netting, two 15 in by 9 5/8 in and two 1/4 in narrower. Bind each round with tinplate strips 3/4 in wide overlapping 3/8 in each side, soldering every wire to the tin, then turning the tin over and soldering every wire again. Solder up four strips 41 in by 2 1/4 in, turn the edges over 1/4 in and turn one edge up square, so the section is an L with legs 1 1/2 in and 1/4 in. Cut the narrow rib with a chisel at the bends and bend each strip into the three sides of a half-basket, the short side 9 3/4 in on two and 1/8 in less on the other two. Solder the framed netting against the rib. On the wider pair turn over the 5/8 in that projects with a short wire in it as a pull; on the narrower pair clip some off and turn 1/4 in down. Cut a hole in the end of each half for the frame's top bar. Solder two crossing wires 1/8 in thick over the netting, joined in the middle and bent flat, to stop it bulging.
Bahan untuk langkah ini:
 Logam tidak diketahui1 wire netting, metal not given (never zinc)Kepingan besi putih1 kepingDawai besi1 1/8 inPateri timah-plumbum1 keping
Alatan diperlukan:
Gunting kepingan logamTukul KayuPancangAlat pematerian Pahat besi sejuk
6
6
Make the cylinder
Make the cylinder
Take a tinplate 55 in by 26 in, wire the top and bottom edges with 1/4 in wire, bend it into a cylinder and solder the joint. Cut a bottom about 1/2 in larger than the cylinder's diameter, turn its edge up 1/4 in, set it in sloping, turn the flange down and solder it firmly to the sides. Fit the treacle valve at the lowest point. Solder a bearing for the spindle at the centre of the bottom, its underside filed to the slope so its top is level. Rivet two bands of hoop iron 1/8 in thick and 1 1/4 in wide under the beads.
Bahan untuk langkah ini:
Kepingan besi putih1 55 x 26 inDawai besi1 1/4 in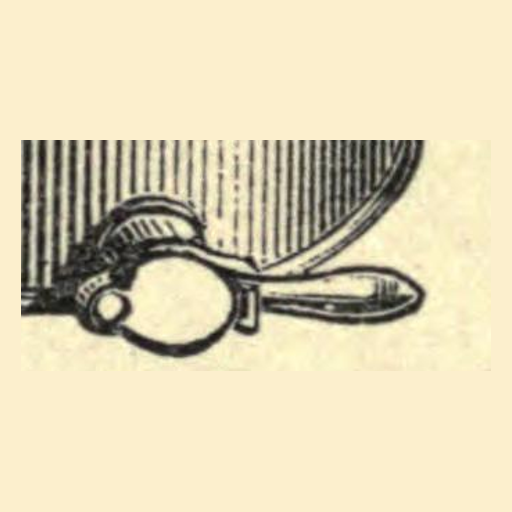 Pili madu1 keping
 Bar Rata Keluli Lembut1 hoop iron 1/8 x 1 1/4 inRivet besi1 kepingPateri timah-plumbum1 keping
Alatan diperlukan:
Gunting kepingan logamTukul KayuPancangAlat pematerianKikir Logam Gerimit tanganTukul
7
7
Fit the spindle
Fit the spindle
Make the spindle once the can is finished and its length is known: 1/2 in round iron or steel, tinned all over, with the lower end brought to a long cone to run in the bottom bearing. Pass it through the middle of both bridges so the cages run true, with the tops of the cages 2 in below the top of the can, and solder it to the bridges. Strengthen the hold with tin washers 1 1/2 in diameter, beaten saucer-shaped, with holes made a little small and turned out until the spindle passes; solder them to spindle and bridges.
Bahan untuk langkah ini:
 Bar bulat keluli lembut1 1/2 in roundKepingan besi putih1 kepingPateri timah-plumbum1 keping
Alatan diperlukan:
Kikir LogamAlat pematerianGunting kepingan logamTukul8
8
Fit the cross-bar, gearing and covers
Fit the cross-bar, gearing and covers
Attach bolts to the top hoop, one of them breaking the joint of the hoop, to hold a cross-bar 1 1/4 in wide, long enough to reach across, drilled for the bolts and the spindle; make it 1/2 in thick when gearing is used, and fasten it with fly nuts or hexagon nuts. Key the pinion to the spindle and run the toothed wheel on a stud riveted to the cross-bar. Rivet a pair of handles to the sides, and make two flat covers, one each side of the cross-bar, with edges turned down to embrace the rim, like a saucepan cover.
Bahan untuk langkah ini:
Bar Rata Keluli Lembut1 cross-bar 1 1/4 x 1/2 in Pelbagai bolt heksagon1 keping
 Nat sayap1 keping
 Pinion1 keping
 Roda gear besar1 kepingRivet besi1 kepingKepingan besi putih1 keping
Alatan diperlukan:
Gerimit tanganTukulGunting kepingan logamTukul KayuBahan
12- 1 55 x 26 inPemegang Tempat
- 1 1/4 inPemegang Tempat
- 7 kepingPemegang Tempat
- 3 kepingPemegang Tempat
- 1 wire netting, metal not given (never zinc)Pemegang Tempat
- 1 kepingPemegang Tempat
- 1 cross-bar 1 1/4 x 1/2 inPemegang Tempat
- 1 1/2 in roundPemegang Tempat
- 1 kepingPemegang Tempat
- 1 kepingPemegang Tempat
- 1 kepingPemegang Tempat
- 1 kepingPemegang Tempat
Alatan Diperlukan
11- Pemegang Tempat
- Pemegang Tempat
- Pemegang Tempat
- 2 vendors sell this, none ship to you yetPemegang Tempat
- Pemegang Tempat
- Pemegang Tempat
- Pemegang Tempat
- Pemegang Tempat
- Pemegang Tempat
- Pemegang Tempat
- Pemegang Tempat
Blueprint ini membuat
CC0 Domain Awam
Blueprint ini dikeluarkan di bawah CC0. Anda bebas menyalin, mengubah, mengedar, dan menggunakan karya ini untuk sebarang tujuan, tanpa meminta kebenaran.
Sokong Pembuat dengan membeli produk melalui Blueprint mereka di mana mereka memperoleh Komisen Pembuat ditetapkan oleh Penjual, atau cipta iterasi baru Blueprint ini dan sertakan ia sebagai sambungan dalam Blueprint anda sendiri untuk berkongsi hasil.