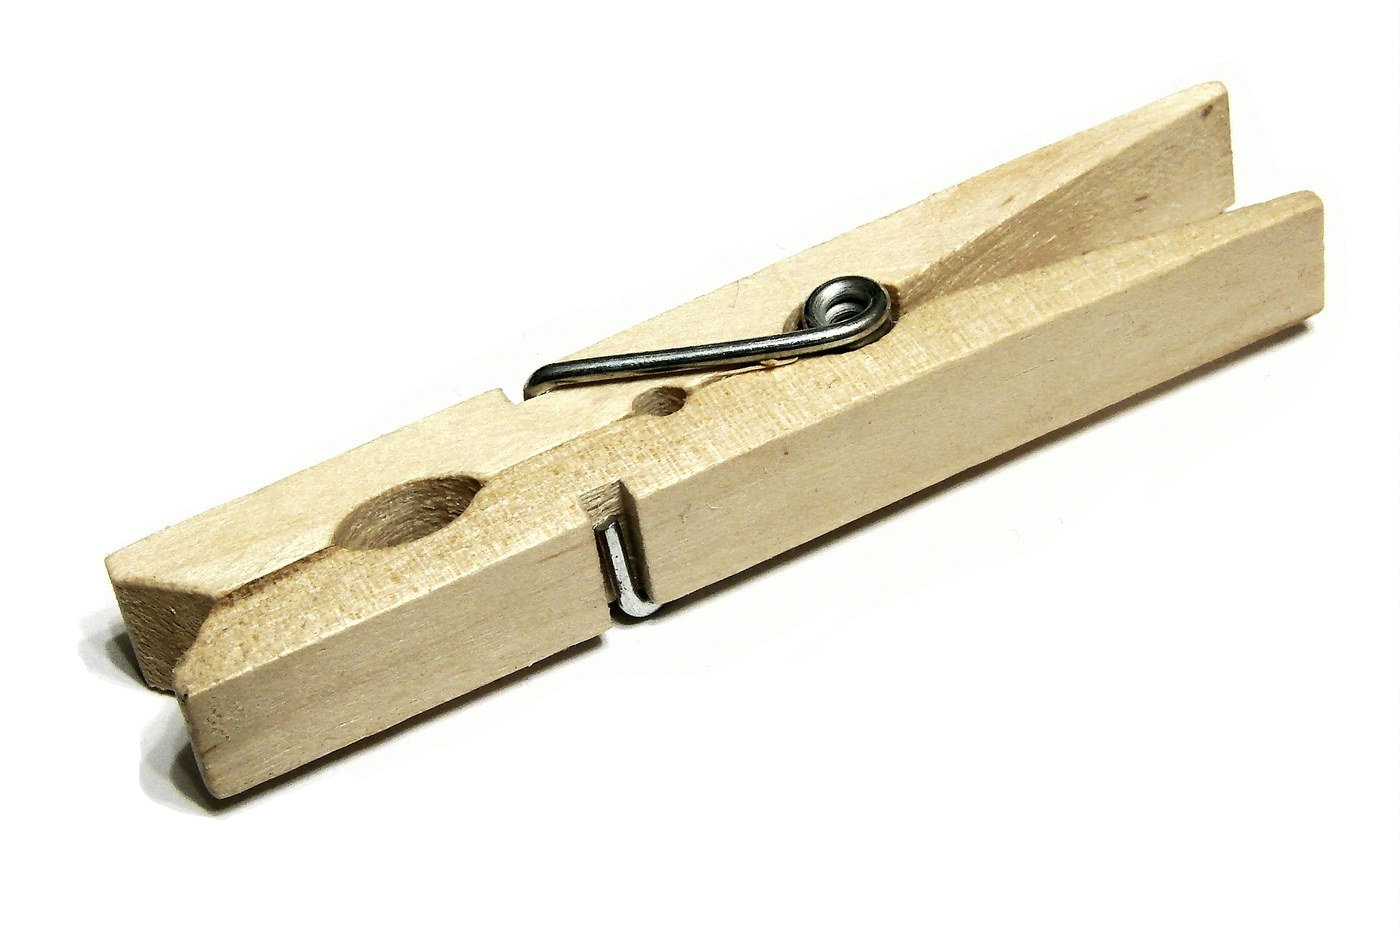


Spring Clothespin
Before 1853 a clothespin was a stick with a slot cut in it. It gripped by friction alone, which meant it gripped a thin cotton shirt and a wet wool blanket with exactly the same force — too little for one and too much for the other. On a windy day the washing came off the line.
David M. Smith of Springfield, Vermont added a spring and a pivot. Two shaped levers, one torsion spring, and the grip now adapts to whatever is between the jaws while pressing constantly. His patent calls it a spring-clamp for clothes-lines; it is a first-class lever pair, and it is still made to the same drawing.
Two pieces of wood, one piece of wire, and an object almost nobody has ever looked at closely.
Arahan
Choose straight-grained hardwood
Choose straight-grained hardwood
Use dry maple, beech or birch with the grain running along the length of the pin. Cross grain at the pivot is where a clothespin splits.
Bahan untuk langkah ini:
 Papan Kayu Keras1 keping
Cut two blanks 75 × 12 × 10 mm
Cut two blanks 75 × 12 × 10 mm
Cut two identical blanks. Both halves of a clothespin are the same part — that is the point of the design, and it halves the work.
Alatan diperlukan:
 Pembaris
Mark the pivot 28 mm from the jaw end
Mark the pivot 28 mm from the jaw end
Mark the pivot point on both blanks at the same distance. This position sets the whole mechanism — jaw side short, handle side long, so hand pressure is multiplied at the jaws.
Cut the spring seat across the pivot
Cut the spring seat across the pivot
Cut a shallow transverse groove at the pivot mark on the inner face of each blank, about 3 mm wide and 2 mm deep, to seat the coil of the spring.
Cut the two notches that trap the spring legs
Cut the two notches that trap the spring legs
On the handle side of each blank, cut a small notch for the spring leg to bear in. Without these the legs slide off sideways and the pin falls apart.
Hollow the jaw faces slightly
Hollow the jaw faces slightly
Pare a shallow concave along the inner face of the jaw end of each half. The hollow makes the pin grip at two edges rather than one flat face, which holds far better on thick cloth.
Round the outer faces
Round the outer faces
Shape the outside of each half so the pair sits comfortably between thumb and forefinger, and ease every edge. A square-edged clothespin is unpleasant to use and it marks wet cloth.
Sand both halves smooth
Sand both halves smooth
Sand through to 180 grit, particularly the jaw faces. Any splinter left there will find its way into a garment.
Wind the torsion spring
Wind the torsion spring
Wind about three turns of 1.0-1.2 mm spring steel wire around a 4 mm mandrel, leaving two straight legs roughly 30 mm long pointing off the coil in the same direction.
Bahan untuk langkah ini:
 Dawai keluli spring1 meter
Alatan diperlukan:
 Playar muncung tirus
Set the legs wider than the finished angle
Set the legs wider than the finished angle
Spread the legs so that fitting them into the notches pre-loads the spring. A spring assembled at its rest angle applies no force at all.
Assemble the two halves around the coil
Assemble the two halves around the coil
Seat the coil in the two grooves, cross the halves at the pivot and drop each spring leg into its notch. The coil is the pivot — there is no pin or axle anywhere in this design.
Check the jaws close along their whole length
Check the jaws close along their whole length
Look along the closed jaws against the light. They should meet evenly end to end. A gap means one blank is out of square — pare and retest.
Test the grip on wet cloth
Test the grip on wet cloth
Hang a soaked towel on a line with it. It should hold without sliding and release with a light squeeze. Too weak: more spring preload. Too strong: fewer coils or thinner wire.
Leave the wood unfinished
Leave the wood unfinished
Do not varnish or oil it. Bare wood grips damp cloth better than any finish, and clothespins live outdoors and get wet by design.
History & Context — the lever hiding on the washing line
History & Context — the lever hiding on the washing line
The patent. David M. Smith of Springfield, Vermont was granted US Patent 10,163 on 25 October 1853 for a spring-clamp for clothes-lines: two levers joined by a coiled spring that presses their jaws together. It was not the first clothespin — one-piece slotted pins are much older, and dozens of clamp designs were patented through the nineteenth century — but it was the first spring pin to succeed commercially, and its geometry is what survived.
Why a spring beats a slot. A slotted pin grips by friction and by the elasticity of the wood itself: its force depends entirely on how thick the cloth is, so it is either too slack or it splits. A spring clamp separates the two jobs. The spring supplies a roughly constant force over a range of openings, while the pivot lets the jaws adapt to thickness. That is why one size handles a handkerchief and a blanket, and why the design has never needed revising.
A first-class lever, twice. Each half is a lever with the fulcrum between effort and load. Because the handle side is longer than the jaw side, finger pressure is multiplied at the jaws; because both halves are identical, the assembly is symmetrical and can be made on one set of tooling. Cheapness of manufacture is part of the invention, not a side effect.
A Vermont industry, and a caution about attribution. Clothespin manufacture became a substantial trade in Vermont, using the hardwood and water power to hand, and the state's mills turned them out by the million into the twentieth century. Popular accounts often credit the Shakers with inventing the clothespin; the Shakers were skilled woodworkers who certainly made them, but the documented spring patent is Smith's. Where the record is a patent, follow the patent.
Bahan
2- 1 kepingPemegang Tempat
- 1 meterPemegang Tempat
Blueprint ini membuat
Blueprint berkaitan
Blueprint ini berkongsi pengetahuan — teknik, bahan atau prinsip

CC0 Domain Awam
Blueprint ini dikeluarkan di bawah CC0. Anda bebas menyalin, mengubah, mengedar, dan menggunakan karya ini untuk sebarang tujuan, tanpa meminta kebenaran.
Sokong Pembuat dengan membeli produk melalui Blueprint mereka di mana mereka memperoleh Komisen Pembuat ditetapkan oleh Penjual, atau cipta iterasi baru Blueprint ini dan sertakan ia sebagai sambungan dalam Blueprint anda sendiri untuk berkongsi hasil.