Kerjasama
SENI
KECANTIKAN & KESEJAHTERAAN
KRAFTANGAN
BUDAYA & SEJARAH
HIBURAN
ALAM SEKITAR
MAKANAN & MINUMAN
KEJURUTERAAN TERBALIK
SAINS
SUKAN
TEKNOLOGI
BOLEH PAKAI
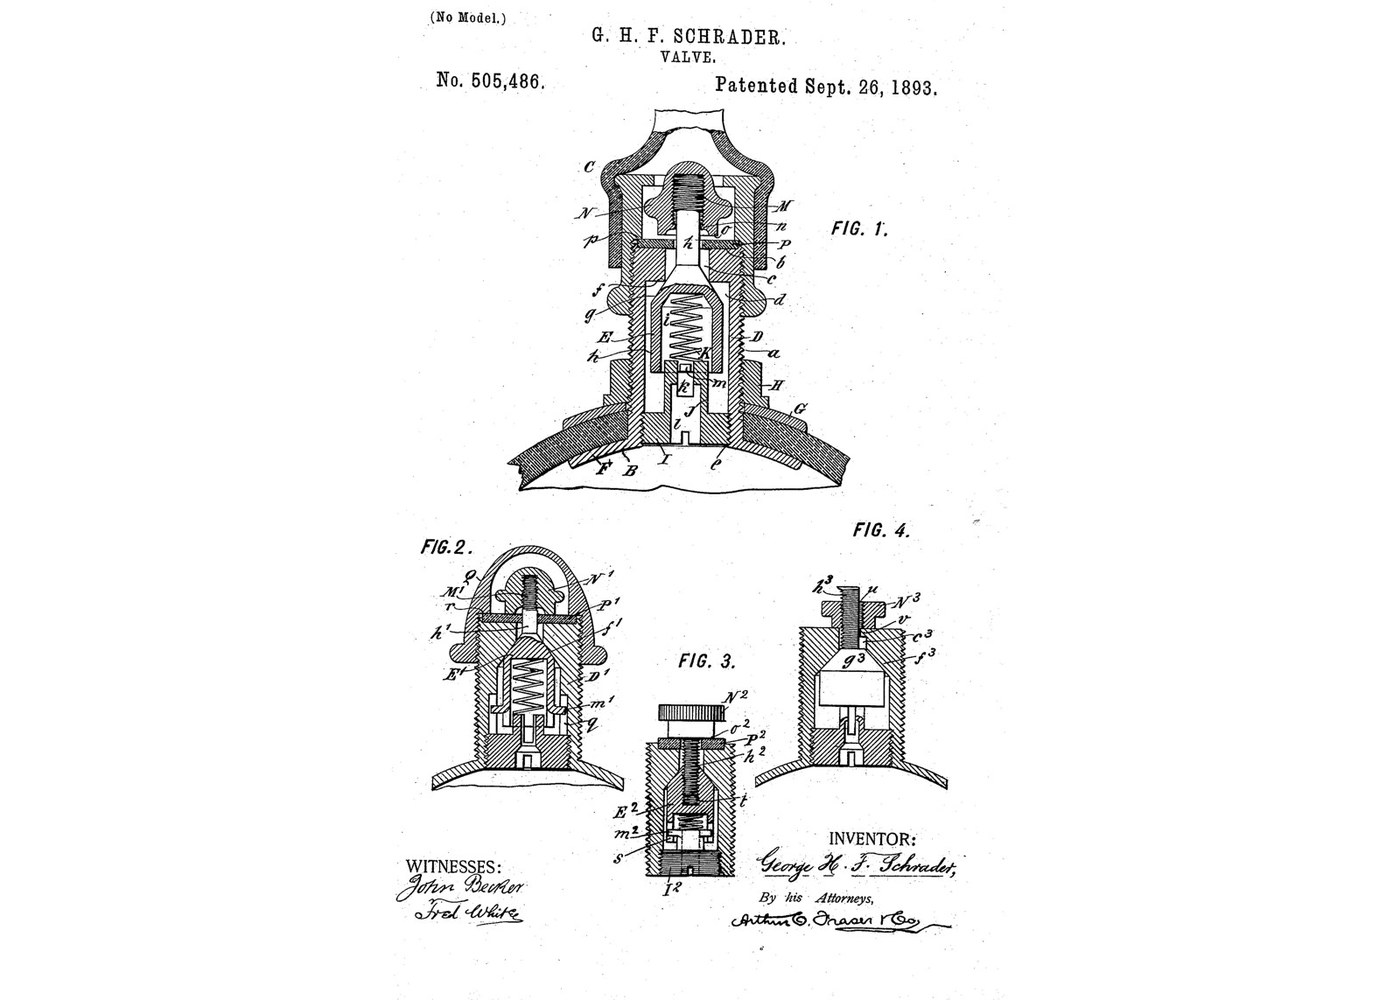


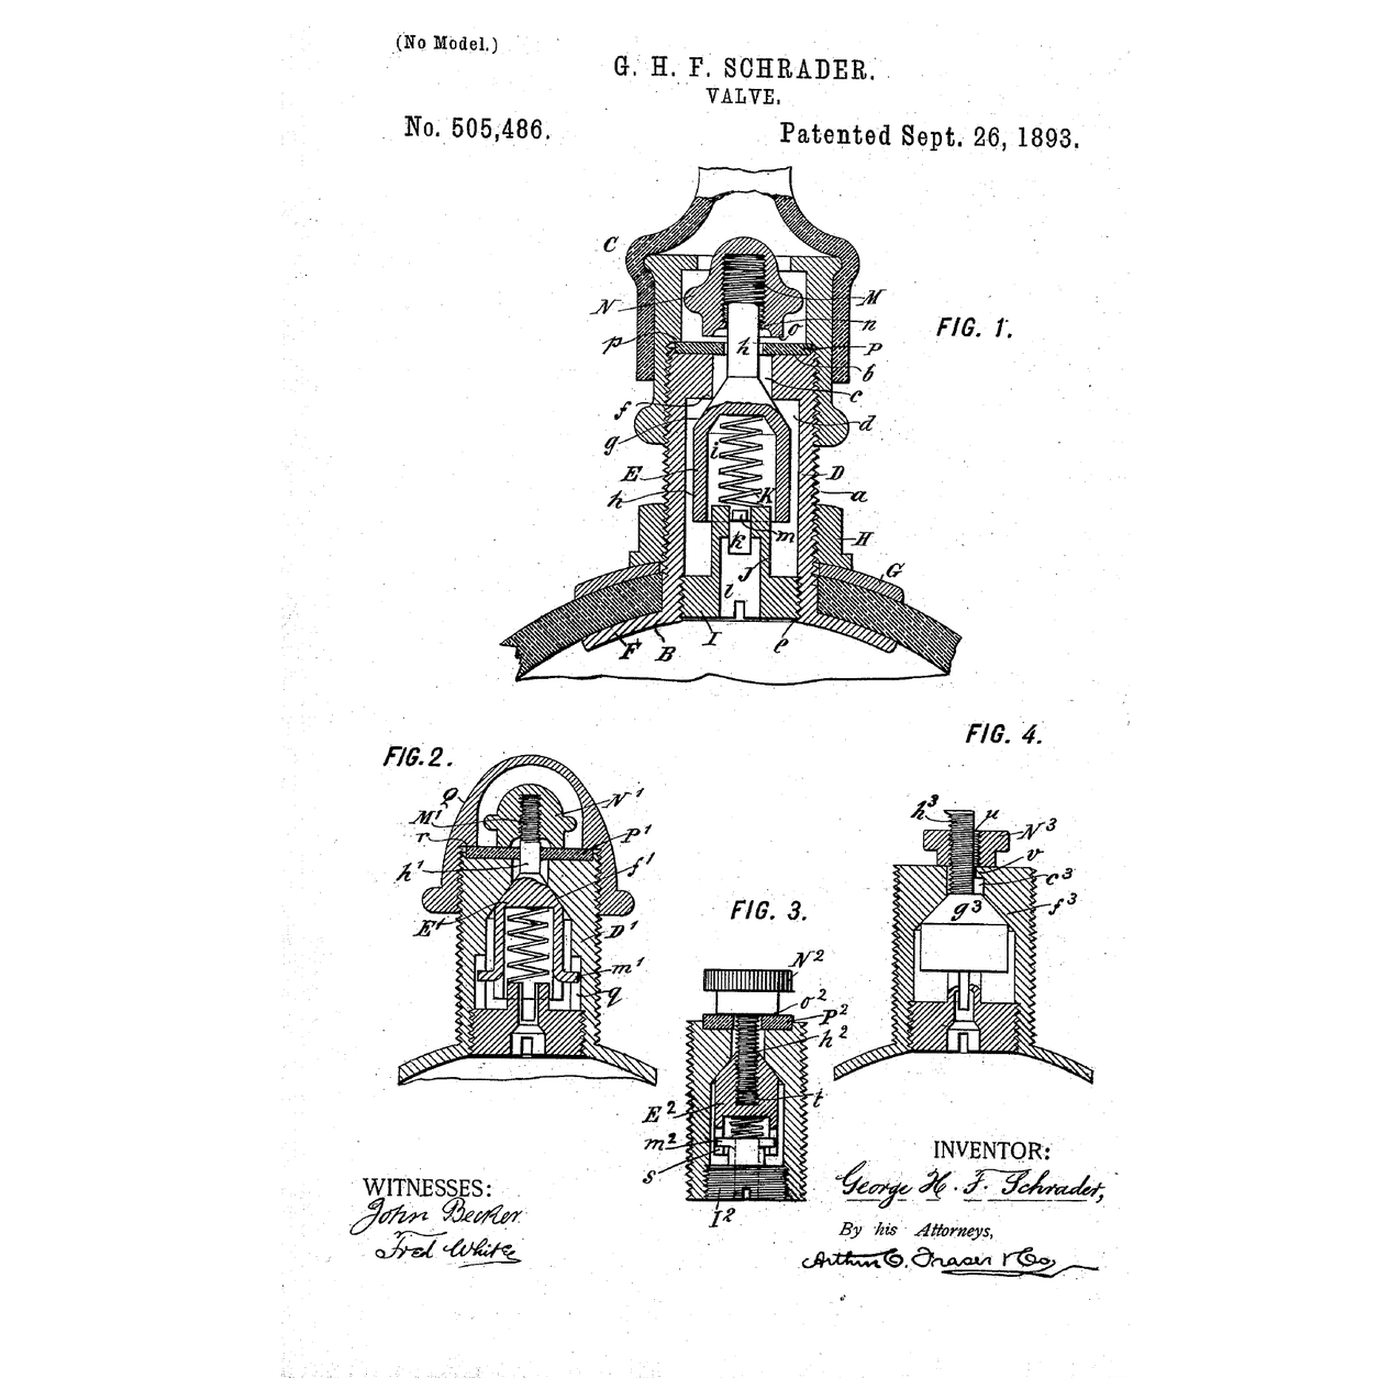
Tire Valve: Spring-Closed Plunger and Locking Hand Nut (Schrader 1893)
Schrader's bicycle-tire valve: a plunger in a tube, pushed onto its seat by a spring and by the air in the tyre. The pump's air lifts it, the tyre's air closes it. A hand nut on the stem then screws down on a washer to lock it tight, and a lip on the nut stops it coming off the stem.
Source: George H. F. Schrader, US 505,486 (1893), Fig. 1. Unknown: the metals, the packing and the sizes. Schrader gives none of them, so they are linked to unknown heads. Lathe work and grinding the seat are ours. Picture: the patent's drawing.
Lanjutan
2 days
Arahan
1
1
Turn the casing
Turn the casing
Turn a tube with a flange at its lower end and a thread up its outside, ending in a socketed top face. Bore a narrow aperture down from that face into a wider space, leaving a square-cornered shoulder between them: that corner is the seat. Thread the inside of the lower end. Turn a nut for the outer thread. Unknown: the metal and the sizes.
Bahan untuk langkah ini:
 Logam tidak diketahui1 as required
Alatan diperlukan:
 Mesin Pelarik Logam
 Set mata larik (HSS)
 Set pemotong ulir
 Angkup Vernier
 Dimensi tidak diketahui
2
2
Turn the plunger and its plug
Turn the plunger and its plug
Turn the plunger: a conical face that meets the seat, a smooth stem above it rising through the aperture with a threaded head at its end, and below it a hollow cylinder nearly filling the casing, open at the bottom. Turn a plug that screws into the casing's lower end, with a stub that fits loosely inside the hollow, a cross groove across the stub and a hole through the plug. Strike a lug in from the plunger's lower edge so it rides in the groove and stops the plunger turning.
Bahan untuk langkah ini:
Logam tidak diketahui1 as requiredAlatan diperlukan:
Mesin Pelarik LogamSet mata larik (HSS)Set pemotong ulir Set KikirDimensi tidak diketahui
3
3
Make the spring, washers and hand nut
Make the spring, washers and hand nut
Wind a spring to fit inside the plunger's hollow. Cut a packing washer for the socket on top of the casing and a washer for the tyre side. Turn a hand nut that screws onto the stem head, with a seating face underneath, and turn its lip inwards round the stem so it overhangs the head. Unknown: the spring metal and the packing.
Bahan untuk langkah ini:
Logam tidak diketahui1 as required Pembungkus tidak diketahui2 keping
Alatan diperlukan:
Mesin Pelarik Logam Playar GabunganDimensi tidak diketahui
4
4
Grind the seat and assemble
Grind the seat and assemble
Grind the plunger's conical face onto the casing seat, as Schrader recommends alongside the washer. Put the spring in the plunger and screw in the plug from below, the lug in the groove. Fit the packing washer in the socket and the hand nut on the stem. Clamp the casing through the tyre between its flange and the outer washer and nut. Pump: the air lifts the plunger. Stop: spring and tyre pressure close it. Screw the hand nut down onto the washer to lock it.
Alatan diperlukan:
Playar Gabungan Cermin mata keselamatan
Bahan
2- 1 as requiredPemegang Tempat
- 2 kepingPemegang Tempat
Alatan Diperlukan
8- Pemegang Tempat
- Pemegang Tempat
- Pemegang Tempat
- Pemegang Tempat
- Pemegang Tempat
- Pemegang Tempat
- Pemegang Tempat
- Pemegang Tempat
Blueprint ini membuat

Blueprint berkaitan
Blueprint ini berkongsi pengetahuan — teknik, bahan atau prinsip
CC0 Domain Awam
Blueprint ini dikeluarkan di bawah CC0. Anda bebas menyalin, mengubah, mengedar, dan menggunakan karya ini untuk sebarang tujuan, tanpa meminta kebenaran.
Sokong Pembuat dengan membeli produk melalui Blueprint mereka di mana mereka memperoleh Komisen Pembuat ditetapkan oleh Penjual, atau cipta iterasi baru Blueprint ini dan sertakan ia sebagai sambungan dalam Blueprint anda sendiri untuk berkongsi hasil.