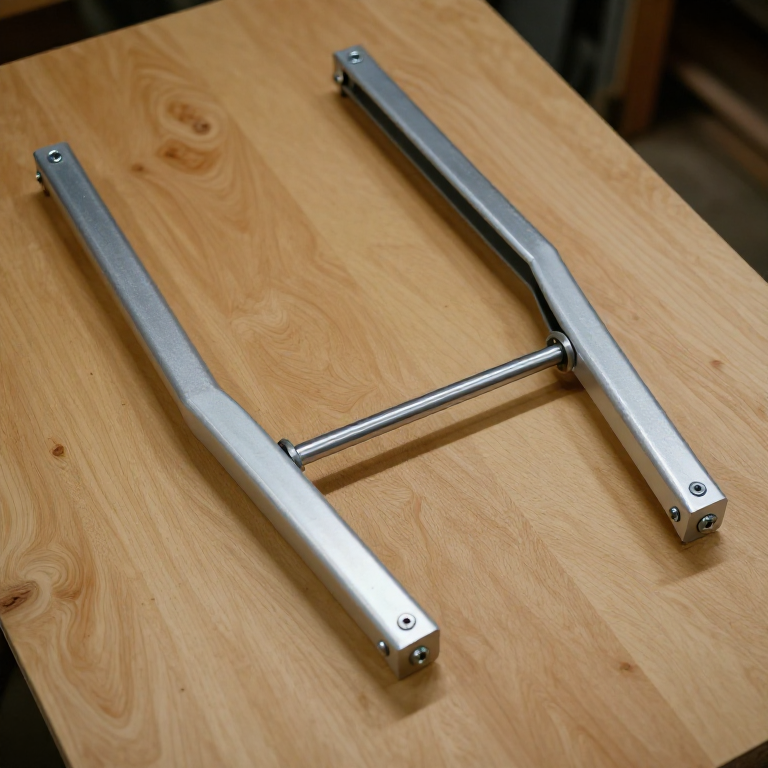


Watt's Linkage
Arahan
Lay out the three bars
Lay out the three bars
Two long arms and one short coupler, symmetrical about the centre.
- Cut two rocking arms at 120 mm hole centres from 3 mm aluminium flat bar.
- Cut one coupler at 60 mm hole centres.
- Mark the coupler's midpoint at 30 mm — the tracing point.
- Stack-drill the two arms together at 4.1 mm so they match exactly.
The proportion that matters: the tracing point divides the coupler in the inverse ratio of the two arm lengths. With equal arms, that is the exact midpoint. Make the arms unequal and the tracing point must move off centre by the same ratio, or the path tilts.
Equal arms is the easy case and the one to build first. It is also what a vehicle Watt's link uses, for the same reason — symmetry means the axle stays centred as it rises and falls.Bahan untuk langkah ini:
 Bar Rata Aluminium1 keping
Alatan diperlukan:
 Bingkai Gergaji Besi dengan Mata
 Ragum Bangku
 Penebuk Pusat
 Gerudi Tanpa Wayar
 Angkup Digital 6 Inci
Set the two fixed pivots
Set the two fixed pivots
Pivot spacing decides how long the straight portion is.
- Cut a baseplate 250 × 200 mm from 18 mm ply.
- Mark two fixed pivots on a vertical centreline, 180 mm apart.
- Drill 4.2 mm and fit M4 × 30 socket head cap screws × 2 from behind, with M4 flat washers × 2 and M4 hex nuts × 2.
- Check the two pivots are exactly level with the combination square.
Bahan untuk langkah ini:
 Kepingan papan lapis1 helaian
 Skru Kepala Soket2 keping
 Sesendal Rata4 keping
 Nat Heksagon2 keping
Alatan diperlukan:
Gerudi Tanpa Wayar Set Mata Gerudi
 Sesiku Gabungan
 Set Kunci Heks
Hang the arms and fit the coupler
Hang the arms and fit the coupler
Four pivots total, and the assembly order is fixed by access.
- Fit each arm onto its ground pin with a washer above and below, retained by an M4 nylon insert lock nut.
- Swing both arms so their free ends point toward one another.
- Join the coupler to both arm ends with M4 × 16 socket head cap screws × 2, washers each side, and M4 nylon insert lock nuts × 2.
- Check the whole assembly falls under its own weight from any position.
Bahan untuk langkah ini:
Skru Kepala Soket2 kepingSesendal Rata8 keping Nat Kunci Sisipan Nilon4 keping
Alatan diperlukan:
Set Kunci HeksTrace the figure of eight
Trace the figure of eight
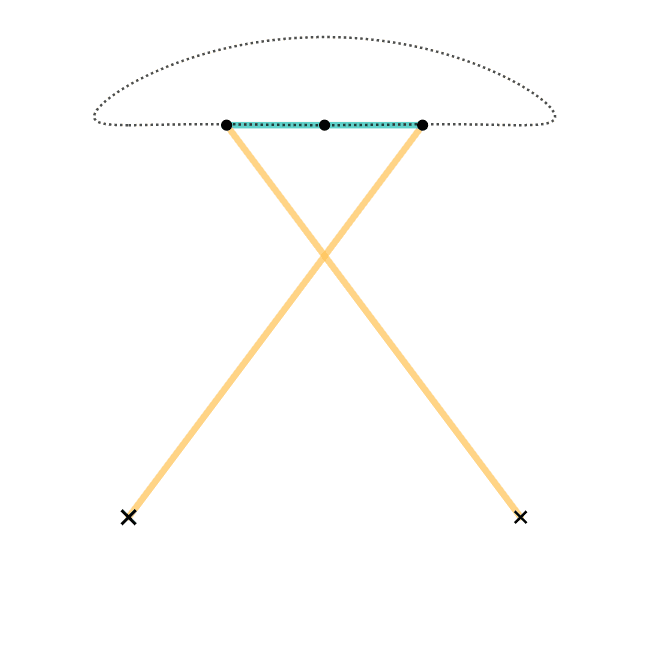
Watt's linkage does not draw a line — it draws a very slim figure of eight, and you use the middle of it.
- Fit a marker at the coupler midpoint.
- Sweep the linkage through its FULL range, well past the working region, and let it draw.
- Examine the trace: a slender crossing curve.
- Lay a straight edge along the central section and measure how far it stays within a tenth of a millimetre.
Bahan untuk langkah ini:
Kepingan papan lapis1 bungkusAlatan diperlukan:
Angkup Digital 6 InciSesiku GabunganHistory and its second life
History and its second life
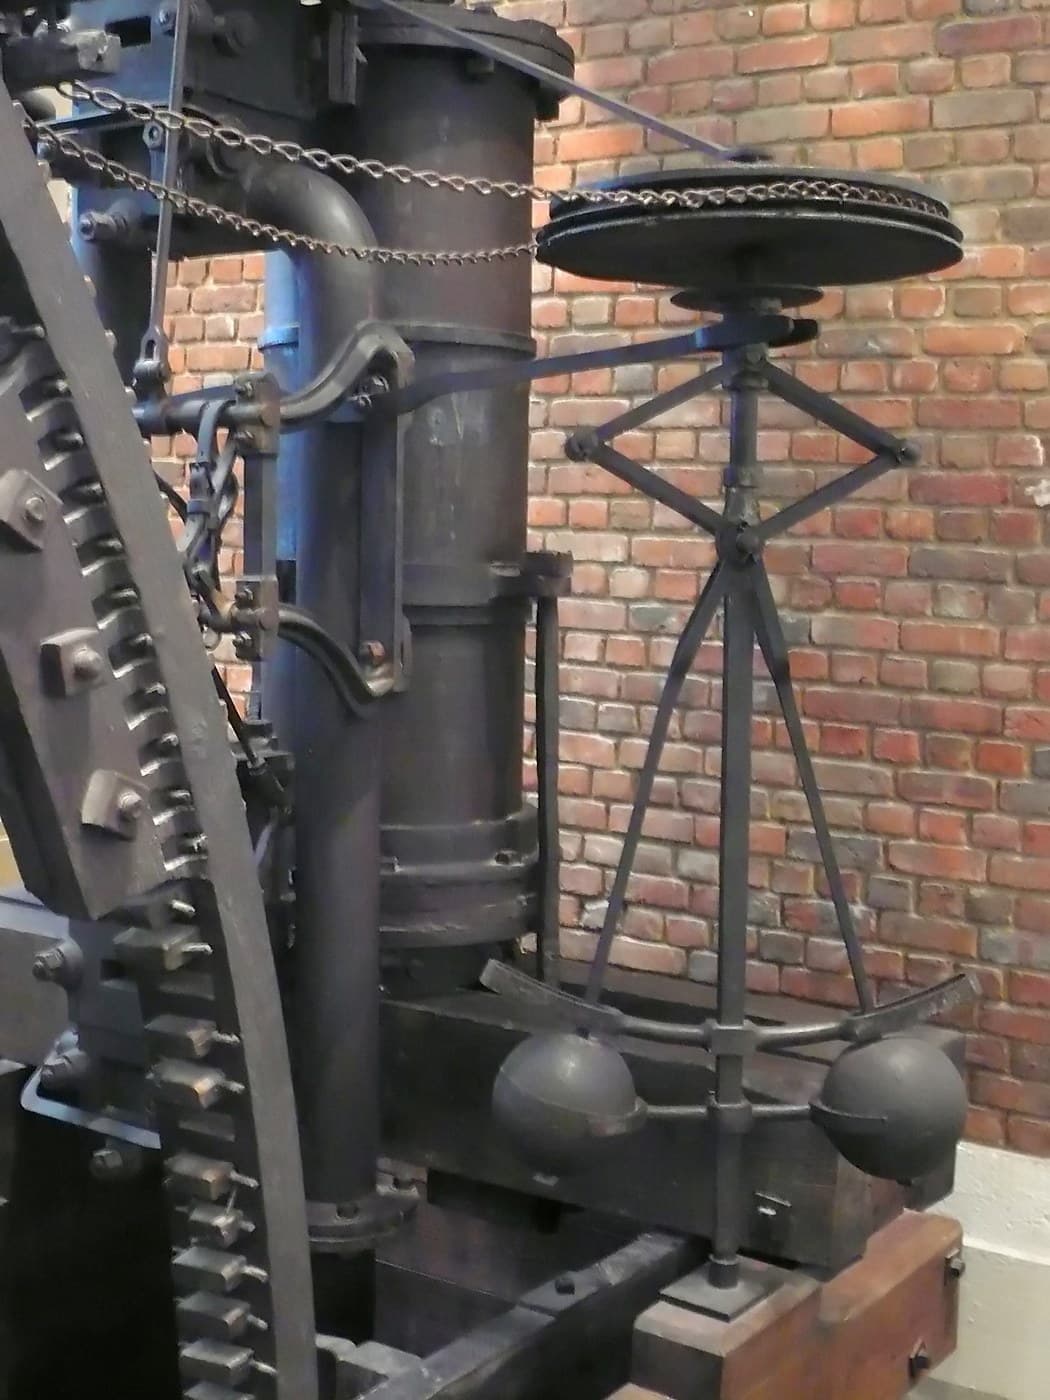
James Watt devised the linkage in 1784. His double-acting engine drove the beam in both directions, so the flexible chain used on earlier single-acting engines was useless — it could pull but not push. A rigid connection was needed, and it had to travel straight while the beam end swung in an arc. Watt wrote to Boulton that he was not "over anxious after fame" but was "more proud of the parallel motion than of any other mechanical invention I have ever made".
What the parallel motion actually was: in the engines, Watt combined this three-bar linkage with a pantograph so that the piston rod and the air pump rod could both be driven from one beam. The straight-line element at its heart is what is built here.
Its second life is the surprising part. Long after beam engines were scrapped, the Watt's link reappeared in vehicle suspension. Mounted transversely, it locates a live rear axle laterally while allowing it to move vertically along that near-straight central path — better centred than a Panhard rod, which swings the axle sideways as it rises. It is still fitted to production cars and to many racing chassis.
Compared with its siblings: three bars and four pivots make it the most compact and the cheapest of the straight-line family. Chebyshev's four bars give a mathematically minimised error; Peaucellier's eight give exactness. Watt's is the one that has been in continuous industrial use for two hundred and forty years — which suggests that compactness and part count matter at least as much as accuracy when a mechanism has to survive in the real world.
Bahan
6- 1 kepingPemegang Tempat
- 1 bungkusPemegang Tempat
- 2 kepingPemegang Tempat
- 12 kepingPemegang Tempat
- 2 kepingPemegang Tempat
- 4 kepingPemegang Tempat
Alatan Diperlukan
8- Pemegang Tempat
- Pemegang Tempat
- Pemegang Tempat
- 1 vendor sell this, none ship to you yetPemegang Tempat
- Pemegang Tempat
- Pemegang Tempat
- Pemegang Tempat
- Pemegang Tempat
Blueprint berkaitan
Blueprint ini berkongsi pengetahuan — teknik, bahan atau prinsip


CC0 Domain Awam
Blueprint ini dikeluarkan di bawah CC0. Anda bebas menyalin, mengubah, mengedar, dan menggunakan karya ini untuk sebarang tujuan, tanpa meminta kebenaran.
Sokong Pembuat dengan membeli produk melalui Blueprint mereka di mana mereka memperoleh Komisen Pembuat ditetapkan oleh Penjual, atau cipta iterasi baru Blueprint ini dan sertakan ia sebagai sambungan dalam Blueprint anda sendiri untuk berkongsi hasil.