SENI
KECANTIKAN & KESEJAHTERAAN
KRAFTANGAN
BUDAYA & SEJARAH
HIBURAN
ALAM SEKITAR
MAKANAN & MINUMAN
KEJURUTERAAN TERBALIK
SAINS
SUKAN
TEKNOLOGI
BOLEH PAKAI
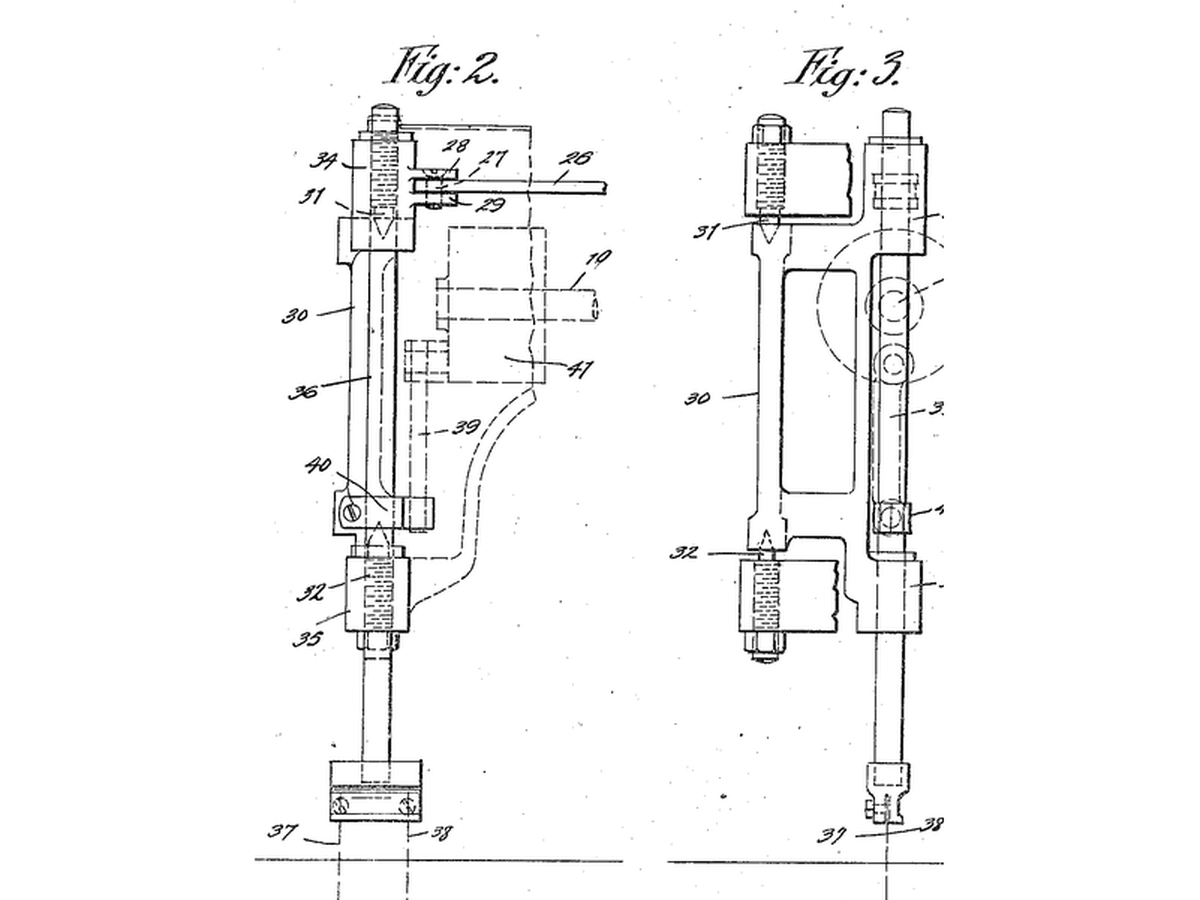


Zigzag Stitch Mechanism
The lock-stitch machine already published sews a straight line, and a straight line of thread cannot stretch - which is why early machines could not sew knitted cloth, finish a raw edge, or work a buttonhole. The next rung is a mechanism that swings the needle bar sideways between stitches, driven by a cam turning with the main shaft.
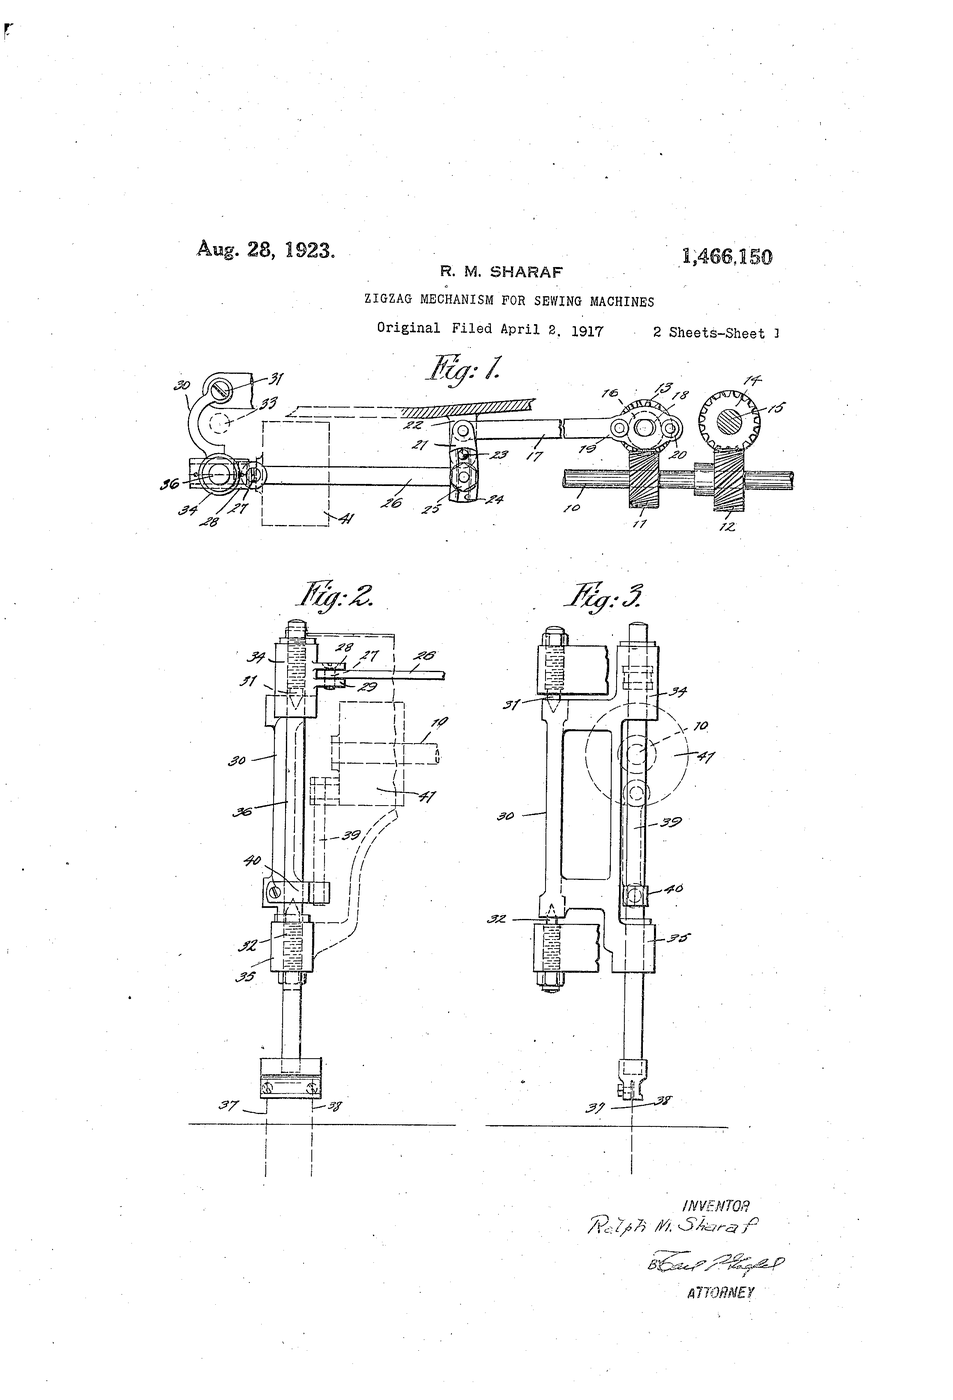
**US 1,466,150**, "Zigzag mechanism for sewing machines", Ralph M. Sharaf, filed 2. April 1917, granted 28. August 1923: a cam-driven vibration of the needle bar while the machine stitches, with the throw adjustable. Domestic zigzag machines followed in the 1950s.
**You build the motion in wood** - a cam, a follower and a pen drawing the needle's path - then sew both stitches on jersey and pull them until something gives.
Pertengahan
3 hours
Arahan
1
1
Cut a cam
Cut a cam
From 18 mm plywood cut a 60 mm disc and drill its pivot hole 5 mm off centre: that offset is half the zigzag width. Cut a second disc with a 10 mm offset for a wider stitch.
Bahan untuk langkah ini:
 Kepingan papan lapis1 keping
Alatan diperlukan:
 Gergaji Tangan
 Gerudi Tanpa Wayar
 Pembaris
2
2
Follower and needle bar
Follower and needle bar
Screw a pivoted arm to the board so one end rides on the cam's edge and the other carries a dowel - the needle bar. A spring keeps the follower against the cam. Tape a marker to the dowel.
Bahan untuk langkah ini:
 Skru mesin4 keping
 Pelbagai spring mampatan1 set
 Rod Pasak Kayu1 keping
Alatan diperlukan:
 Penembak gam panas
 Ragum Bangku
 Penanda Kekal
3
3
Draw the stitch
Draw the stitch
Pull a strip of graph paper steadily under the pen while turning the cam by hand, one turn per stitch. Measure the width of the trace; swap cams and repeat. Lock the follower to draw a straight line for comparison.
Bahan untuk langkah ini:
 Kertas Graf1 helaian
Alatan diperlukan:
Pembaris Pita pelekat kertas
4
4
Sew the real thing
Sew the real thing
Cut six 200 x 50 mm jersey strips. Join them in pairs with a 100 mm seam: straight stitch, zigzag 3 mm, zigzag 5 mm, all at 2.5 mm stitch length.
Bahan untuk langkah ini:
 Benang10 meter
Alatan diperlukan:
 Mesin jahit
 Gunting kain
 Pakej kain jersi kemeja-T
5
5
Pull until it gives
Pull until it gives
Mark 100 mm across each seam. Pull each pair apart steadily by hand and note the marked length when the thread snaps - or when it does not, and the cloth simply stretches.
Alatan diperlukan:
Pembaris Pita Ukur
6
6
Thread geometry and your results
Thread geometry and your results
Memuatkan buku nota Jupyter…
7
7
History & Context
History & Context
**What the patent specifies:** a cam-driven mechanism that vibrates the needle bar laterally during stitching, with adjustable throw. **Modern build (derived):** a plywood cam and follower drawing the path, plus real seams for the test.
The same sideways swing gave overcast edges, buttonholes and decorative stitches, and cam stacks later let a machine select a pattern. Its limits: a zigzag uses more thread, can tunnel thin cloth if the tension is wrong, and the needle bar's sideways travel puts a limit on machine speed.
Bahan
6- 1 kepingPemegang Tempat
- 4 kepingPemegang Tempat
- Pemegang Tempat
- 1 kepingPemegang Tempat
- 1 helaianPemegang Tempat
- 10 meterPemegang Tempat
Alatan Diperlukan
11- Pemegang Tempat
- 1 vendor sell this, none ship to you yetPemegang Tempat
- Pemegang Tempat
- Pemegang Tempat
- Pemegang Tempat
- Pemegang Tempat
- Pemegang Tempat
- Pemegang Tempat
- Pemegang Tempat
- Pemegang Tempat
- 1 vendor sell this, none ship to you yetPemegang Tempat
Blueprint berkaitan
Blueprint ini berkongsi pengetahuan — teknik, bahan atau prinsip
CC0 Domain Awam
Blueprint ini dikeluarkan di bawah CC0. Anda bebas menyalin, mengubah, mengedar, dan menggunakan karya ini untuk sebarang tujuan, tanpa meminta kebenaran.
Sokong Pembuat dengan membeli produk melalui Blueprint mereka di mana mereka memperoleh Komisen Pembuat ditetapkan oleh Penjual, atau cipta iterasi baru Blueprint ini dan sertakan ia sebagai sambungan dalam Blueprint anda sendiri untuk berkongsi hasil.