

Flat Belt and Crowned Pulley
Ìlànà
Make one flat pulley and one crowned pulley
Make one flat pulley and one crowned pulley
You need both, because the comparison is the entire blueprint.
- Cut four 100 mm discs from 18 mm Baltic birch plywood; glue in pairs to make two pulleys 36 mm wide.
- Bore both centres 8.0 mm.
- Leave the FIRST pulley's face dead cylindrical — check with a straightedge along the face.
- On the SECOND, file the face to a shallow barrel: about 0.4 mm higher at the centre than at each edge.
- Verify the crown with the caliper — measure diameter at the centre and at both edges.
Modern build spec (derived). A crown of roughly 1% of face width is the usual rule, so 36 mm wide gives about 0.4 mm. It is a small enough curve that you can barely see it, which is exactly why people assume flat belt pulleys are flat.
Make the crown symmetrical. A lopsided crown has its high point off centre, and the belt will obediently track to wherever that high point actually is rather than to the middle.Àwọn ohun èlò fún ìgbésẹ̀ yìí:
 Pìláwọ́ọ̀dù Bíṣì Baltiki1 ewé
Àwọn irinṣẹ́ tí a nílò:
 Ayùn Jígísò
 Àkójọ Ìfá
 Òṣùwọ̀n Kálípà Díjítà Ìnṣì 6
 Igun Àpapọ̀
 Ẹ̀rọ Ìlùkòkò Aláìlókùn
 Àkójọ Orí Ìlùkòkò
Mount the shafts parallel — deliberately
Mount the shafts parallel — deliberately
Parallel first, so that later you can misalign them on purpose and watch what happens.
- Cut a baseplate 400 × 200 mm from 18 mm ply.
- Mount two shafts 300 mm apart in 608 bearings in pillow blocks.
- Fix each block with M5 × 40 socket head cap screws × 2, M5 flat washers × 4 and M5 hex nuts × 2.
- Make the SECOND block's holes slotted, so one shaft can be swung a few degrees out of parallel.
- Set both parallel with the combination square and lock.
Àwọn ohun èlò fún ìgbésẹ̀ yìí:
Pìláwọ́ọ̀dù Bíṣì Baltiki1 ewé Ball Bearing - Non-Flanged (8mm Bore, 22mm OD)4 ẹyọ
 Wáṣà Pẹrẹsẹ8 ẹyọ
 Nọ́ọ̀tì Onígun Mẹ́fà4 ẹyọ
 Ọ̀pá Róbótó Alumíníọ̀mù1 ẹyọ
Àwọn irinṣẹ́ tí a nílò:
Ẹ̀rọ Ìlùkòkò AláìlókùnÀkójọ Orí Ìlùkòkò Ayùn Kópìngì
 Àkójọ Kọ́kọ́rọ́ Onígun Mẹ́fàIgun Àpapọ̀
Run the flat pulleys first, and watch the belt walk off
Run the flat pulleys first, and watch the belt walk off
Establish the problem before demonstrating the solution.
- Fit both CYLINDRICAL pulleys and a flat belt of leather, canvas or thin rubber.
- Drive one shaft slowly by hand or with a drill.
- Watch the belt's position on the face.
- Nudge the belt toward one edge and let go.
Àwọn ohun èlò fún ìgbésẹ̀ yìí:
 Aṣọ Mọ́sìlínì Òwú1 metre
Àwọn irinṣẹ́ tí a nílò:
Ẹ̀rọ Ìlùkòkò AláìlókùnÒṣùwọ̀n Kálípà Díjítà Ìnṣì 6Swap in the crowned pulley and try to make it fail
Swap in the crowned pulley and try to make it fail
Now attack the solution and find out how strong it is.
- Fit the CROWNED pulley in place of one cylindrical one and run again.
- Push the belt deliberately to one edge and release — it should climb back to the centre by itself.
- Now swing the slotted block to put the shafts a degree or two out of parallel and run again.
- Increase the misalignment until the belt finally runs off, and record that angle.
Àwọn irinṣẹ́ tí a nílò:
Ẹ̀rọ Ìlùkòkò AláìlókùnIgun Àpapọ̀Àkójọ Kọ́kọ́rọ́ Onígun Mẹ́fàÒṣùwọ̀n Kálípà Díjítà Ìnṣì 6What flat belts buy, and history
What flat belts buy, and history
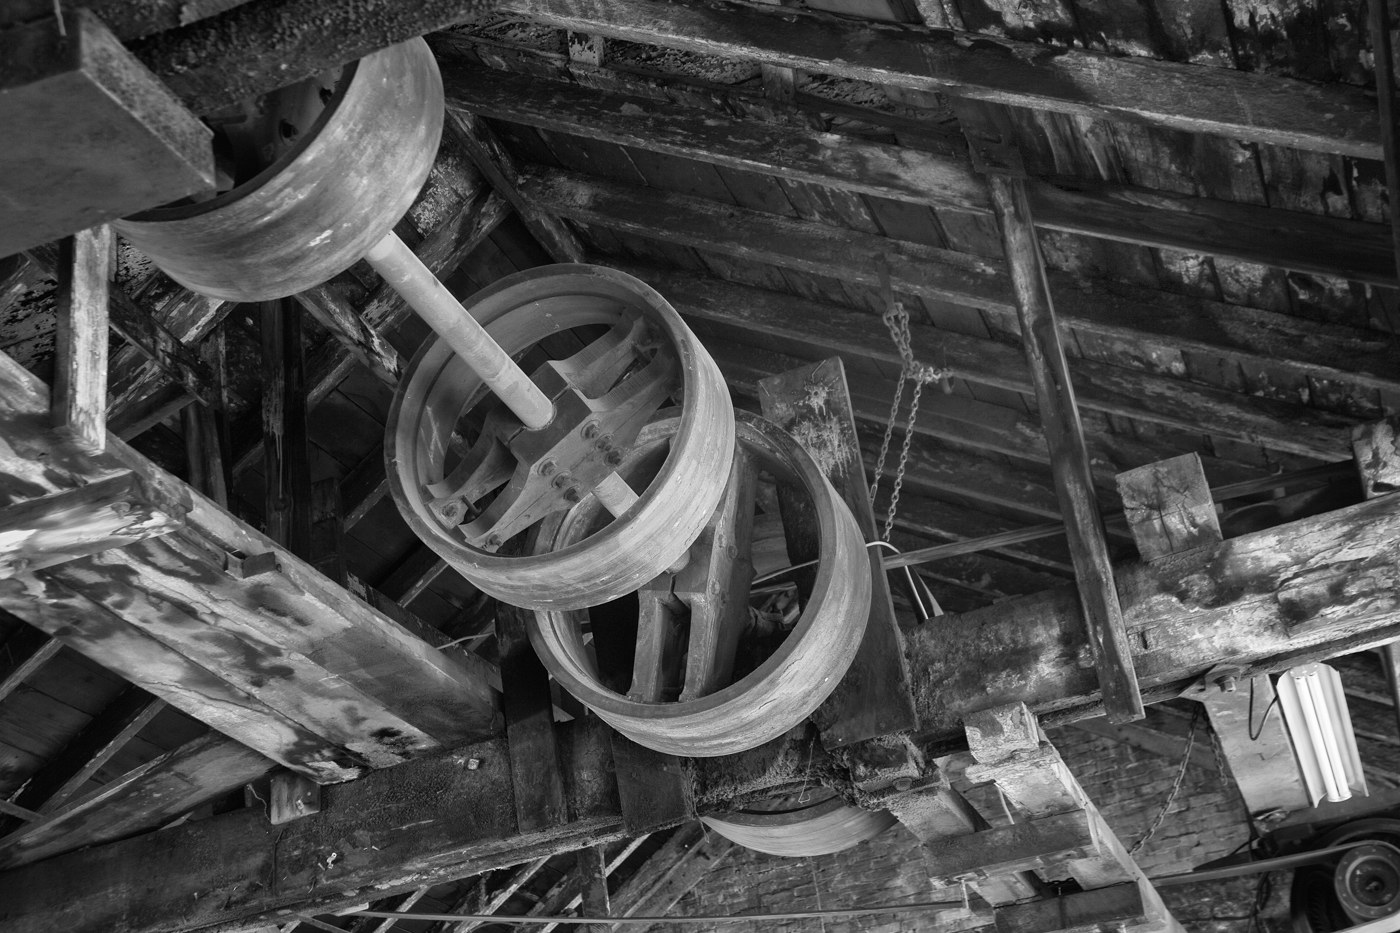
Whole factories ran on this. Before individual electric motors, one engine drove overhead line shafting the length of a workshop, and every machine took its power from a flat leather belt dropped onto a pulley. Belts could be shifted between fast and loose pulleys to start and stop a machine, crossed to reverse it, and moved to stepped pulleys to change speed. The crowned pulley is what made that practical without a single guide or flange.
What it gives up against its siblings. A V-belt wedges into its groove and transmits far more torque for the same tension, in a fraction of the width. A timing belt cannot slip at all, so it can drive a camshaft where timing must be exact. A flat belt slips under overload — which was often regarded as a safety feature, since a jammed machine simply stopped the belt rather than breaking something — and it tolerates misalignment, long centre distances and twisting that would destroy either of the others.
It is not obsolete. Every bandsaw tracks its blade on crowned wheels, using exactly this effect. Belt sanders, treadmills and conveyor systems use crowned rollers for the same reason. Wherever a wide flat thing has to stay centred on a roller, the crown is the answer, and it needs no sensors, no adjustment and no maintenance.
The general principle worth taking away: the best correction mechanisms are the ones built into a shape rather than added as a part. The crown adds no components, no friction and nothing to wear out — it just makes the error self-correcting. That is a design ideal well beyond belts.
Àwọn ohun-èlò
6- Àyè
- 4 ẹyọ$1.26
- 8 ẹyọÀyè
- 4 ẹyọÀyè
- Àyè
- 1 metreÀyè
Àwọn irinṣẹ́ tó nílò
8- 1 vendor sell this, none ship to you yetÀyè
- Àyè
- Àyè
- 1 vendor sell this, none ship to you yetÀyè
- Àyè
Blueprint tó jọra
Àwọn blueprint wọ̀nyí pín ìmọ̀ — ọ̀nà, ohun-èlò tàbí ìlànà

CC0 Àgbègbè Gbogbogbò
Blueprint yìí ti jáde lábẹ́ CC0. O lè ṣe àdàkọ, yí padà, pín, àti lò láìsí ìyọ̀ǹda.
Ṣàtìlẹ́yìn Olùṣẹ́dá nípa rírà àwọn ọjà nipasẹ̀ Blueprint wọn Ẹ̀san Olùṣẹ́dá tí àwọn Olùtajà gbé kalẹ̀, tàbí ṣẹ̀dá àtúnṣe tuntun ti Blueprint yìí kí o sì fi sínú Blueprint rẹ gẹ́gẹ́ bí ìsopọ̀ láti pín owó-wíwọlé.