IṢẸ́ ỌNÀ
ẸWÀ ÀTI ÌLERA
IṢẸ́ ỌWỌ́
ÀṢÀ ÀTI ÌTÀN
ÌṢERÉ
ÀYÍKÁ
OÚNJẸ ÀTI OHUN MÍMU
REVERSE ENGINEERING
SÁYẸ́ǸSÌ
ERÉ ÌDÁRAYÁ
ÌMỌ̀-Ẹ̀RỌ
ÀWỌN OHUN WÍWỌ̀
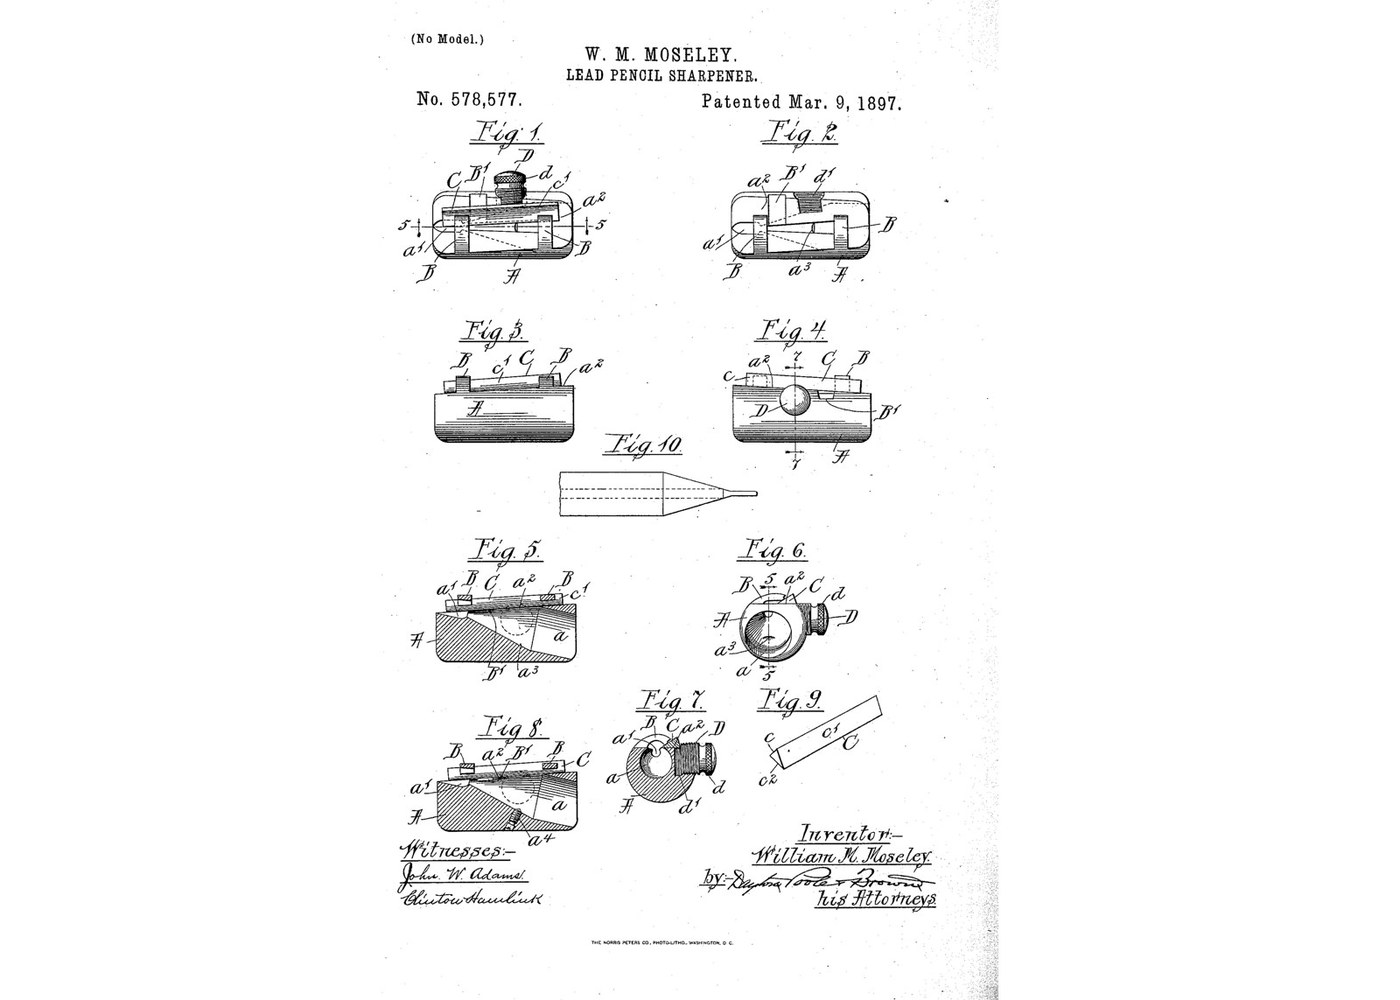


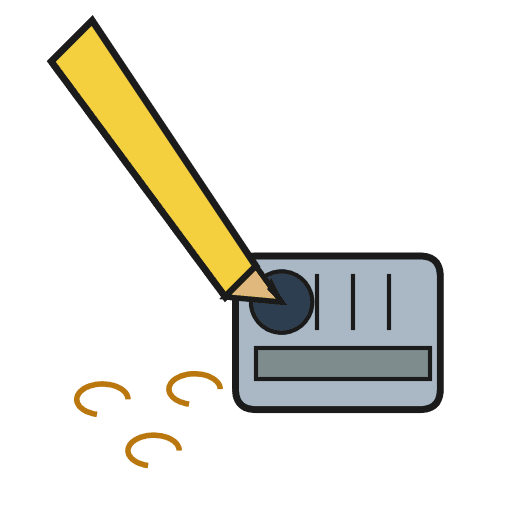
Pencil Sharpener: Conical Bore and a Reversible Triangular Blade (Moseley 1897)
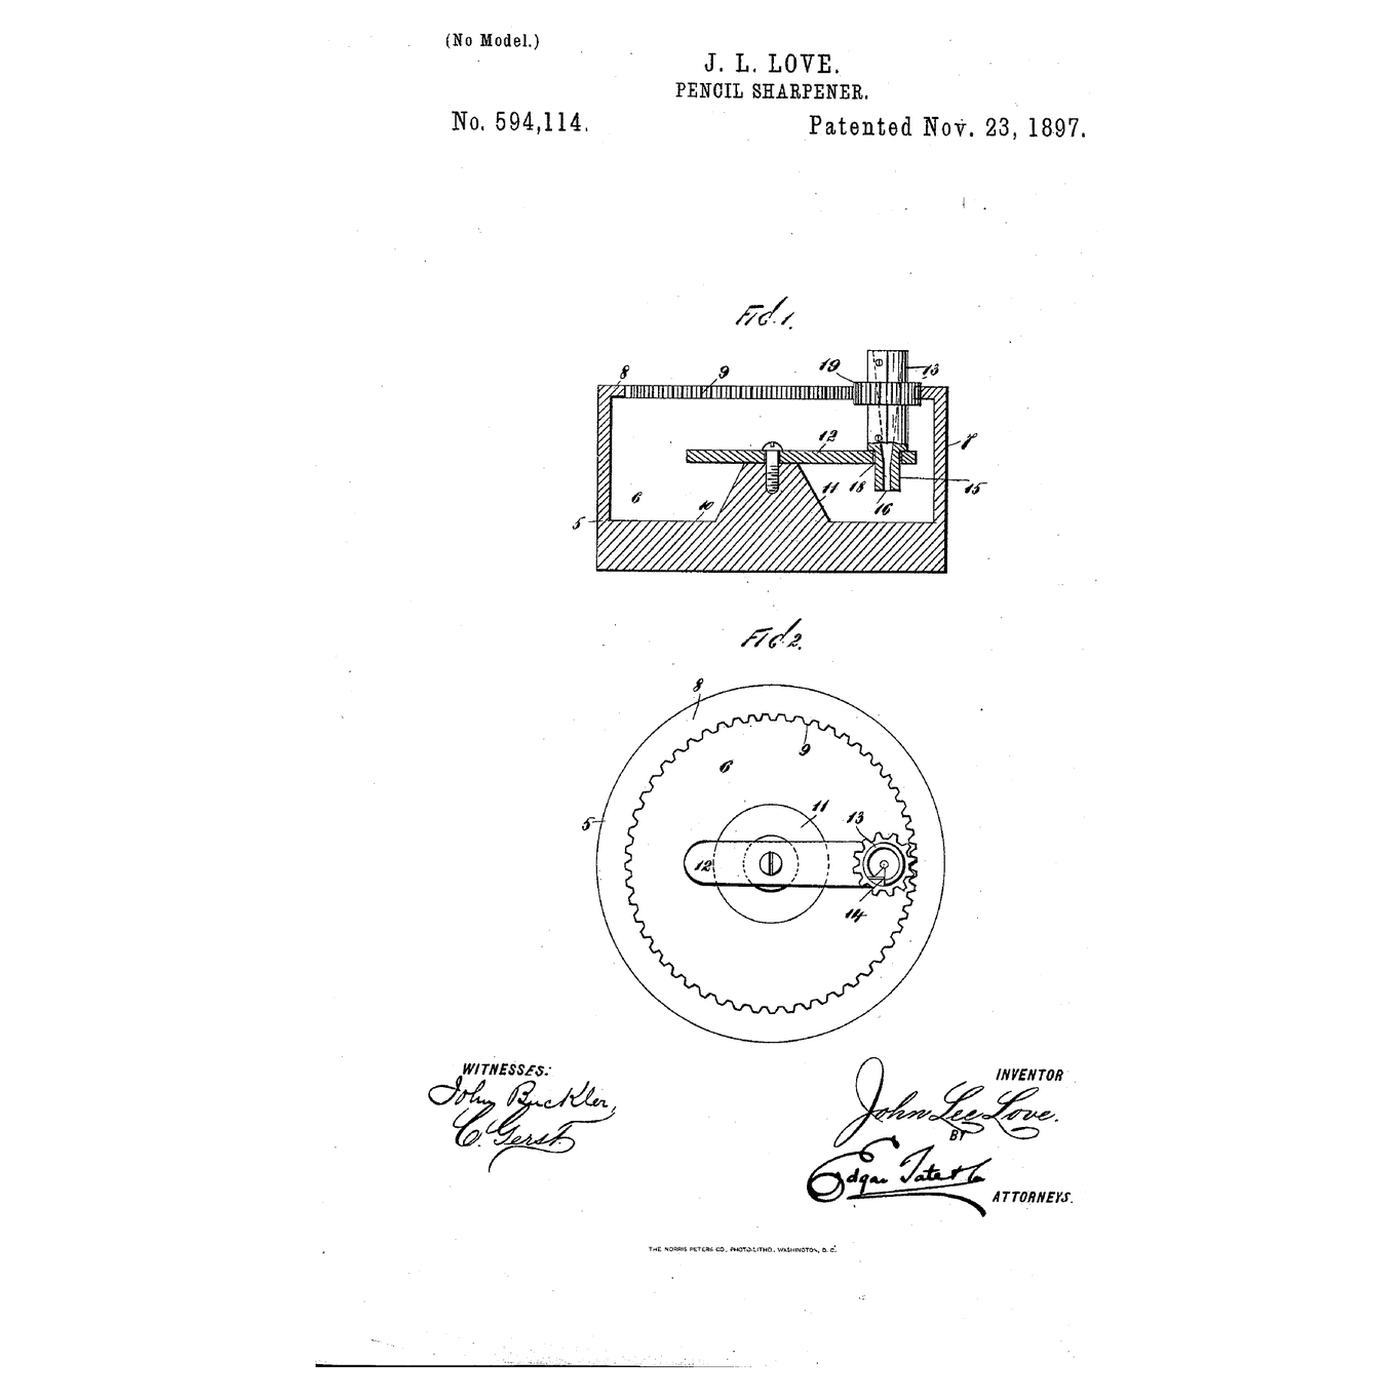
The pocket pencil sharpener: twist the pencil in a conical hole and a blade along its side shaves the wood and lead to a point. Moseley made the body from plain round rod by drilling the cone at a slant, so the flat seat for the blade could be cut close to the rod's surface. His blade is longer than it needs to be: when the part that meets the lead wears, slide it along or turn it end for end.
Source: William M. Moseley, US 578,577 (1897). Unknown: the metals and the sizes. Moseley gives the body as metal, hard rubber or the like, and no sizes or angles, so these are linked to unknown heads. Lathe and mill are ours. Picture: the patent's drawing.
Àárín
1 day
Ìlànà
1
1
Turn the body from rod
Turn the body from rod
Cut a length of round rod and round its ends. In one end, bore a cone tapering inwards, its axis set at an angle to the rod's axis. Unknown: the metal, the sizes and the angle.
Àwọn ohun èlò fún ìgbésẹ̀ yìí:
 Irin tí a kò mọ̀1 as required
Àwọn irinṣẹ́ tí a nílò:
 Ẹ̀rọ Ìyí Irin
 Àpò ohun èlò lathe (HSS)
 Kálípà Fáníà
 Ìwọ̀n tí a kò mọ̀
2
2
Cut the blade seat and the stop arms
Cut the blade seat and the stop arms
Mill one side of the rod flat to make the blade seat, roughly parallel with the side of the cone, so it breaks into the bore. Leave two ribs standing across it as stop arms, and undercut them so the blade's edge slips under. Give their free ends oblique faces matching the blade. Cut away a clearance space in front of the blade so shavings do not clog. Drill and tap a hole for the clamping stud.
Àwọn irinṣẹ́ tí a nílò:
 Ẹ̀rọ Ìgégé Irin
 Àkójọ Ìfá
 Ìtò irinṣẹ́ ìgé iháÌwọ̀n tí a kò mọ̀
3
3
Make the blade and the clamping stud
Make the blade and the clamping stud
Make a triangular blade: a back, and two converging faces meeting in the cutting edge, longer than the cone. Turn a threaded stud with a knurled head for the finger.
Àwọn ohun èlò fún ìgbésẹ̀ yìí:
Irin tí a kò mọ̀1 as requiredÀwọn irinṣẹ́ tí a nílò:
Àkójọ ÌfáẸ̀rọ Ìyí IrinÌtò irinṣẹ́ ìgé iháÌwọ̀n tí a kò mọ̀4
4
Clamp the blade and sharpen
Clamp the blade and sharpen
Lay the blade with one face on the seat and the other against the arms, edge projecting into the bore, and screw the stud down. Twist a pencil in the cone. When the part of the edge that meets the lead wears, slide the blade along; when that is used up, turn it end for end.
Àwọn irinṣẹ́ tí a nílò:
 Gíláàsì ààbò
Àwọn ohun-èlò
1- 1 as requiredÀyè
Àwọn irinṣẹ́ tó nílò
8- Àyè
- Àyè
- Àyè
Ìtọ́nisọ́nà yìí ń ṣe
Blueprint tó jọra
Àwọn blueprint wọ̀nyí pín ìmọ̀ — ọ̀nà, ohun-èlò tàbí ìlànà
CC0 Àgbègbè Gbogbogbò
Blueprint yìí ti jáde lábẹ́ CC0. O lè ṣe àdàkọ, yí padà, pín, àti lò láìsí ìyọ̀ǹda.
Ṣàtìlẹ́yìn Olùṣẹ́dá nípa rírà àwọn ọjà nipasẹ̀ Blueprint wọn Ẹ̀san Olùṣẹ́dá tí àwọn Olùtajà gbé kalẹ̀, tàbí ṣẹ̀dá àtúnṣe tuntun ti Blueprint yìí kí o sì fi sínú Blueprint rẹ gẹ́gẹ́ bí ìsopọ̀ láti pín owó-wíwọlé.