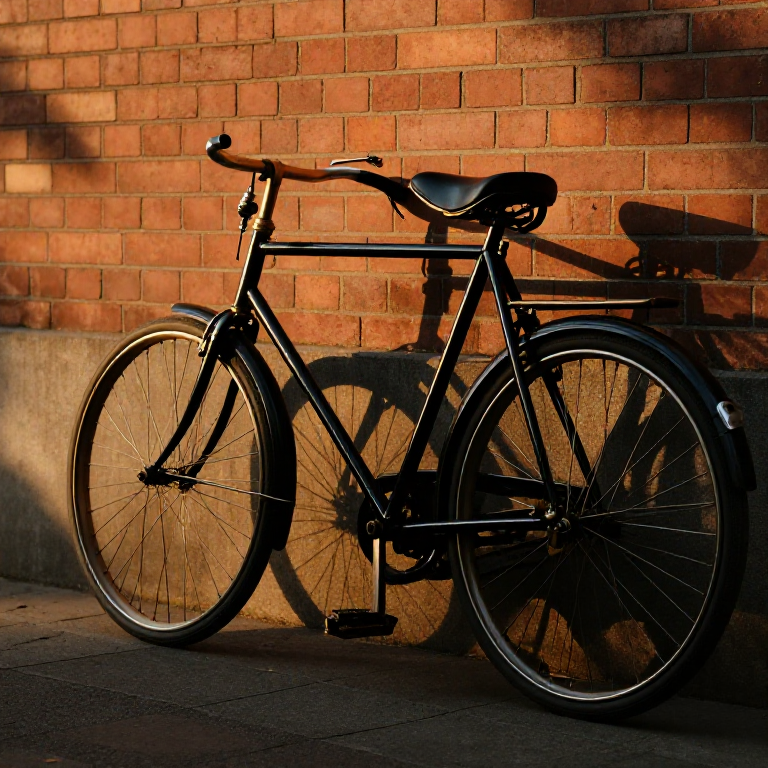


Building a Safety Bicycle — Chain Drive, Equal Wheels, and Personal Freedom
The bicycle that everyone rides today was settled in the 1880s and is still called, in the trade, the safety bicycle — to distinguish it from the terrifying high penny-farthing it replaced. Two equal wheels, a diamond frame, a chain driving the rear wheel, and soon air-filled tyres made cycling safe, fast, and available to ordinary people.
Each feature solves a problem. Equal wheels and a low frame mean you can put a foot down and cannot be pitched over the handlebars. The chain and gearing let a small wheel travel fast without the giant front wheel of the penny-farthing. The diamond frame, built of brazed steel tubes, is astonishingly light and strong for its weight. And Dunlop's pneumatic rubber tyres turned a bone-shaking ride into a smooth one.
The safety bicycle was more than transport. Cheap, simple, and needing no horse or fuel, it gave working people and especially women a freedom of movement they had never had — which is why it is often credited with as much social change as mechanical.
Ìlànà
Understand the safety design
Understand the safety design
Braze the diamond frame
Braze the diamond frame
Àwọn ohun èlò fún ìgbésẹ̀ yìí:
 Páìpù irin ilé4 mítà
Àwọn irinṣẹ́ tí a nílò:
 Ọ̀gọ̀ ìdàpọ̀ brazing
Build the wheels
Build the wheels
Àwọn ohun èlò fún ìgbésẹ̀ yìí:
 Àwọn ọ̀pá kẹ̀kẹ́ irin72 ẹyọ
 Rim kẹ̀kẹ́ (aluminium)2 ẹyọ
Àwọn irinṣẹ́ tí a nílò:
 Ẹ̀rọ ìgbáradì ọ̀pá kẹ̀kẹ́
Fit pneumatic tyres
Fit pneumatic tyres
Àwọn ohun èlò fún ìgbésẹ̀ yìí:
 Táyà rọ́bà2 ẹyọ
Build the chain drive
Build the chain drive
Àwọn ohun èlò fún ìgbésẹ̀ yìí:
 Ẹ̀wọ̀n onírọ́là1 ẹyọ
 Kẹ̀kẹ́ ẹ̀wọ̀n1 ìtò
 Kẹ̀kẹ́ ẹ̀wọ̀n1 ìtò
Fit the bottom bracket and cranks
Fit the bottom bracket and cranks
Àwọn ohun èlò fún ìgbésẹ̀ yìí:
 Bọ́ọ̀lù ìyípo1 ìtò
Set up the steering
Set up the steering
Àwọn ohun èlò fún ìgbésẹ̀ yìí:
 Ìdarí kẹ̀kẹ́1 ẹyọ
Fit brakes
Fit brakes
Àwọn ohun èlò fún ìgbésẹ̀ yìí:
 Caliper ìdènà2 ẹyọ
Fit the saddle
Fit the saddle
Àwọn ohun èlò fún ìgbésẹ̀ yìí:
 Gàárì awọ1 ẹyọ
Assemble and true
Assemble and true
Àwọn irinṣẹ́ tí a nílò:
 Ìdìmú òpó
Test and tune
Test and tune
Àwọn irinṣẹ́ tí a nílò:
Ìdìmú òpóAppreciate the freedom it gave
Appreciate the freedom it gave
Àwọn ohun-èlò
11- 4 mítàÀyè
- 72 ẹyọÀyè
- Àyè
- 2 ẹyọÀyè
- 1 ẹyọÀyè
- 1 ìtòÀyè
- 1 ìtòÀyè
- 1 ìtòÀyè
- 1 ẹyọÀyè
- 2 ẹyọÀyè
- 1 ẹyọÀyè
Ìtọ́nisọ́nà yìí ń ṣe

Blueprint tó jọra
Àwọn blueprint wọ̀nyí pín ìmọ̀ — ọ̀nà, ohun-èlò tàbí ìlànà

CC0 Àgbègbè Gbogbogbò
Blueprint yìí ti jáde lábẹ́ CC0. O lè ṣe àdàkọ, yí padà, pín, àti lò láìsí ìyọ̀ǹda.
Ṣàtìlẹ́yìn Olùṣẹ́dá nípa rírà àwọn ọjà nipasẹ̀ Blueprint wọn Ẹ̀san Olùṣẹ́dá tí àwọn Olùtajà gbé kalẹ̀, tàbí ṣẹ̀dá àtúnṣe tuntun ti Blueprint yìí kí o sì fi sínú Blueprint rẹ gẹ́gẹ́ bí ìsopọ̀ láti pín owó-wíwọlé.