Flint Collection and Identification — Raw Material for Stone Tools
Guide to recognizing, collecting, and evaluating flint (Flint, SiO₂) as raw material. From the chalk cliffs of the Baltic Sea coast to the moraine fields of northern Germany — where to find flint, how to assess quality, and how to store it safely for further processing.
Instructions
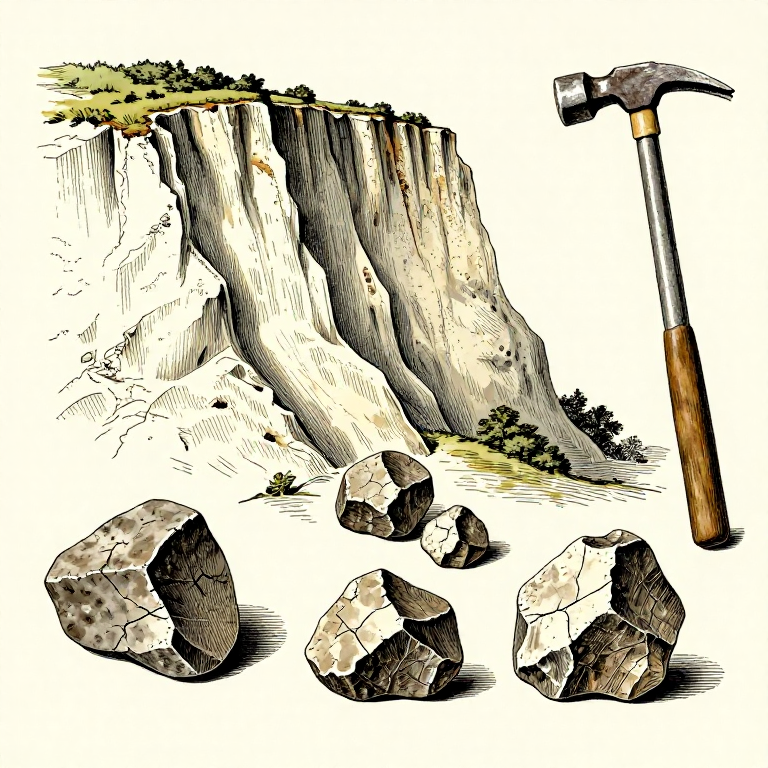
What Is Flint?
What Is Flint?
Getting to Know Collecting Sites in Northern Germany
Getting to Know Collecting Sites in Northern Germany
Identifying Flint by Color
Identifying Flint by Color
Checking for Conchoidal Fracture
Checking for Conchoidal Fracture
Tools needed:
 Geological Hammer
Performing the Spark Test
Performing the Spark Test
Tools needed:
 Carbon Steel Striker
Scratch Test for Hardness Determination
Scratch Test for Hardness Determination
Materials for this step:
 Glass Fragment (for testing)1 piece
Tools needed:
 Leather Work Gloves
Assessing Quality — Grain
Assessing Quality — Grain
Tools needed:
 Hand Lens (10x)
Checking for Cracks and Frost Damage
Checking for Cracks and Frost Damage
Selecting the Right Size
Selecting the Right Size
Materials for this step:
 Flint Nodules5 kilogram
Collecting Safely
Collecting Safely
Materials for this step:
 Newspaper or Cloth Wrapping10 pieces
Tools needed:
 Sturdy BackpackLeather Work Gloves
Removing the Chalk Cortex (Optional)
Removing the Chalk Cortex (Optional)
Materials for this step:
 Water for Soaking5 liters
Tools needed:
 Stiff Bristle Brush
Washing and Drying the Finds
Washing and Drying the Finds
Labeling and Storing the Flint
Labeling and Storing the Flint
Tools needed:
 Pencil or Wax Marker
Documenting the Collecting Site
Documenting the Collecting Site
Tools needed:
 Field Notebook
Cleaning Up the Collecting Site
Cleaning Up the Collecting Site
Materials
4- 1 piecePlaceholder
- 5 kilogramPlaceholder
- 10 piecesPlaceholder
- 5 litersPlaceholder
Tools Required
8- Placeholder
- Placeholder
- Placeholder
- Placeholder
- Placeholder
- Placeholder
- Placeholder
- Placeholder
CC0 Public Domain
This blueprint is released under CC0. You are free to copy, modify, distribute, and use this work for any purpose, without asking permission.
Support the Maker by purchasing products through their Blueprint where they earn a Maker Commission set by Vendors, or create a new iteration of this Blueprint and include it as a connection in your own Blueprint to share revenue.