ART
BEAUTY & WELLNESS
CRAFT
CULTURE & HISTORY
ENTERTAINMENT
ENVIRONMENT
FOOD & DRINKS
GREEN FUTURE
REVERSE ENGINEERING
SCIENCES
SPORTS
TECHNOLOGY
WEARABLES
English
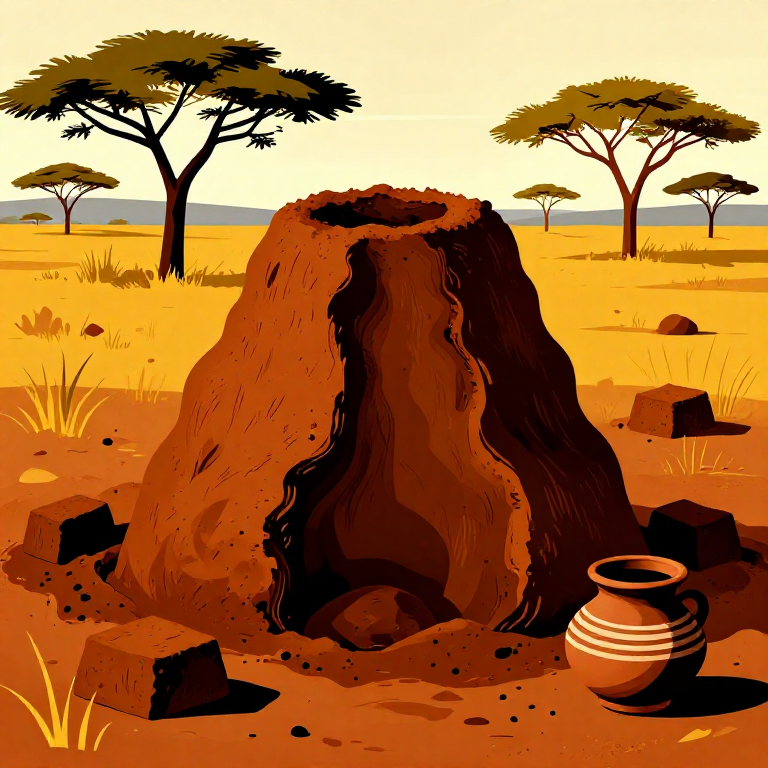
Collecting Termite Mound Clay — Traditional East African Building Material
How to collect and prepare termite mound clay for construction. Termites naturally process soil — carrying fine particles from deep underground and binding them with natural cement-like chemicals (polysaccharides and glycoproteins). Termite mound clay is stronger than ordinary soil and has been used for traditional house construction across East Africa for thousands of years.
Beginner
4-6 saa
Instructions
1
1
Understand why termite mound soil is superior
Understand why termite mound soil is superior
Termites (especially Macrotermes and Odontotermes species) excavate soil from a depth of 3-10 meters underground. They select very fine particles (clay particles smaller than 0.002 mm) and carry them up with their mouths. Termite saliva contains polysaccharides and glycoproteins that act as natural glue, binding soil particles together. The result is soil with superior properties compared to ordinary soil: 2-4 times greater compressive strength, very low water permeability, and resistance to erosion. This is why termite mound houses can last 50-100 years.
2
2
Distinguish between living and abandoned mounds
Distinguish between living and abandoned mounds
It is very important to distinguish between living and abandoned termite mounds. Living mounds: have visible termite activity (termites walking around), are moist inside, often have fresh soft soil on top. Abandoned mounds: have become hard and dry, no termites visible, plants may have started growing on top. USE ONLY ABANDONED MOUNDS — breaking living mounds destroys the termite colony and the local ecosystem. Termites are very important for soil health — they move and mix soil, improve drainage, and help decompose dead plant matter.
3
3
Choose a suitable mound
Choose a suitable mound
Look for abandoned mounds of medium to large size (1-3 meters tall). Large Macrotermes mounds can reach 5-8 meters tall in some parts of Africa. Check the soil color — red or reddish-brown soil (containing iron oxide) is more stable than gray soil. Avoid mounds very close to rivers or flood-prone areas — their soil may contain too much sand. A single medium mound (1.5 meters tall) can yield 200-500 kilograms of quality building soil.
4
4
Prepare work tools
Prepare work tools
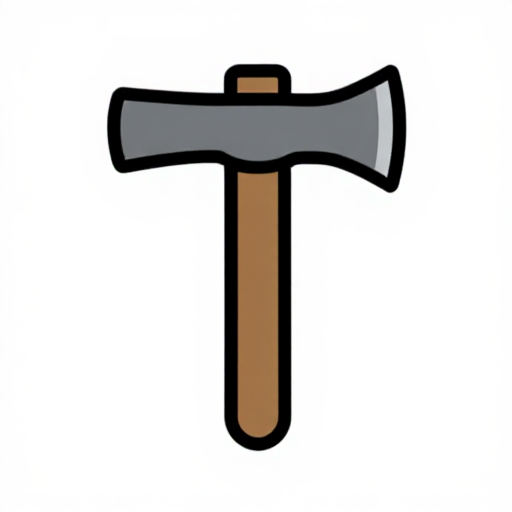
Tools needed: a hoe or large pickaxe for breaking the mound, a shovel for digging, buckets for carrying soil, a heavy hammer for breaking large pieces. Dried termite mounds can be very hard — the soil is bound by termite saliva to a consistency like soft concrete. You may need a cold chisel and hammer for the hardest pieces. Wear work gloves and sturdy boots — termite mound soil may contain thorns from plants trapped inside it.
Tools needed:
Hoe (jembe)
 Pickaxe
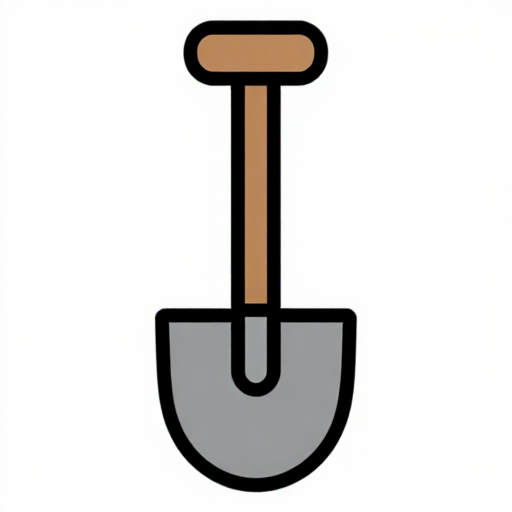 Shovel
 Heavy Hammer
 Cold Chisel
 Work Gloves
 Sturdy Boots
5
5
Break down the mound step by step
Break down the mound step by step
Start breaking the mound from top to bottom. Use a hoe or pickaxe to strike and loosen chunks of soil. Remove large pieces and set them aside. The interior of the mound has a structure of chambers and tunnels built by the termites — this is normal and does not affect soil quality. In fact, this porous structure is what makes the soil excellent for construction after crushing — it contains small air pockets inside that help it dry evenly. Collect 100-200 kilograms in one day of work.
Materials for this step:
 Termite Mound Clay (raw, from abandoned mound)200 kilogram
Tools needed:
Hoe (jembe)
Pickaxe Collection Buckets
6
6
Crush the soil into smaller pieces
Crush the soil into smaller pieces
Break large pieces of termite mound soil into smaller pieces of 3-5 centimeters using a hammer. Place the soil on a hard surface (flat stone or concrete area). Smaller pieces will dissolve more easily when water is added later. Remove roots, stones, and any visible debris. Good termite mound soil has a uniform color and dense texture without large sand particles.
Tools needed:
Heavy Hammer Flat Stone
7
7
Dry the soil in the sun
Dry the soil in the sun
Spread the soil pieces on a tarpaulin or on a clean, flat surface under strong sunlight for 1-2 days. Dry soil crushes much more easily than moist soil. Turn the soil regularly so it dries evenly on all sides. The soil is dry enough when it breaks easily into powder when struck with a hammer.
Tools needed:
 Ground Tarp
8
8
Crush and sieve the soil
Crush and sieve the soil
Pound the dry soil into powder using a hammer and mortar (or pestle). Then sieve through a screen with 5-10 millimeter holes to remove stones, roots, and large pieces. The sieved soil should be a fine, uniform powder. If you want finer soil for wall plastering, use a finer sieve (2-3 millimeters). Store the sieved soil in dry sacks or buckets.
Tools needed:
 Mortar and Pestle
 Sieve (5-10 mm mesh)
 Fine Sieve (2-3 mm mesh, for plaster)
 Storage Bucket
9
9
Test soil quality with the ball test
Test soil quality with the ball test
Take a handful of sieved soil and mix it with water little by little until you get a smooth lump like bread dough (plastic but not too sticky). Roll the lump into a ball about 3 centimeters in diameter. Drop the ball from a height of 1 meter onto a hard surface. A good termite mound soil ball should dent slightly but not crack — this indicates a good balance of clay and silt. If the ball shatters completely, the soil has too much sand. If the ball compresses without denting, the soil has too much clay and needs sand added.
Materials for this step:
Clean Water (for testing)1 liter
10
10
Test quality with the rope test
Test quality with the rope test
Roll moist soil into a long rope of 3 millimeters thickness by rolling between your palms and a table surface. If the rope reaches 10-15 centimeters in length without breaking, the soil has a good clay content for construction. A rope that breaks under 5 centimeters indicates too much sand. A rope that reaches 20+ centimeters without breaking indicates too much clay — you may need to mix in sand or straw to reduce it. The ideal ratio for earth bricks is 20-30% clay, 40-50% silt, and 20-30% sand.
11
11
Mix soil with water for use
Mix soil with water for use
For construction use, mix the sieved soil with water little by little until you achieve the right consistency. For bricks: the soil should be dense but moldable (like stiff chapati dough). For wall plaster: the soil should be smoother (like thick porridge). The usual ratio is 1 bucket of water to 3-4 buckets of dry soil, but this depends on the soil type. Mix with a hoe or feet (treading the soil is a traditional and effective method) for 15-20 minutes until the mixture is completely uniform with no lumps.
Materials for this step:
Clean Water (for mixing)30 liters
Tools needed:
 Mixing Hoe
 Mixing Trough
12
12
Add straw or palm fronds as needed
Add straw or palm fronds as needed
For earth bricks or walls, add dry chopped straw (5-10 centimeters long) at a ratio of approximately 5-10% of the soil weight. Straw acts as fiber reinforcement — it prevents cracks when the soil dries and shrinks. Suitable alternative plant materials include chopped coconut palm fronds, rice husks, or sorghum stalks. Mix the straw into the moist soil by treading or with a hoe until the straw is evenly distributed.
Materials for this step:
 Chopped Straw5 kilogram
13
13
Make a test brick
Make a test brick
Before starting large-scale construction, make 2-3 test bricks. Fill a wooden mold (typically 30 x 15 x 10 centimeters) with the mixed soil, press and tap to remove trapped air. Remove the mold and let the brick dry in the sun for 7-14 days, turning it every 2-3 days. A well-dried brick should be: (1) hard — it does not break when dropped from a height of 1 meter, (2) shows no large cracks (small surface cracks are normal), (3) produces a metallic sound when struck. A good quality termite mound soil brick has a compressive strength of 1-3 MPa — perfectly suitable for 1-2 story houses.
Tools needed:
 Wooden Brick Mold (30 x 15 x 10 cm)
14
14
Store remaining soil for future use
Store remaining soil for future use
Sieved and dry termite mound soil can be stored for many months in well-sealed sacks or buckets. Do not wet soil you intend to store — dry soil is not attacked by bacteria or mold. Keep in a dry place raised off the ground. When ready to use, soak in water for 12-24 hours before mixing — this allows the clay particles to absorb water evenly and produces better working soil. Termite mound soil is a renewable resource — new termite mounds continue to be built by new colonies.
Tools needed:
 Storage Sacks (sealed)
 Raised Storage Platform
Materials
4- 200 kilogramPlaceholder
- 5 kilogramPlaceholder
Tools Required
19- Placeholder
- Placeholder
- Placeholder
- Placeholder
- Placeholder
- Placeholder
- Placeholder
- Placeholder
- Placeholder
- Placeholder
- Placeholder
- Placeholder
- Placeholder
- Placeholder
- Placeholder
- Placeholder
CC0 Public Domain
This blueprint is released under CC0. You are free to copy, modify, distribute, and use this work for any purpose, without asking permission.
Support the Maker by purchasing products through their Blueprint where they earn a Maker Commission set by Vendors, or create a new iteration of this Blueprint and include it as a connection in your own Blueprint to share revenue.