Bamboo Felling and Selection — From Madake Bamboo Harvest to Oil Removal
Explanation of traditional Japanese bamboo felling techniques. Assessing maturity of madake bamboo (Phyllostachys bambusoides), proper felling timing, branch trimming, drying, and oil removal. The essential first step in securing raw materials for bamboo crafts, construction, and tea ceremony utensils.
Instructions
Identify mature bamboo
Identify mature bamboo
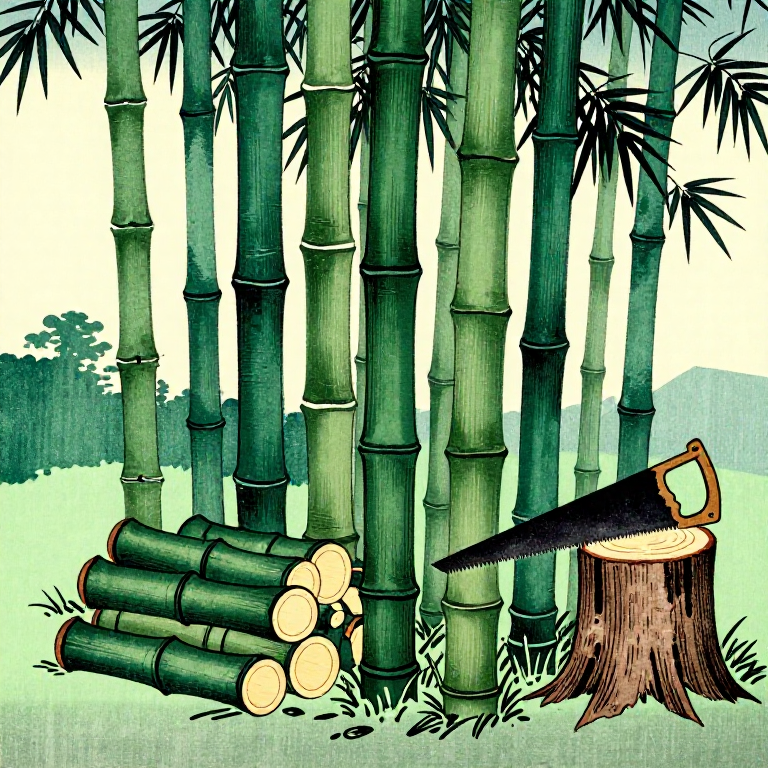
Select 3 to 5-year-old bamboo from the grove. Mature bamboo is deep green, with hard nodes, and produces a clear ringing sound when the trunk is struck. Bamboo 1 to 2 years old is bright green and too soft, while bamboo over 6 years old has begun to deteriorate.
Check the felling time
Check the felling time
Bamboo felling is carried out from autumn to winter (October to February). During this period, the flow of tree sap is minimal and the moisture content is low, which prevents cracking and mold after drying. Bamboo felled in spring to summer contains more moisture and can cause insect damage and mold.
Avoid harvesting on rainy days
Avoid harvesting on rainy days
Select straight bamboo with evenly spaced internodes
Select straight bamboo with evenly spaced internodes
Select bamboo with minimal curvature. High-quality bamboo has uniform spacing between nodes and a diameter that gradually tapers from the base to the tip. Madake bamboo with a diameter of 8-12cm is suitable for general craft purposes.
Materials for this step:
 Mature Bamboo Culm (3-5 years)1 piece
Mark the selected bamboo
Mark the selected bamboo
Materials for this step:
 Cloth Marking Ribbon3 pieces
Clear the area around the base
Clear the area around the base
Tools needed:
 Garden Rake
Determine the position of the cut
Determine the position of the cut
Cut at a height of 10–15 cm from the ground, just above the first node. By cutting above the node, you prevent rainwater from accumulating on the stump and causing it to rot.
Cut with a bamboo saw
Cut with a bamboo saw
Tools needed:
 Bamboo Saw (Take-nokogiri)
Support the falling bamboo
Support the falling bamboo
Tools needed:
Remove the branches
Remove the branches
Tools needed:
 Hatchet (Nata)
Cut to a length suitable for the intended use
Cut to a length suitable for the intended use
The bamboo is cut according to its intended use. For general craft work, sections of 3-4m are typical. For tea ceremony tools, it is cut shorter with consideration for the position of the nodes. Always confirm the position of the nodes and determine the cutting position to include the necessary number of nodes.
Tools needed:
 Measuring Tape
Inspect for insect damage
Inspect for insect damage
Check for discoloration and rot
Check for discoloration and rot
Stand upright for initial drying
Stand upright for initial drying
Tools needed:
 Bamboo Drying Rack
2-4 weeks of natural drying
2-4 weeks of natural drying
Check the dryness level
Check the dryness level
Oil removal (aburanuki)
Oil removal (aburanuki)
Tools needed:
 Gas Burner or Charcoal Fire
 Cotton Cloth
Store horizontally
Store horizontally
Tools needed:
 Storage Rack
Materials
2- Placeholder
- 3 piecesPlaceholder
Tools Required
9- Placeholder
- Placeholder
- Placeholder
- Placeholder
- Placeholder
- Placeholder
- Placeholder
CC0 Public Domain
This blueprint is released under CC0. You are free to copy, modify, distribute, and use this work for any purpose, without asking permission.
Support the Maker by purchasing products through their Blueprint where they earn a Maker Commission set by Vendors, or create a new iteration of this Blueprint and include it as a connection in your own Blueprint to share revenue.