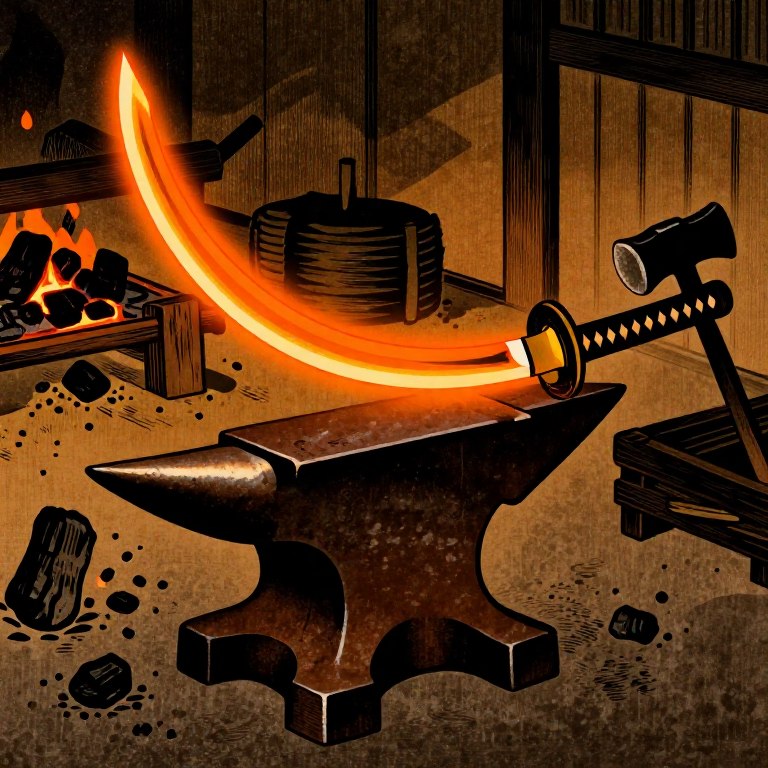
Forging and Chiseling a Tsuba Sword Guard — Iron Openwork Design
Mga Tagubilin
Forge the Iron Disc
Forge the Iron Disc
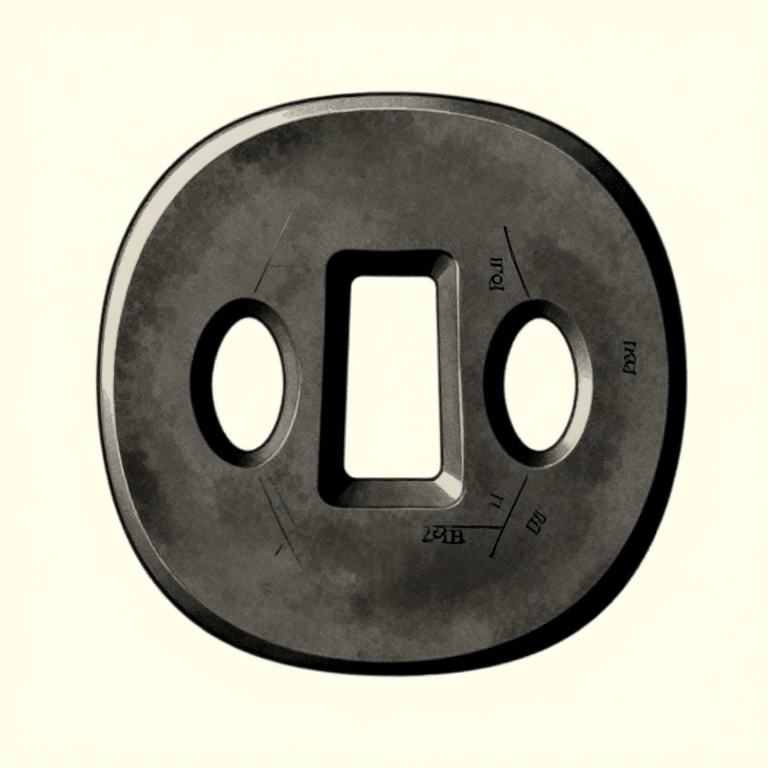
Start with a piece of wrought iron or mild steel approximately 5cm x 10cm x 8mm thick. Heat it to bright orange in the forge and hammer it flat on the anvil, working outward from the centre to create a roughly circular disc 8-10cm in diameter and 4-5mm thick. Uniformity of thickness matters — thin spots will warp during later filing and create structural weak points. After achieving the approximate shape, file or grind the disc to a clean circle. Mark and punch the centre point for the nakago-ana (tang slot).
Materials for this step:
 Mild Steel Plate1 piece, 8-10cm diameter, 4-5mm thick cm
Tools needed:
 Anvil
Anvil Drill Press
 Files (Hand File)
Cut the Tang Slot (Nakago-ana)
Cut the Tang Slot (Nakago-ana)
The nakago-ana is the rectangular slot through which the sword tang passes. Its dimensions must match the tang precisely — typically 3cm long and 8-10mm wide for a katana. Drill a series of holes along the slot outline using a hand drill, then connect them by chiseling out the remaining metal. File the slot smooth and square with a flat needle file. The fit should be snug but not forced. Also cut the two small holes (hitsu-ana) flanking the tang slot that accommodate the kogai (hair pin) and kozuka (utility knife) handles. These are oval, approximately 6mm x 15mm.
Transfer the Sukashi Design
Transfer the Sukashi Design
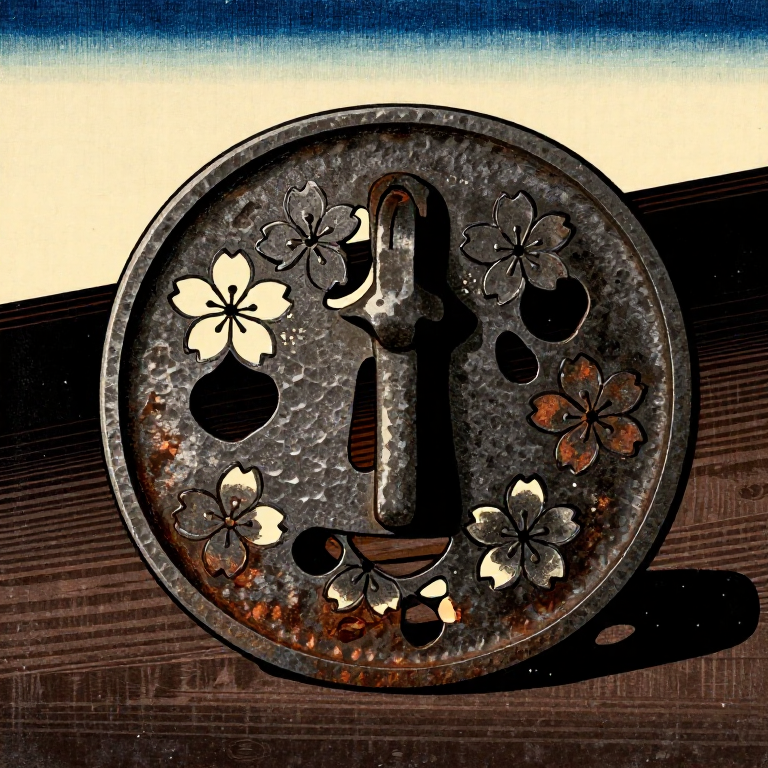
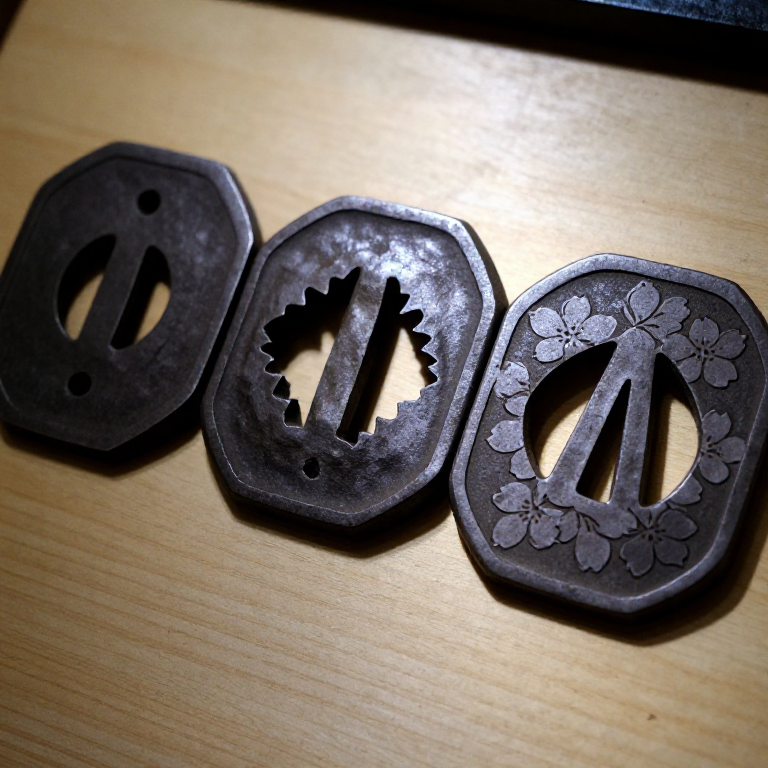
Select or design a sukashi (openwork) pattern. Traditional motifs include cherry blossoms, pine needles, waves, family crests (mon), or geometric patterns. Draw the design on paper first, then transfer it to the iron surface using a sharp scriber. Positive sukashi (ji-sukashi) removes background metal to leave the design standing. Negative sukashi (yo-sukashi) pierces the design itself through the plate. For a first attempt, choose a bold design with few fine details — delicate bridges of metal between piercings are prone to breaking during chiseling.
Chisel and Pierce the Openwork
Chisel and Pierce the Openwork
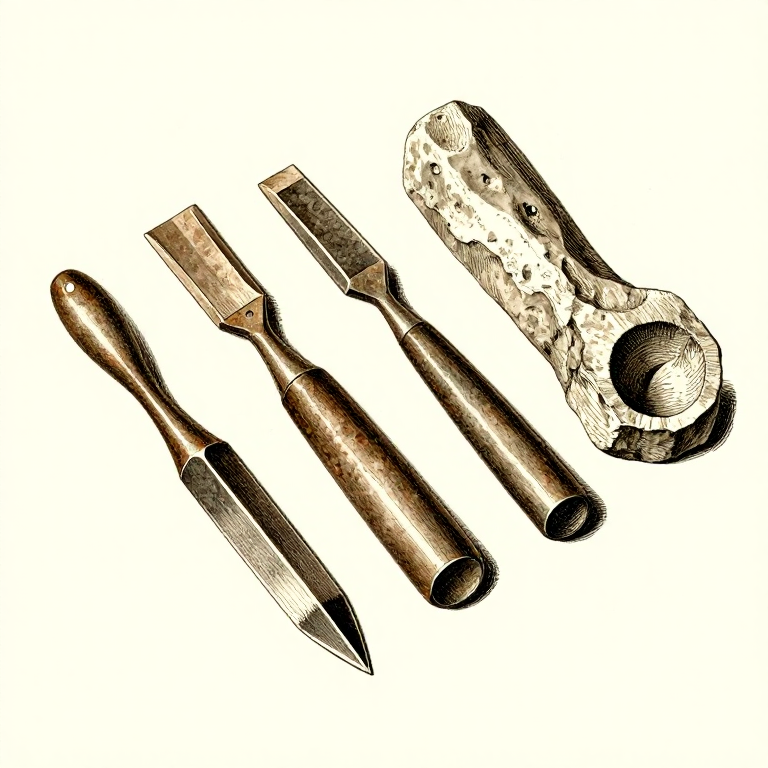
Drill starter holes inside each area to be removed. Working on a lead block or hardwood end-grain surface that supports the iron without cracking it, use narrow cold chisels to cut along the scribed design lines. Work slowly, removing small amounts of metal with each chisel stroke. For curved lines, use a curved chisel or rotate the workpiece frequently. After rough piercing, refine all edges with needle files — flat files for straight edges, half-round for curves. The finished openwork should have clean, slightly beveled edges that catch light when the tsuba is viewed at an angle.
Finish and Patinate the Surface
Finish and Patinate the Surface
File the outer rim (mimi) to a smooth oval or round cross-section. The rim profile affects the tsuba's feel in the hand — a rounded mimi is most comfortable. Sand all surfaces progressively from 120 through 400 grit to remove file marks. To develop a traditional dark patina, heat the tsuba evenly to approximately 300 degrees C (until it turns a straw to blue colour), then quench in cold water. Alternatively, apply a solution of ferric chloride or vinegar to accelerate natural oxidation. Traditional Japanese patina (called tetsu migaki) involves repeated cycles of controlled rusting and burnishing with fine abrasive until the surface develops a deep, lustrous black-brown colour that resists further corrosion.
Mga Materyales
2- 1 piece, 8-10cm dia, 4-5mm thick piecePlaceholder
Mga Kinakailangang Kasangkapan
6- Placeholder
- Placeholder
- Placeholder
- Placeholder
Related blueprints
Other builds that share materials, tools, or techniques with this one.
CC0 Pampublikong Domain
Ang blueprint na ito ay inilabas sa ilalim ng CC0. Malaya kang kumopya, magbago, mamahagi, at gumamit nang walang pahintulot.
Suportahan ang Maker sa pamamagitan ng pagbili ng mga produkto sa kanilang Blueprint Komisyon ng Maker itinakda ng mga Vendor, o lumikha ng bagong bersyon ng Blueprint na ito at isama bilang koneksyon sa iyong Blueprint upang ibahagi ang kita.