SINING
BEAUTY AT WELLNESS
CRAFTS
KULTURA AT KASAYSAYAN
LIBANGAN
KAPALIGIRAN
PAGKAIN AT INUMIN
REVERSE ENGINEERING
AGHAM
ISPORTS
TEKNOLOHIYA
MGA WEARABLE
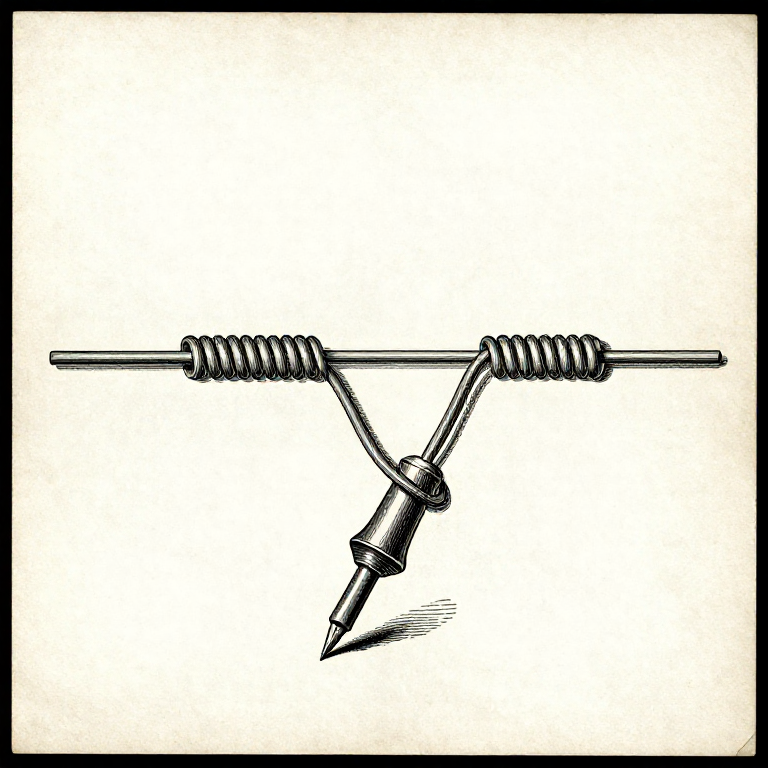


Soldering a Wire Joint: Not the Same Job as Soldering a Board
A board joint is held still by the board. A wire joint is held by nothing, joins two things that both move, and has to survive being flexed for years.
So the technique differs in three ways: the wires must be mechanically joined before any solder arrives, the joint must be supported while it cools, and it must end up FLEXIBLE at the point where the wire leaves it — which is the opposite of what solder naturally does.
The published through-hole soldering rung covers the heat, the flux and the wetting. Everything there still applies; this rung is what is different once there is no board.
Katamtaman
3 hours
Mga Tagubilin
1
1
Mechanical first: the joint must hold before it is soldered
Mechanical first: the joint must hold before it is soldered
Solder is a conductor and an adhesive, not a structural material. A joint relying on solder for its strength will fail, and it will fail at the worst moment.
Make the connection hold on its own first. Hook each stripped end into a small J, link them, and squeeze flat. Or lay the two ends alongside each other and wrap the strands together — the Western Union splice, which was designed for telegraph wire that had to survive weather and tension.
Then solder it, and the solder's only job is to fill the gaps and exclude air. Tug the joint before soldering: if it comes apart in your fingers, solder will not save it.
Mga materyales para sa hakbang na ito:
 Kawad na pandugtong2 piraso
 Kawad na Panghinang1 piraso
Mga kailangang kasangkapan:
 Panghinang
 Pambalat ng kawad
 Mabigat na bise ng bangko
2
2
Heat the joint, feed from the far side, and do not move it
Heat the joint, feed from the far side, and do not move it
Put the iron on one side of the twisted joint and feed solder in from the OTHER side. When the joint is hot enough, the solder melts on contact with the wire rather than the iron and flows right through the strands.
Melting solder onto the iron and carrying it over gives a joint that looks filled and is not — the solder sits on top of cold copper. That is the same cold joint the board rung warns about, and on a wire it is harder to spot because there is no shiny fillet to judge.
Hold everything still until the solder has visibly gone dull and solid. A joint moved while freezing has a fractured crystal structure: it is grey and grainy rather than smooth, and it is weak. Helping hands or a vice are worth using for this reason alone.
Mga materyales para sa hakbang na ito:
Kawad na Panghinang1 piraso Pastang flux sa panghihinang (batay sa dagta)1 piraso
Mga kailangang kasangkapan:
PanghinangMabigat na bise ng bangko Lupang Pampalaki
3
3
Keep the solder OUT of the flex zone
Keep the solder OUT of the flex zone
Solder wicks along stranded wire under the insulation, and wherever it goes the wire becomes rigid. The boundary between the stiff soldered section and the flexible wire is then a hinge, and the wire breaks exactly there.
Keep the joint short, use just enough solder, and do not let it creep back under the insulation. A little flux and quick work help; a big blob and a long dwell guarantee wicking.
This is the same reason the crimp rung says never to solder a crimp. Wherever a wire must flex, it must be copper doing the flexing — not a stiff soldered section with a stress concentration at its end.
Mga materyales para sa hakbang na ito:
Kawad na Panghinang1 pirasoKawad na pandugtong1 pirasoMga kailangang kasangkapan:
PanghinangLupang Pampalaki4
4
Insulate it, and choose heat shrink over tape
Insulate it, and choose heat shrink over tape
Slide the heat shrink on BEFORE you solder — far enough down the wire that the iron will not shrink it prematurely — then bring it over the finished joint and warm it evenly.
Heat shrink grips the wire on both sides of the joint, so it adds real strain relief as well as insulation. Adhesive-lined shrink seals against moisture too, which matters for anything outdoors or in an engine bay.
Electrical tape is a temporary answer. It unwinds in heat, its adhesive creeps, and a taped joint in a loom will be found hanging open years later. Use it for a test, not for a build.
Mga materyales para sa hakbang na ito:
 Heat shrink tubing1 piraso
 Teyp na pangbukod ng kuryente1 piraso
Mga kailangang kasangkapan:
PanghinangLupang PampalakiMga Materyales
5- 3 pirasoPlaceholder
- 3 pirasoPlaceholder
- Placeholder
- 1 pirasoPlaceholder
- 1 pirasoPlaceholder
Ang blueprint na ito ay gumagawa ng
Kaugnay na Blueprint
Ang mga blueprint na ito ay nagbabahagi ng kaalaman — mga teknik, materyales, o prinsipyo

CC0 Pampublikong Domain
Ang blueprint na ito ay inilabas sa ilalim ng CC0. Malaya kang kumopya, magbago, mamahagi, at gumamit nang walang pahintulot.
Suportahan ang Maker sa pamamagitan ng pagbili ng mga produkto sa kanilang Blueprint Komisyon ng Maker itinakda ng mga Vendor, o lumikha ng bagong bersyon ng Blueprint na ito at isama bilang koneksyon sa iyong Blueprint upang ibahagi ang kita.