فن
خوبصورتی اور تندرستی
دستکاری
ثقافت اور تاریخ
تفریح
ماحول
خوراک اور مشروبات
ریورس انجینئرنگ
سائنسز
کھیل
ٹیکنالوجی
پہننے والے آلات
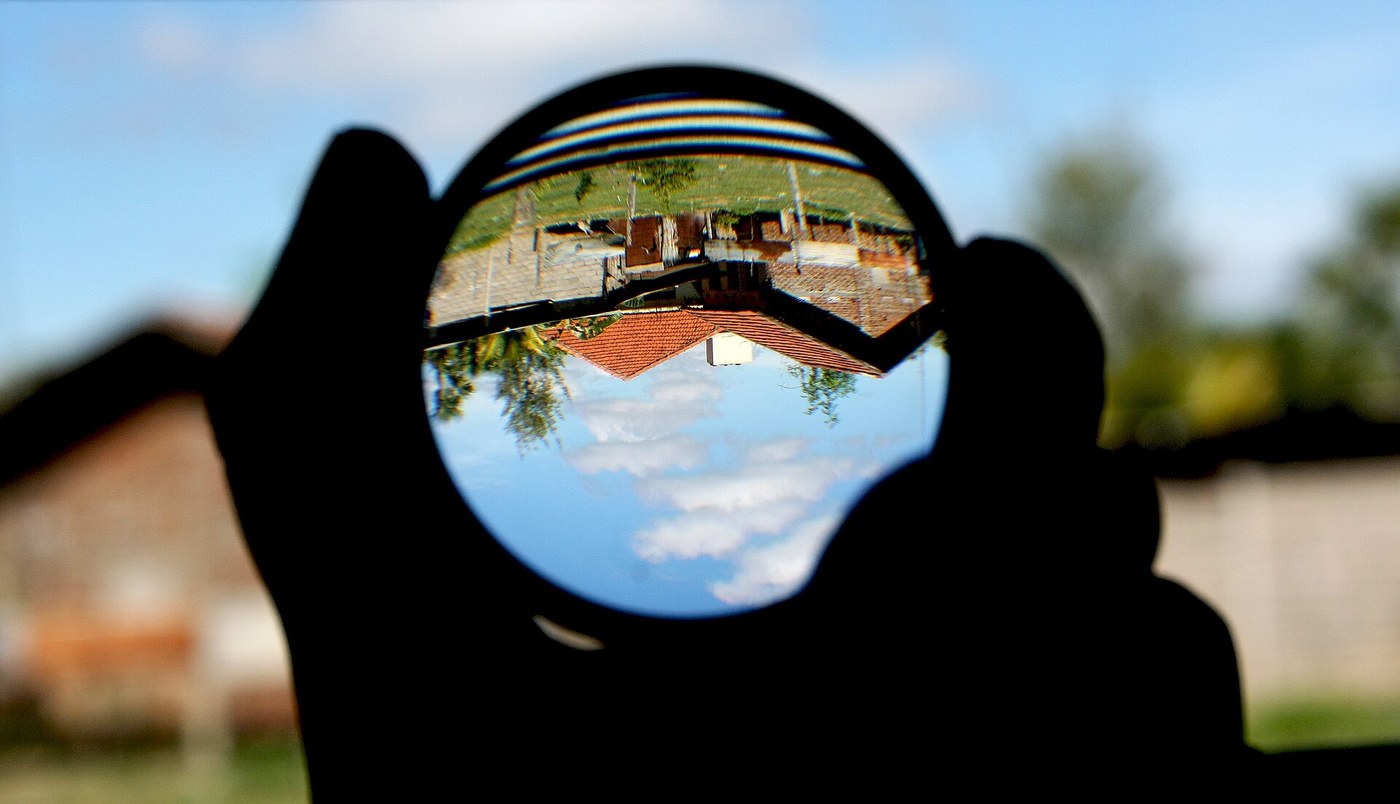


Convex and Concave Lenses Ground as a Pair
Rub one glass disc over another with wet grit and both change shape: the one on top goes hollow, the one beneath goes domed, and they stay a perfect fit. Grind both faces of a pair this way and the bottom disc becomes a double-convex lens, the top one a double-concave lens of the same curve. Longer work gives deeper curves and shorter focal lengths.
The picture: a double-convex lens held at arm's length shows the scene small and upside down.
اعلیٰ
Several days per pair
ہدایات
1
1
Cut two discs
Cut two discs
Score two equal circles on the glass sheet, snap them out and nibble the edges round with grozing pliers. Fix a short wooden handle to the back of each with warm pitch.
اس مرحلے کے لیے مواد:
 شیشے کی چادر1 ٹکڑا
 چیڑ کے تارکول کی لئی20 گرام
 سخت لکڑی کی پتلی پٹی1 ٹکڑا
درکار اوزار:
 شیشہ کاٹنے کا آلہ
 شیشہ کترنے کا پلاس
 حفاظتی عینک
2
2
Rough grind the first faces
Rough grind the first faces
Lay one disc face up on a firm table, wet it and sprinkle coarse grit. Push the other disc over it, face down, in short strokes, turning both a little all the time. The top one becomes concave, the bottom convex. Rinse and recharge as the grit wears.
اس مرحلے کے لیے مواد:
 پانی2 لیٹر
درکار اوزار:
 پیمانہ
 سیلیکون کاربائیڈ کے دانے
3
3
Check the curve
Check the curve
Lay a ruler across the hollow disc and measure the depth at the centre with the caliper. Keep the top disc on top to deepen the curve; swap them to flatten it.
درکار اوزار:
پیمانہ ڈیجیٹل ورنیئر کیلیپر ۶ انچ
4
4
Fine grind and polish
Fine grind and polish
Go through finer grits, washing everything clean between grits. Polish each face on a pitch lap pressed to the other disc's curve, with tin oxide (putty powder) and water, until clear.
اس مرحلے کے لیے مواد:
 ٹن آکسائیڈ (اسٹینک آکسائیڈ)30 گرامچیڑ کے تارکول کی لئی100 گرام
درکار اوزار:
سیلیکون کاربائیڈ کے دانے5
5
Turn them over, do the second faces
Turn them over, do the second faces
Move the handles to the finished faces and grind the other sides the same way, the same disc on top, to the same depth. The bottom disc is now a double-convex lens, the top one double-concave.
اس مرحلے کے لیے مواد:
ٹن آکسائیڈ (اسٹینک آکسائیڈ)20 گرامدرکار اوزار:
ڈیجیٹل ورنیئر کیلیپر ۶ انچسیلیکون کاربائیڈ کے دانے6
6
Find the focal length
Find the focal length
Hold the convex lens in sunlight over paper and move it until the spot is smallest; that distance is its focal length. Grind more pairs to different depths for a set of focal lengths.
درکار اوزار:
پیمانہ7
7
Focal length from the curve
Focal length from the curve
Jupyter نوٹ بک لوڈ ہو رہی ہے…
8
8
Limits
Limits
Which disc goes hollow is the mirror makers' rule (Sky & Telescope, Stellafane); the lens formula is from Wikipedia. Window glass is not optical glass: expect some colour fringes and bubbles.
مواد
5- 1 ٹکڑاپلیس ہولڈر
- 120 گرامپلیس ہولڈر
- 1 ٹکڑاپلیس ہولڈر
- 2 لیٹرپلیس ہولڈر
- 30 گرامپلیس ہولڈر
یہ بلوپرنٹ بناتا ہے


متعلقہ بلیو پرنٹ
یہ بلیو پرنٹ علم بانٹتے ہیں — تکنیک، مواد یا اصول

CC0 پبلک ڈومین
یہ بلیو پرنٹ CC0 کے تحت جاری کیا گیا ہے۔ آپ اجازت لیے بغیر اس کام کو نقل، ترمیم، تقسیم اور کسی بھی مقصد کے لیے استعمال کرنے کے لیے آزاد ہیں۔
میکر کی حمایت کریں ان کے بلیو پرنٹ کے ذریعے پروڈکٹس خرید کر جہاں وہ میکر کمیشن وینڈرز کی طرف سے مقرر، کماتے ہیں، یا اس بلیو پرنٹ کی نئی تکرار بنائیں اور آمدنی شیئر کرنے کے لیے اسے اپنے بلیو پرنٹ میں کنکشن کے طور پر شامل کریں۔