Folding and Binding Shibori Resist Patterns — Japanese Shaped-Resist Dyeing
ہدایات
Prepare the Fabric
Prepare the Fabric
Wash the cotton fabric in hot water with soda ash or washing soda to remove sizing, oils, and any finishes that would prevent dye uptake. This process is called scouring. Rinse thoroughly and wring out the excess water. The fabric should be damp but not dripping when you begin binding — damp fabric folds more crisply and holds its shape better than dry fabric. Iron the damp fabric flat if it has wrinkled, as creases will create unintended resist marks. Cut the fabric into manageable pieces (30cm x 30cm squares work well for practice) or work with a full length for a finished textile.
اس مرحلے کے لیے مواد:
 Organic Cotton Fabric (White, 3 Yards)1-2 metres piece
 Cotton5-10m m
 Indigo Dye Vat Kitprepared vat piece
 Wooden Mallet2 matching pieces piece
درکار اوزار:
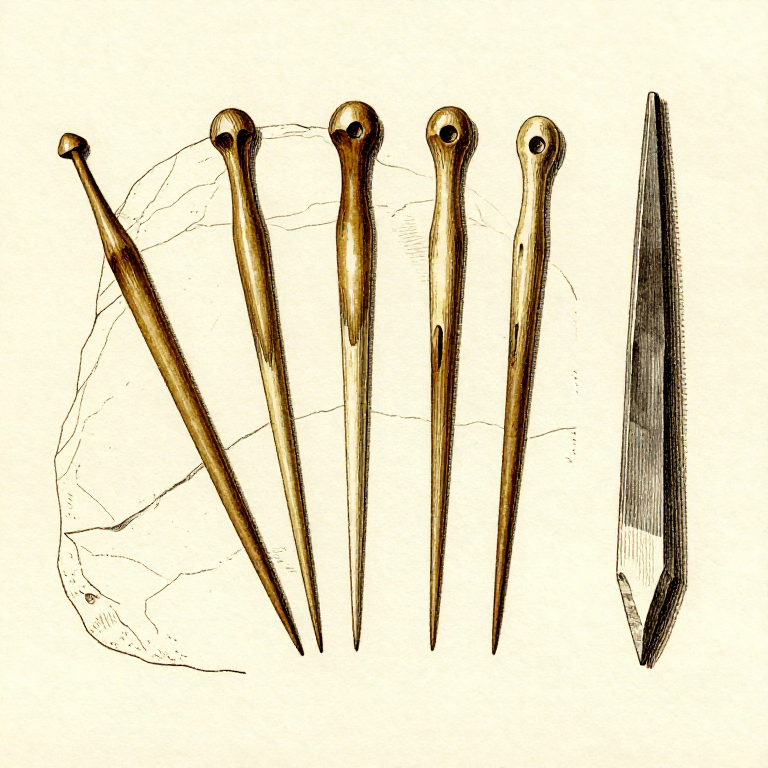
 Taxidermy Thread & Needle Set
Apply Resist Techniques
Apply Resist Techniques
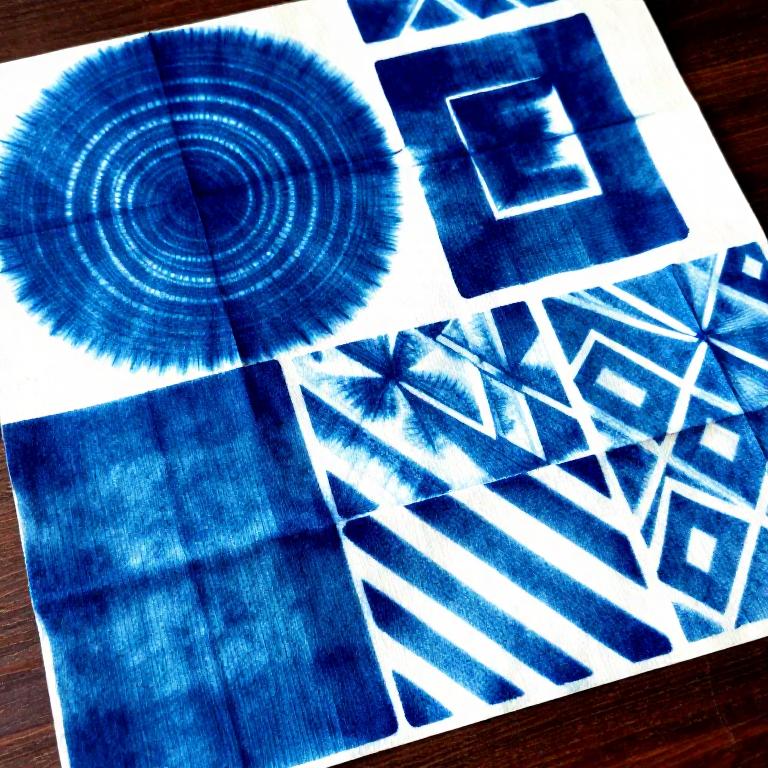
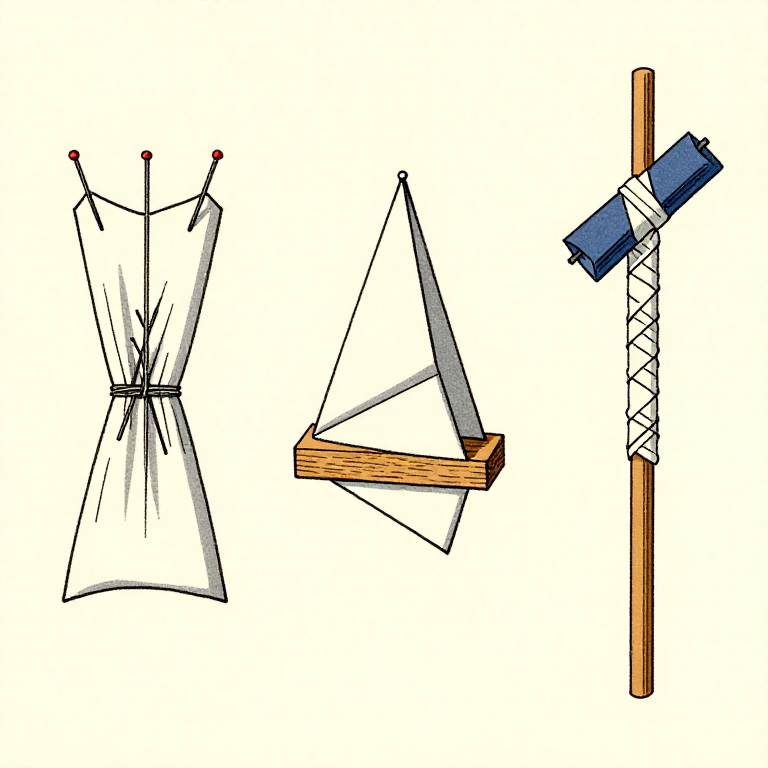
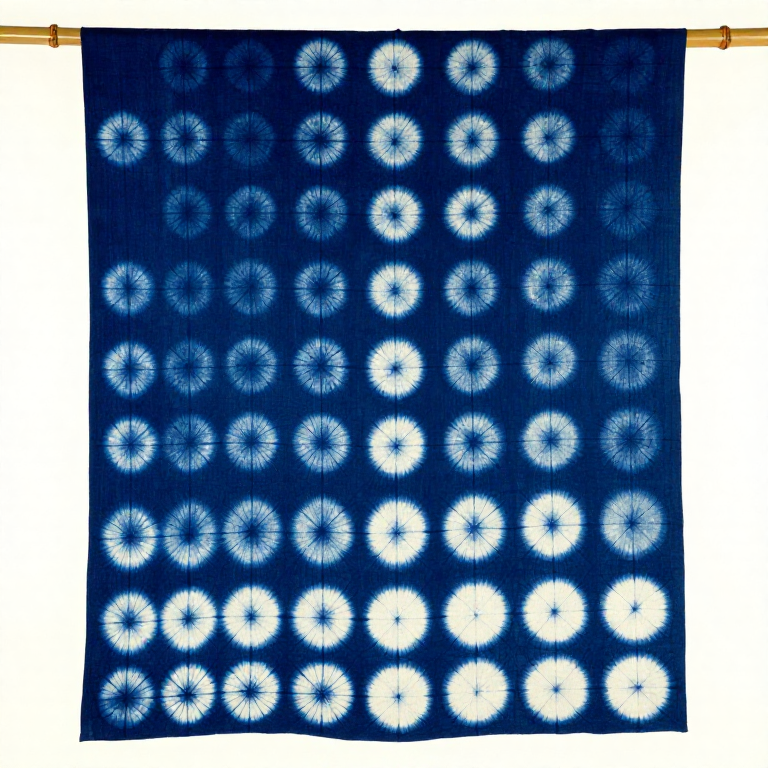
Choose one or more shibori resist techniques. For kumo (spider web) shibori, pinch a point of fabric, pull it into a peak, and bind it tightly with string at intervals down the peak — each bound section creates a concentric ring when opened. For itajime (clamp resist), fold the fabric into a precise accordion then fold again into triangles or squares, and clamp between two identical wooden shapes — the clamped areas remain undyed, creating geometric repeating patterns. For arashi (storm) shibori, wrap the fabric diagonally around a pole, push it into compressed pleats along the pole, and bind it in place — this creates diagonal stripe patterns. Each technique can be combined with others on a single piece of fabric for complex overlapping designs.
Dye the Bound Fabric
Dye the Bound Fabric
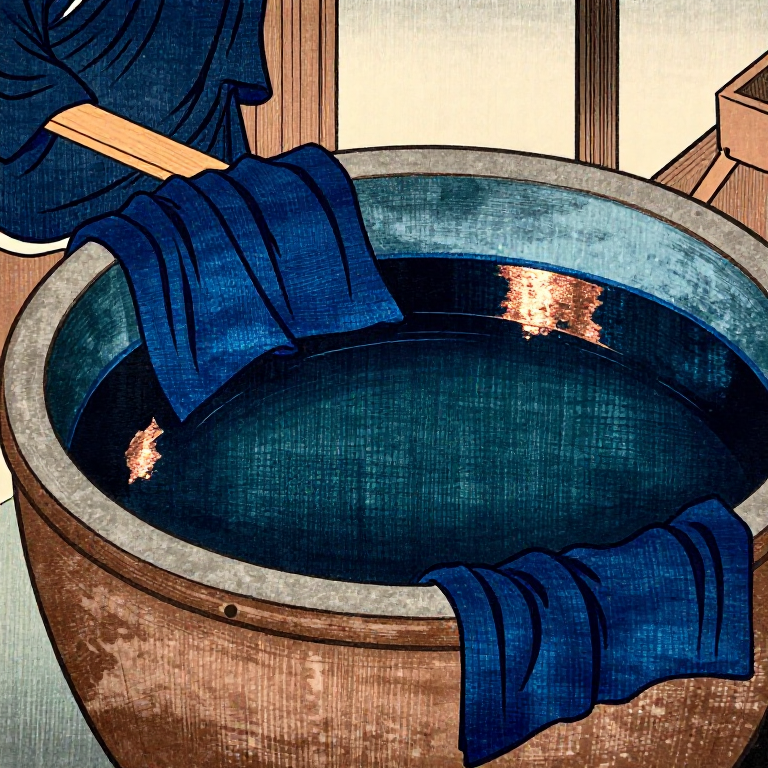
Submerge the bound fabric in a prepared indigo vat (or other dye bath). Keep it submerged for 3-5 minutes, gently squeezing to encourage dye penetration into the exposed areas while the bound, clamped, or stitched areas resist absorption. Remove and oxidize in the air for 15-20 minutes. The key to crisp shibori patterns is tight, secure binding — any areas where the binding has loosened will allow dye to seep in, blurring the pattern. Repeat the dip-and-oxidize cycle 3-5 times for medium indigo blue, more for darker shades. With itajime clamping, the clamps can be tightened between dips if they have loosened.
Unbind and Reveal the Pattern
Unbind and Reveal the Pattern
After the final dye dip and oxidation, carefully remove all string, clamps, or stitching while the fabric is still damp. Unclamp itajime pieces gently to avoid tearing wet fabric. Cut and pull stitching threads slowly. The resist areas appear white or very light against the dyed ground, revealing the shibori pattern for the first time. This moment of unfolding is one of the most rewarding aspects of shibori — the pattern is never fully predictable because small variations in folding tension, binding tightness, and dye penetration create unique results even when following the same technique repeatedly.
Rinse and Set the Pattern
Rinse and Set the Pattern
Rinse the unbound fabric in cold running water until the water runs clear. Avoid wringing or twisting, which can distort the still-wet fabric and blur crisp pattern edges. Lay the fabric flat or hang it to dry away from direct sunlight. The pattern is now permanent — indigo bonds mechanically to the cotton fibres and does not wash out. If using dyes other than indigo, follow the specific setting instructions for that dye (heat setting, vinegar rinse, etc.). Once dry, the fabric can be ironed on a medium setting. Traditional Edo-period shibori textiles were used for kimono, noren (door curtains), furoshiki (wrapping cloths), and tenugui (hand towels).
مواد
5- 1 pieceپلیس ہولڈر
- 20 pieceپلیس ہولڈر
- پلیس ہولڈر
- 2 pairs pieceپلیس ہولڈر
Related blueprints
Other builds that share materials, tools, or techniques with this one.

CC0 پبلک ڈومین
یہ بلیو پرنٹ CC0 کے تحت جاری کیا گیا ہے۔ آپ اجازت لیے بغیر اس کام کو نقل، ترمیم، تقسیم اور کسی بھی مقصد کے لیے استعمال کرنے کے لیے آزاد ہیں۔
میکر کی حمایت کریں ان کے بلیو پرنٹ کے ذریعے پروڈکٹس خرید کر جہاں وہ میکر کمیشن وینڈرز کی طرف سے مقرر، کماتے ہیں، یا اس بلیو پرنٹ کی نئی تکرار بنائیں اور آمدنی شیئر کرنے کے لیے اسے اپنے بلیو پرنٹ میں کنکشن کے طور پر شامل کریں۔