تعاون
فن
خوبصورتی اور تندرستی
دستکاری
ثقافت اور تاریخ
تفریح
ماحول
خوراک اور مشروبات
ریورس انجینئرنگ
سائنسز
کھیل
ٹیکنالوجی
پہننے والے آلات
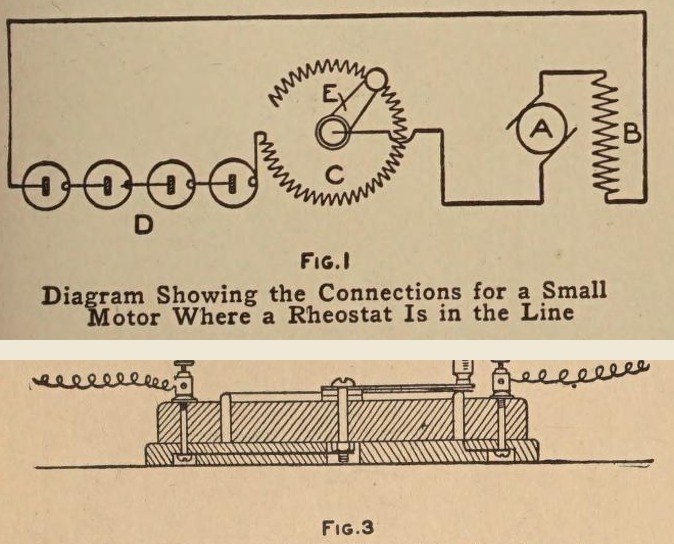


Rheostat: a Small Ring Rheostat for Toy Motors (Boy Mechanic, 1915)
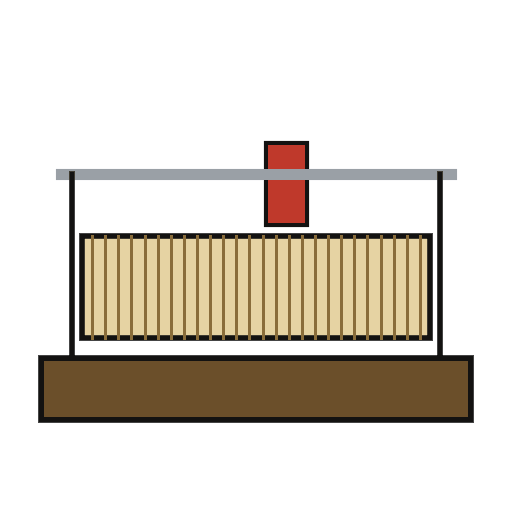
A small variable resistor to set the speed of a toy motor: resistance wire wound on a fibre strip bent into a ring, set in a groove in a hardwood base, with a brass arm that slides round the bared top of the winding.
Wired in series with the motor, it works like a valve in a water pipe.
Source: The Boy Mechanic, Book 2 (1915), pp. 393-394. Unknown: wire alloy. Picture: Figs. 1 and 3 of the book.
درمیانہ
Unknown
ہدایات
1
1
Wind the resistance strip
Wind the resistance strip
Smooth a strip of thin fibre about 1/16 in thick, 1/2 in wide and 10 in long. Wind it with No. 22 cotton-covered resistance wire, close turns from 1/4 in from one end to 1/4 in from the other, securing the ends through small drilled holes and leaving 3 to 4 in free. Bend the strip into a ring round a round object, winding outward, and note its inside and outside diameters.
اس مرحلے کے لیے مواد:
 نامعلوم مادہ1 fibre strip
 جرمن سلور مزاحمتی تار1 No. 22
درکار اوزار:
 ہاتھ کا برما
2
2
Make the base
Make the base
Round the corners and top edges of a seasoned hardwood block 1/2 x 4 1/2 x 4 1/2 in, mark the ring's two diameters from the centre, and saw out the circles so the ring fits between them. Screw this onto a second board 1/4 x 4 3/4 x 4 3/4 in from below with countersunk screws. Drill a hole for one wire end, fit two back-connected binding posts in the corners, and cut grooves underneath for the leads; one post goes to the winding, the other to the centre bolt.
اس مرحلے کے لیے مواد:
 سخت لکڑی کا تختہ2 1/2 and 1/4 in
 لکڑی کے پیچ1 ٹکڑا
 بائنڈنگ پوسٹ2 ٹکڑے
درکار اوزار:
 دو نوکوں والا پرکار
 پشت دار آریہاتھ کا برما
 پیچ کس - چپٹا
3
3
Make and mount the arm
Make and mount the arm
Cut the arm from 1/16 in sheet brass, 2 in long, 1/2 in wide at one end and 1/4 in at the other. Under the narrow end solder thin spring brass to bear on the ring; fit a small handle on top. Mount it on a 1/8 in brass bolt about 1 in long through the centre, with washers under it, the base hole countersunk underneath 1/2 in wide and 1/4 in deep. Solder a short brass strip to the nut, set in a recess, and lock with a second nut or a spring washer.
اس مرحلے کے لیے مواد:
 پیتل کی چادر1 arm, spring
 نامعلوم دھات1 1/8 in brass bolt
 چپٹا چھلا3 ٹکڑے
 Spring Washer1 ٹکڑا
 ٹن-سیسے کا ٹانکہ1 ٹکڑا
درکار اوزار:
 چادر کاٹنے کی قینچیہاتھ کا برما
 برقی سولڈرنگ آئرن
4
4
Bare the track and finish
Bare the track and finish
Set the ring in its groove. Sand the insulation off the top edge of the winding so the spring contact touches the wire. Give the wood a coat of shellac.
اس مرحلے کے لیے مواد:
 شیلیک کی وارنش1 ٹکڑا
درکار اوزار:
 ریگ مال
 باریک برش
مواد
11- 1 fibre stripپلیس ہولڈر
- 1 No. 22پلیس ہولڈر
- 2 1/2 and 1/4 inپلیس ہولڈر
- 1 ٹکڑاپلیس ہولڈر
- پلیس ہولڈر
- 1 arm, springپلیس ہولڈر
- 1 1/8 in brass boltپلیس ہولڈر
- 3 ٹکڑےپلیس ہولڈر
- 1 ٹکڑاپلیس ہولڈر
- 1 ٹکڑاپلیس ہولڈر
- 1 ٹکڑاپلیس ہولڈر
درکار اوزار
8- پلیس ہولڈر
- پلیس ہولڈر
- پلیس ہولڈر
- پلیس ہولڈر
- پلیس ہولڈر
- پلیس ہولڈر
- پلیس ہولڈر
- پلیس ہولڈر
یہ بلوپرنٹ بناتا ہے
CC0 پبلک ڈومین
یہ بلیو پرنٹ CC0 کے تحت جاری کیا گیا ہے۔ آپ اجازت لیے بغیر اس کام کو نقل، ترمیم، تقسیم اور کسی بھی مقصد کے لیے استعمال کرنے کے لیے آزاد ہیں۔
میکر کی حمایت کریں ان کے بلیو پرنٹ کے ذریعے پروڈکٹس خرید کر جہاں وہ میکر کمیشن وینڈرز کی طرف سے مقرر، کماتے ہیں، یا اس بلیو پرنٹ کی نئی تکرار بنائیں اور آمدنی شیئر کرنے کے لیے اسے اپنے بلیو پرنٹ میں کنکشن کے طور پر شامل کریں۔